Ever walked into a brand-new building only to find it plagued by comfort complaints and wild energy bills? The culprit, almost every time, is a botched or nonexistent HVAC load calculation. It’s a story architects, engineers, and contractors know all too well: inheriting a project with no documentation of how loads were calculated, mechanical systems that never seem right-sized for actual conditions, or callbacks traced to poor load analysis.
The problem isn't usually the software. It's the lack of a disciplined, systematic process. We've reviewed thousands of load calculations—the ones that lead to successful projects share one thing in common: a systematic process that doesn't skip steps or hide assumptions. This guide demystifies that process, moving from initial data gathering to final equipment selection.

Why Understanding the Full HVAC Load Calculation Process Matters
Relying on software without understanding the methodology behind it is a recipe for disaster. The real value isn't in pushing a button; it's in knowing how to gather accurate inputs, follow a recognized methodology, and validate the results before making costly equipment decisions. A robust load calculation process creates predictability, protects project margins, and prevents the RFIs and change orders that erode profitability.
The contrast is stark: a project with a traceable, defensible calculation process sails through permitting and performs as designed. One based on rules of thumb or hidden assumptions leads to oversized equipment, energy waste, and comfort complaints that never seem to go away.
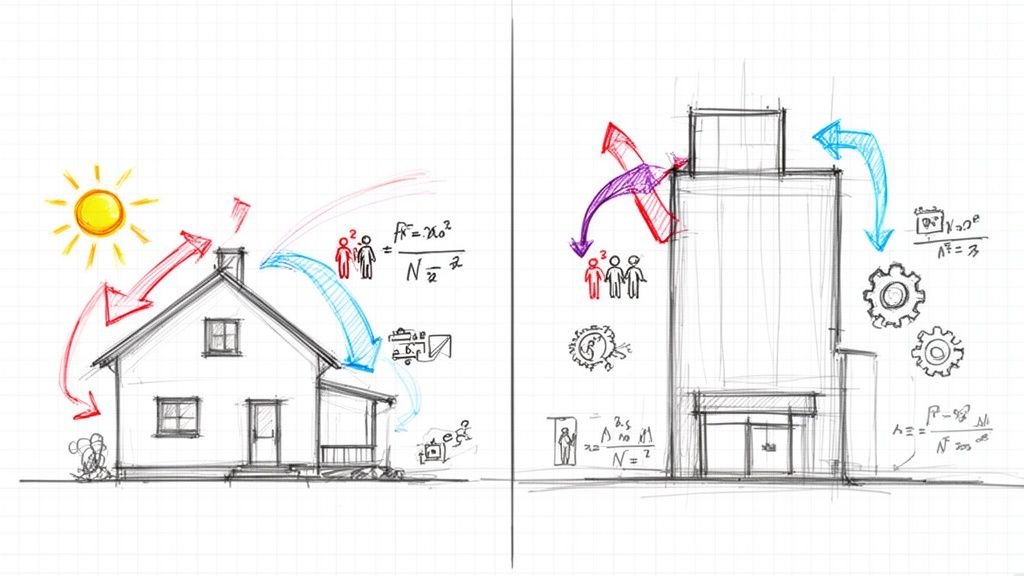
What HVAC Load Calculations Actually Determine
A mechanical load analysis isn't just about finding a single number. It’s a comprehensive look at how a building behaves in its environment and responds to its occupants. The process boils down to four critical metrics:
- Heating Load (Heat Loss): This is the amount of heat that escapes through the building’s shell—its walls, windows, and roof—on the coldest design day of the year. This number tells you how powerful your heating system needs to be.
- Cooling Load (Heat Gain): This is the total heat a building absorbs from the sun, through its shell, and from internal sources like people, lights, and equipment on the hottest design day. This dictates the required air conditioning capacity.
- Sensible vs. Latent Loads: A proper calculation splits the heat you can feel (sensible load) from the moisture in the air (latent load). Getting this balance wrong is a primary cause of humidity and comfort problems.
- Peak Load: This is the absolute maximum heating or cooling the building will need at any given moment. It's the single most important number for final equipment sizing, but it's only trustworthy if the underlying process is sound.
These calculations are the foundation for nearly every subsequent decision in HVAC design, from equipment selection and duct sizing to energy modeling.
The Complete Process: 10 Steps from Data to Equipment
Solid HVAC load calculations all come down to following a logical, step-by-step process. After reviewing thousands of these calculations, one thing is clear: the successful ones never skip steps or hide their assumptions. The sequence is everything. It ensures every decision builds on a foundation of verified data, not just a hunch.
The workflow starts with big-picture project requirements and ends with picking out specific equipment. Each step feeds directly into the next, creating a clear trail from the architect’s drawings to the final mechanical design. This disciplined approach is what separates a defensible HVAC design from one based on pure guesswork.

The Dangers of Shortcuts
Taking shortcuts—like relying on generic rules of thumb ("tons per square foot") or not bothering to verify architectural data—is a recipe for disaster. This leads to oversized equipment, sky-high energy bills, poor humidity control, and expensive callbacks. The goal isn't just to click a button in some software; it's to master a process that delivers predictable results and protects your project's bottom line.
The answer isn't more sophisticated software—it's a more rigorous process. The difference between a reliable system and a problematic one is the discipline applied to gathering inputs, following methodology, and validating results.
Step 1: Gather Project Information and Requirements
First, define the project’s operational DNA. This isn’t just about noting the building is an "office." It's about getting into the weeds of how that office will actually be used day-to-day. A clear project brief, established through decision checkpoints with the owner and architect, is your best defense against bad assumptions.
Lock down these key data points:
- Building Type and Use: A 24/7 data center, a standard 9-to-5 corporate office, or a school with massive seasonal swings in occupancy.
- Occupancy Schedules: When are people in the building, and how many? Assuming a building is fully occupied when it’s a flexible workspace will inflate your cooling load. For example, using a diversity factor of 70% for office occupancy can reduce calculated cooling loads by 10-15% compared to assuming 100% occupancy.
- Owner Requirements: Specific temperature and humidity targets (e.g., 72°F, 50% RH), efficiency goals (LEED, net-zero), or operational constraints.
- Code Requirements: The governing energy codes (ASHRAE 90.1, IECC), ventilation standards (ASHRAE 62.1), and any local amendments.
Step 2: Collect Climate and Location Data
Anchor the building in its specific climate. Using generic weather data is a rookie mistake. The industry standard is ASHRAE climate data, which provides statistically validated design conditions for thousands of locations.
The critical numbers are the design day temperatures, which represent realistic, not extreme, conditions:
- 1% Cooling Design Dry-Bulb/Wet-Bulb: The temperature that is only exceeded 1% of the hours in a year. This sets your peak cooling load.
- 99% Heating Design Dry-Bulb: The temperature that is only undercut 1% of the hours in a year. This sets your peak heating load.
Selecting data for the wrong city or failing to account for microclimates can easily skew results by 10% or more. This is a non-negotiable step that demands precision.
Step 3: Document Building Envelope
Meticulously document the building’s shell—the barrier separating the conditioned interior from the outside world. This information should come directly from the architectural drawings and specifications. If the data is incomplete or missing, flag it with an RFI. Never guess.
Your documentation checklist must include:
- Wall and Roof Assemblies: Every layer and its corresponding U-value (thermal transmittance).
- Window Specifications: U-value, Solar Heat Gain Coefficient (SHGC), area, and orientation for every window.
- Door and Foundation Details: U-values for exterior doors and details on slab-on-grade or below-grade walls.
- Thermal Bridging: Account for heat paths through studs, slab edges, and other structural elements.
Example: Swapping out windows with an SHGC of 0.40 for high-performance windows with an SHGC of 0.25 can reduce the solar heat gain portion of the cooling load by nearly 40%, significantly impacting the required tonnage.
Step 4: Define Building Geometry and Orientation
Define the spaces where heat gains and losses occur. This involves documenting the building’s geometry with precision, a fundamental input for any load calculation software. Modern BIM workflows have made this far more reliable than old-school CAD methods.
Key data points to capture:
- Floor Areas by Zone: Square footage for each distinct thermal zone.
- Exterior Wall Areas by Orientation: Wall surface areas facing north, south, east, and west.
- Window and Roof Areas: Accurately measure these surfaces, as they are major pathways for heat transfer.
- Building Volume: Essential for calculating ventilation and infiltration loads.
Exporting a gbXML file from a Revit model allows this data to be imported seamlessly, reducing manual errors and aligning architectural design with engineering analysis.
Step 5: Establish Internal Heat Gains
Internal heat gains from people, lights, and equipment can be a huge part of the cooling load, especially in modern, well-insulated buildings. This step requires moving beyond generic values to use realistic schedules and diversity factors.
- Occupancy: People generate sensible heat (body heat, ~250 BTU/h at rest) and latent heat (moisture from breathing, ~200 BTU/h). A realistic occupancy schedule reflecting staggered arrivals, lunch breaks, and remote work can significantly lower the peak load compared to assuming a full house from 9 to 5.
- Lighting: Use the actual power density (watts per square foot) from the electrical design, not a rule of thumb. Assuming 1.0 W/sf when a modern LED design only calls for 0.6 W/sf will artificially inflate your cooling load by over 1.3 BTU/h for every square foot.
- Equipment and Plug Loads: This covers everything from computers to kitchen appliances. A diversity factor acknowledges that not all equipment runs at full power simultaneously.
Step 6: Determine Ventilation Requirements
Mechanically introduced fresh outdoor air is required to maintain indoor air quality, guided by standards like ASHRAE 62.1. This process introduces a significant thermal load that the HVAC system must handle, as the outdoor air must be heated or cooled and humidified or dehumidified.
For a typical office, code-required outdoor air can easily add 15-20% to the total cooling load. Forgetting or miscalculating this is a common mistake that leads to poor air quality or an undersized system.
Step 7: Calculate Infiltration
Infiltration is the uncontrolled leakage of outdoor air into a building through cracks in the envelope. It adds a parasitic load that the system must constantly fight.
Methods for estimating infiltration include:
- Air Change Method: Assumes a number of air changes per hour (ACH) based on building tightness.
- Crack Method: A more detailed calculation based on the length of cracks around windows and doors.
- Blower Door Data: The gold standard, using results from an on-site pressure test to quantify actual air leakage.
Example: A well-sealed modern building might have an infiltration rate of 0.25 ACH, while an older, leakier structure could be 1.0 ACH or higher. This fourfold difference has a direct and substantial impact on both heating and cooling loads, demonstrating the value of airtight construction and accurate modeling.
Step 8: Perform Load Calculations
With all inputs gathered, it’s time to crunch the numbers using the right methodology and software. The goal is to pinpoint the peak heating and cooling loads for every zone and for the building as a whole.
- Methodology: For residential work, Manual J load calculation is the standard. For commercial, Manual N or the ASHRAE Radiant Time Series (RTS) method found in software like TRACE™ 3D Plus or HAP is used. RTS is ideal for complex buildings as it models how building mass stores and releases heat over time.
- Zone-by-Zone vs. Block Load: A block load gives one number for the entire building. A zone-by-zone analysis is non-negotiable for systems serving multiple spaces with different peak times (e.g., an east-facing office peaking in the morning vs. a west-facing one peaking in the afternoon).
Step 9: Analyze and Validate Results
Once the calculation is done, the QA process begins. Never accept the output report at face value. Check the results against industry rules of thumb to see if anything is wildly off. These benchmarks are a sanity check, not a design tool.
| Building Type | Typical Cooling Load (Sq Ft per Ton) |
|---|---|
| Office Building | 350 – 450 |
| Retail Store | 250 – 350 |
| Full-Service Restaurant | 150 – 250 |
| School/Classroom | 300 – 500 |
If your calculation for a standard office spits out a value of 200 sq ft/ton, that’s a major red flag. It tells you to go back and check your work—you've likely made an error in an input like internal gains or window properties.
Step 10: Translate Loads to Equipment Sizing
The final step is converting the calculated heating and cooling loads into real-world equipment. The goal is to select equipment that closely matches the calculated load, not to just round up and apply excessive safety factors.
- Safety Factors: A small, justifiable safety factor of 5-10% can account for minor unknowns. The real danger is layering excessive factors on top of already conservative inputs—a recipe for a grossly oversized system.
- Oversizing Consequences: Oversized equipment leads to higher upfront costs, wasted energy from short-cycling, poor humidity control, and accelerated wear on components.
- Part-Load Performance: Consider how the system will perform at 25%, 50%, and 75% of its peak capacity, as this is where it will operate most of the time.
A disciplined selection process involves taking the calculated load, applying a minimal safety factor, and then diving into manufacturer data to find a unit with the right capacity at your design conditions.

Quality Control Throughout the Process
A trustworthy mechanical load analysis has checkpoints built into the workflow to catch mistakes early.
- Input Data Verification: A peer should verify all inputs against architectural and electrical documents before calculations run.
- Calculation Review: A senior engineer should perform a sanity check on results, comparing them to benchmarks.
- Revision Tracking: When a design changes, the load calculation must be updated. A formal process ensures the analysis remains aligned with the current design, preventing RFIs.
Documentation and Deliverables
Your final report is the official record of your engineering judgment. It provides total clarity for permitting prep and project archiving. A complete deliverable includes:
- Input Data Summary: A clean list of all key inputs (climate data, U-values, SHGCs, etc.).
- Assumptions Log: A transparent record of diversity factors, operating schedules, and other assumptions with justifications.
- Results Summary: A detailed breakdown of heating and cooling loads by zone and for the building total.
- Equipment Selection Rationale: A clear explanation of how you translated loads to capacities, including any safety factors applied.
This level of detail is a core part of professional MEP design services. It’s not just about getting the right answer; it’s about proving how you got there.
Common Process Failures
- Skipping Envelope Verification: Accepting architectural data without cross-referencing specs.
- Using Generic Assumptions: Plugging in default values for occupancy, lighting, or equipment.
- Ignoring Schedules and Diversity: Assuming a building is 100% occupied 24/7 leads to massive oversizing.
- Applying Excessive Safety Factors: A 20% safety factor on top of conservative inputs is a direct cause of comfort complaints from systems that short-cycle.
- Calculating Once and Never Updating: The load calculation is a living document that must evolve with the design.
Tools and Resources
- Software: Trane TRACE™ 3D Plus, Carrier HAP, Wrightsoft, CoolCalc.
- BIM Integration: Use gbXML exports from Revit for seamless geometry transfer.
- Authoritative Standards: Refer to ASHRAE's official resources and ACCA for methodologies.
HVAC load calculations aren't mysterious—they follow a logical, sequential process that produces reliable results when each step is performed thoroughly. The difference between a good and bad calculation isn't the software; it's the production maturity and QA process applied to gathering inputs, following methodology, and validating results before sizing equipment.
To help your team build a more rigorous and defensible process, download our HVAC Load Calculation Input Checklist.
Get our HVAC Load Calculation Input Checklist.