The call comes from the site: a framing crew just discovered a 48-inch HVAC duct running straight through the space where a structural beam is supposed to go. Work stops. An RFI goes out. The schedule slips, the cost gets absorbed somewhere, and the most frustrating part? The model had all the information needed to catch this. The coordination just didn't happen in the right sequence.
This isn't a software failure; it's a process failure. Revit MEP coordination isn't about running one big interference check right before issuing the permit set. It's a structured, repeatable process that happens in phases, by discipline, with a clear resolution and documentation workflow. Most teams skip the structure and run a single check at the end—which is why they're still finding clashes in the field. This guide lays out a practical workflow for catching clashes before construction starts, covering the discipline routing sequence, how to use Revit's native Interference Check tool effectively, how to triage results, and when Navisworks is actually worth the investment.

Why Most Revit MEP Coordination Fails Before It Starts
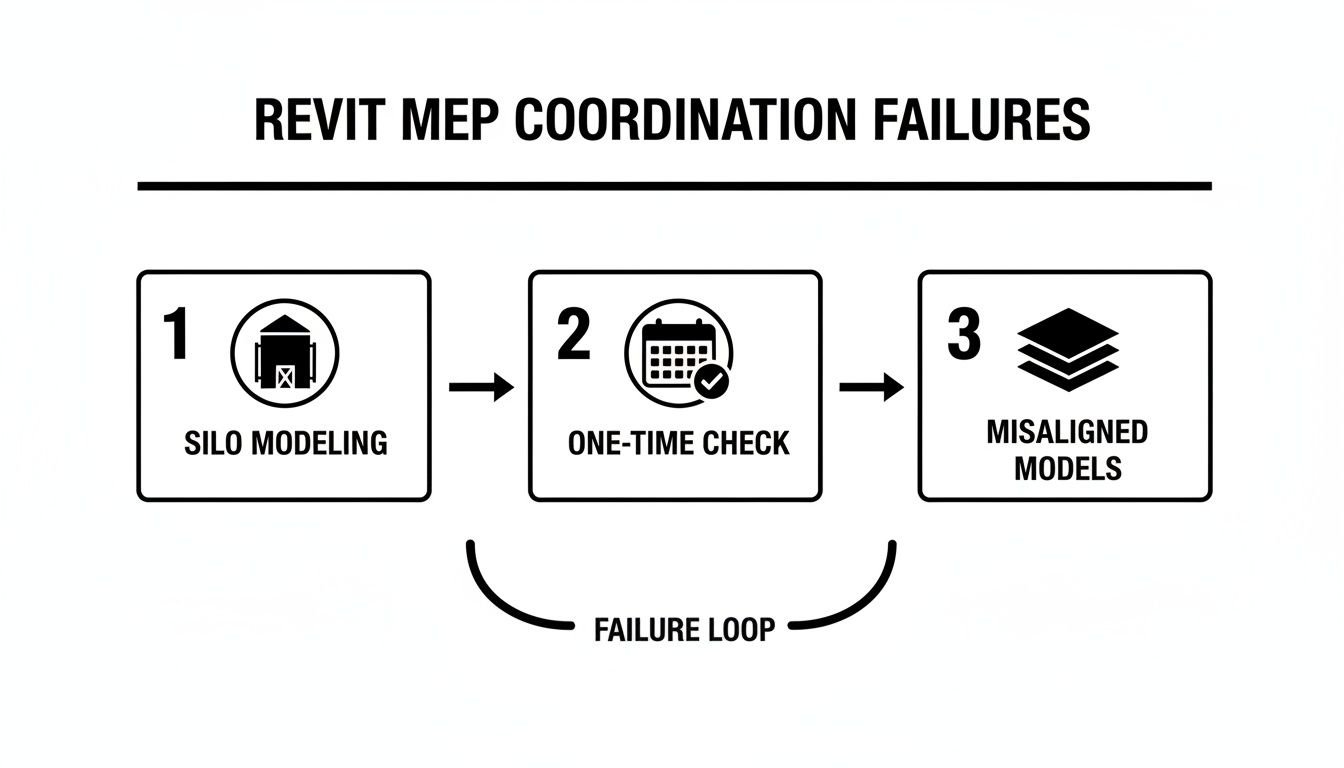
The problem is almost never the software—it's the lack of a coordination protocol. When clashes get discovered during framing, it’s a symptom of a deeper process breakdown. There are three common root causes that torpedo production maturity and make on-site rework inevitable.
First, there's no routing sequence established. Every discipline routes independently in their own model, then the models are linked and coordination is attempted after the fact. By that point, everyone has committed to a routing strategy and nobody wants to move their systems. This isn’t collaboration; it’s a setup for painful, margin-eroding rework.
Second, coordination is treated as a one-time event. Teams run an interference check once before permit submittal, generate a 200-item clash report, resolve the obvious ones, and issue. The report isn't tracked, resolved items aren't documented, and the same clashes reappear after the next model update. This turns coordination into a frustrating loop of solving the same problem repeatedly.
Finally, linked model settings are wrong. Phase mapping between linked models doesn't match the host. Visibility overrides are inconsistent. What appears in the coordination view doesn't represent the actual current state of every model. Decisions get made based on an inaccurate composite, undermining the entire BIM workflow.
Fixing Revit MEP coordination isn't about better software—it's about establishing a sequence and sticking to it. The rest of this article covers exactly what that sequence looks like.
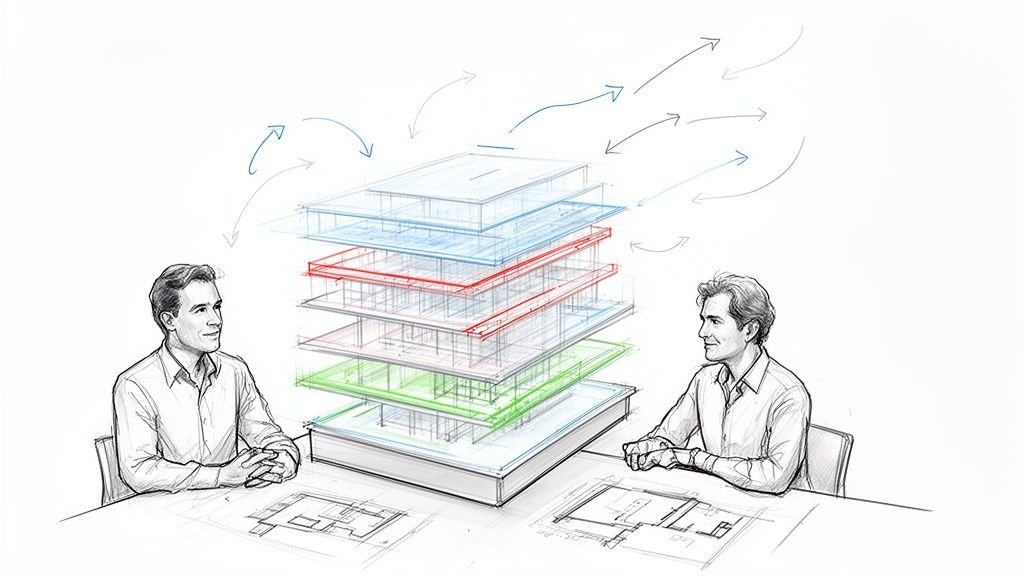
The Discipline Routing Sequence—Who Models First and Why
This is the section most coordination guides skip entirely, but it's the core of a predictable workflow. Establishing a routing priority sequence eliminates the majority of hard clashes before a single interference check is run. The check then becomes a tool for QA, catching exceptions, not a desperate attempt to untangle a completely uncoordinated model.
Structural model first—establish the hard constraints. Before any MEP routing begins, the structural model needs to be linked and coordinated with architecture. Beam depths, column locations, slab penetrations, and ceiling-to-structure clearances are the fixed constraints that every MEP discipline routes around. If structural isn't locked, every MEP routing decision is provisional and at risk.
HVAC ductwork second—it takes the most space. Main duct runs are the largest MEP elements in the building. They need to be routed first because they have the least flexibility—you can't reroute a 48-inch main supply duct as easily as you can shift a conduit. Route main trunk lines first, then branch runs. Establish duct elevation zones early and document them in a ceiling coordination drawing. This is a foundational step in preventing RFIs.
Plumbing and fire protection third—slope is non-negotiable. Sanitary and storm drainage pipes have a fixed slope requirement (typically ¼" per foot minimum). They can't be adjusted up or down freely to avoid clashes the way pressure pipes can. Route sloped drain lines after HVAC but before electrical, so electrical can route around them rather than the reverse. This simple sequencing protects operational consistency and prevents costly late-stage redesigns.
Electrical conduit and cable trays last—most flexible routing. Electrical has the highest routing flexibility—conduit can bend, cable trays can be re-sized and re-elevated relatively easily. Electrical routes around the constrained systems. This doesn't mean electrical is an afterthought; it means the coordination sequence gives electrical drafters the clearest picture of available space before they commit, enabling a more efficient and scalable delivery.
This sequence eliminates the majority of hard clashes before you run a check. The check then catches the exceptions, not the entire uncoordinated model.
Setting Up Revit's Interference Check Tool to Actually Be Useful
Most teams run Revit's Interference Check against everything at once, get an unmanageable report, and give up. The tool isn't the problem; the one-and-done approach is. To make MEP clash detection in Revit a productive part of your QA process, you must use it systematically.
Run by category pair, not all-at-once. The Interference Check dialog lets you select specific categories to check against each other. Use this deliberately. Run these checks in sequence:
- Ducts vs. Structural Framing
- Ducts vs. Floors / Ceilings
- Pipes vs. Structural Framing
- Pipes vs. Ducts
- Conduit vs. Structural Framing
- Conduit vs. Pipes
- Cable Trays vs. Ducts
Running category pairs produces a focused, manageable report for each combination rather than a 400-item wall of results where duct-vs-beam clashes are buried next to minor conduit overlaps.
Check across linked models, not just within one model. In the Interference Check dialog, use the dropdown to select categories from linked files. This is where most teams miss clashes—they run the check only within the MEP model and never check against the linked architectural or structural model. Every check should include the structural Revit MEP linked model at a minimum.
Run checks at model update milestones, not just at permit. Establish a coordination check schedule tied to design milestones: after schematic routing, after design development, after any major structural revision, and before permit submittal. A clash caught at schematic routing costs a duct re-route. A clash caught at permit costs a structural RFI and a schedule slip. This discipline is central to margin protection.
Export and track the report. Every Interference Check generates an exportable HTML report with element IDs. Export it, date-stamp it, and use it as the basis for the coordination meeting. This creates a documented record of what was found, what was resolved, and what was accepted—critical for accountability and avoiding repeat clashes.
Triaging Clash Results—How to Tell What Actually Matters
Not every clash is a real problem. A 200-item interference report contains genuine construction conflicts, minor overlaps resolved by standard installation clearances, and false positives from imprecise modeling. Teams that treat every item equally waste coordination time and lose credibility.
Introduce a simple three-tier triage framework. This discipline turns a 200-item report into a 20-item action list before the meeting even starts.
Hard clashes—two elements physically occupying the same space with no clearance. These must be resolved before issuing. Examples: a duct vs beam clash in Revit, or a pipe running through a column. These are the showstoppers.
Soft clashes—elements that don't intersect but violate minimum clearance requirements for maintenance access, insulation, or code-required separation. These require review and usually resolution. Examples: conduit too close to a duct without required separation, or equipment placed without maintenance access clearance.
False positives—modeled overlaps that don't represent real construction conflicts. Examples: pipe insulation modeled at the wrong thickness, families with exaggerated connector geometry, or minor overlaps at model linking boundaries.
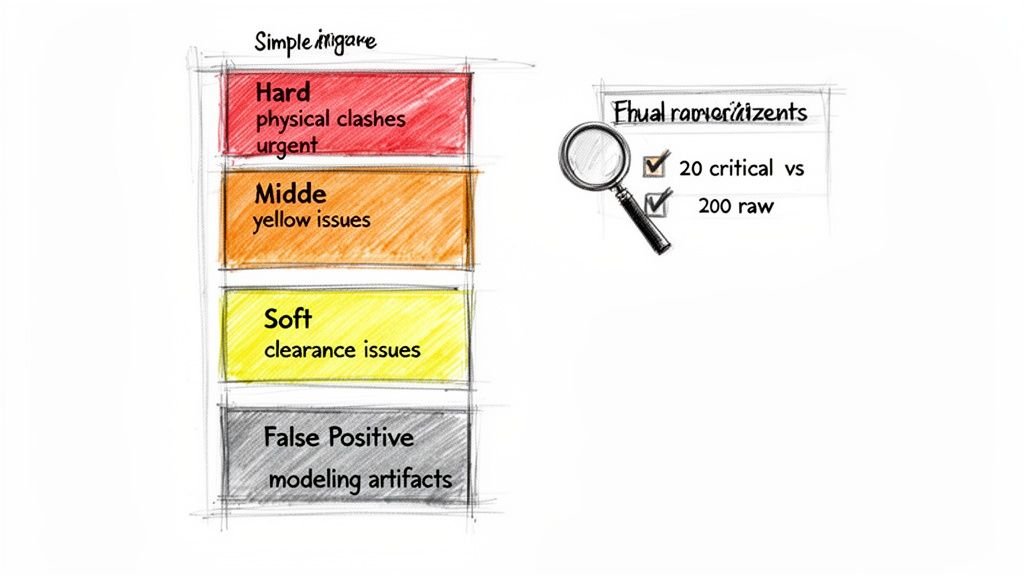
The coordination team should triage the report into these buckets before the coordination meeting. Hard clashes get resolved. Soft clashes get reviewed. False positives get documented and dismissed so they don't recur. This is a key decision checkpoint in a mature BIM workflow.
Documenting and Assigning Clash Resolution
A coordination workflow without a resolution tracking system is just a series of meetings that go nowhere. A minimal but effective clash documentation process prevents RFIs and ensures decisions stick. You don't need expensive software; a shared spreadsheet is often enough.
Your minimum viable tracking sheet needs these columns: Clash ID, Date Found, Discipline(s) Involved, Description, Assigned To, Resolution Action, Date Resolved, and Model Version Verified. This creates an accountability trail.
Link clash IDs to the Revit Interference Check MEP report. The exported HTML report includes element IDs—use these as the Clash ID so anyone can navigate directly to the location in the model. This simple step saves immense time.
Verify resolution in the model, not just in the meeting. A clash is only closed when the responsible discipline updates their model and the interference check is re-run to confirm the clash no longer appears. "We agreed to move the duct" is not a resolved clash. The moved duct in the updated model is. This is the difference between aspirational coordination and reliable delivery.
Set a model update cadence. For active coordination, models should be updated and re-linked on a defined schedule—weekly during design development is typical. Ad-hoc updates make it impossible to know if the model anyone is coordinating against is current.
This level of discipline is exactly what separates firms that find clashes in the model from firms that find them in the field.
When to Bring Navisworks Into the Workflow
Let's be direct: Navisworks is not required for effective MEP coordination on most small-to-medium projects. Revit's native Interference Check tool, used systematically as described above, handles the majority of coordination needs for projects under a certain scale and complexity threshold, including most residential additions, 6-story mixed-use buildings, and school renovations.
Navisworks adds meaningful value in specific situations:
- Large, complex projects with 10+ linked models across multiple disciplines and firms, where the sheer volume of potential clashes exceeds what Revit's native tool can manage efficiently.
- Projects with non-Revit disciplines where structural or civil models are in different file formats (NWC, IFC) that can't be directly linked into Revit for a Revit interference check MEP.
- 4D scheduling requirements where clash detection needs to be tied to the construction sequence—Navisworks' TimeLiner capability handles this where Revit cannot.
- Owner or GC-required coordination deliverables. Some GCs require Navisworks clash reports as a project deliverable. In that case, the tool isn't optional, regardless of project scale.
For everything else, the goal is coordination quality, not tool complexity. Investing in a structured workflow within Revit provides a better return than adding a complex new tool to a broken process.
Your Process is Your Production System
MEP coordination failures aren't a software problem—they're a process problem. The teams that catch clashes before construction don't have better tools. They have a routing sequence, a coordination schedule, a triage protocol, and a resolution tracking system. That’s it. It’s this production discipline that delivers predictability, protects project margins, and separates you from firms that are still finding clashes in the field.
For firms that need to ensure this level of discipline without building the system from scratch, a production partner can embed this entire workflow into your delivery. It's not about selling hours; it's about providing the systems that guarantee clarity and reliable delivery. When your partner owns the MEP BIM coordination workflow, your team can focus on high-value design, knowing the production model will be clash-free and ready for construction.
If you’re ready for a more predictable MEP delivery process, we've built the system for it.