Revit view templates aren't just about controlling how drawings look. They are the operational backbone for predictable, scalable documentation. Think of them as the single source of truth for every plan, section, and elevation—a system that enforces consistency and prevents the graphical chaos that erodes margins and frustrates teams.
Escape the Chaos of Inconsistent Project Graphics
Inconsistent documentation is a silent margin killer. It's the slow burn of endless redlines, frustrating QA cycles, and team members wasting hours trying to fix views that never match. This isn't about aesthetics; it's about production maturity and protecting your bottom line.

The real pain shows up in the details. One team member’s lineweights are heavier than another's. A critical filter is accidentally broken on a floor plan, hiding fire-rated walls. A view range clips just enough of a section to cause confusion. Every one of these little inconsistencies is a potential RFI, a delay in permitting, or another round of client-side redlines.
The True Cost of Manual Overrides
Without disciplined Revit view templates, your production workflow is left to individual heroics and manual overrides. That approach just doesn't scale. As teams grow and deadlines get tighter, the cracks start to show:
- QA/QC Bottlenecks: Review cycles drag on as managers hunt down graphical errors that should have been automated from the start.
- Wasted Production Hours: Junior staff spend valuable time trying to replicate a "look" instead of applying a pre-approved standard.
- Eroding Client Confidence: When sheets look different from one submission to the next, it signals a lack of internal control and professionalism.
This is the evolution from reactive CAD workflows to a proactive BIM system. Standardizing Revit graphics isn’t a cosmetic upgrade; it's a decision checkpoint that forces clarity and predictability into your process. We’ve seen firms cut CD turnaround time significantly once view templates were unified across teams. The impact on margin protection is direct and measurable.
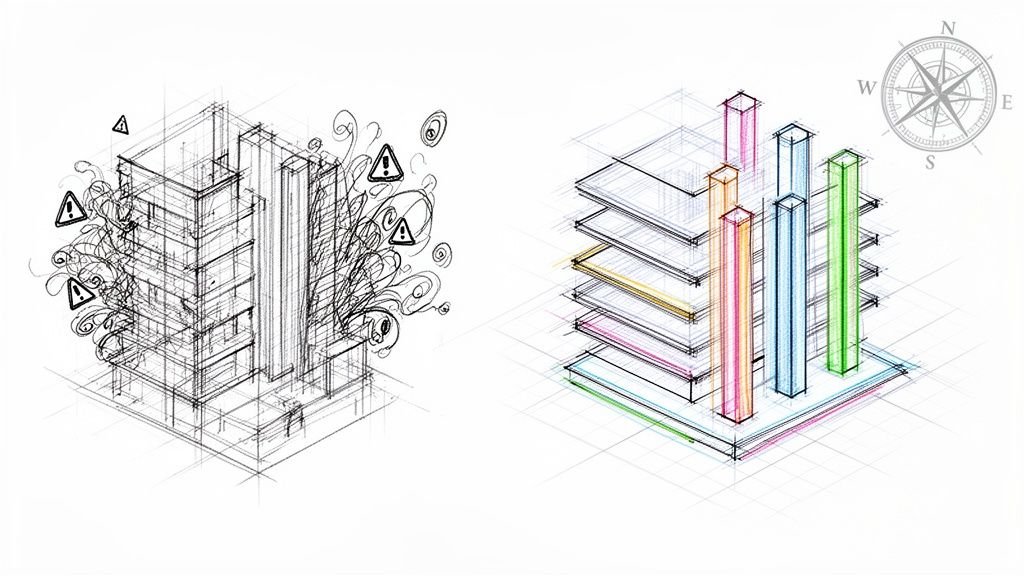
The Production Impact of Inconsistent vs Standardized Views
The difference between a firm that struggles with view standards and one that masters them is night and day. It shows up in everything from team morale to project profitability.
| Production Area | Symptom with Inconsistent Templates | Outcome with Standardized Templates |
|---|---|---|
| QA/QC Process | Endless redlines, long review cycles, managers fixing basic errors. | Reviews focus on design intent, not graphical mistakes. Faster turnaround. |
| Team Productivity | Junior staff waste time guessing settings. Senior staff get pulled into fixing views. | Everyone applies the correct standard instantly. Production time is predictable. |
| Client Perception | Submission sets look disjointed, signaling a lack of internal control. | Documents are professional and consistent, building trust and confidence. |
| Risk Management | Inconsistent views hide information, leading to RFIs and change orders. | Key information is always visible, reducing coordination errors and on-site issues. |
| Onboarding | New hires struggle to learn the "right way" to set up views for each project. | New team members become productive faster by applying established templates. |
Ultimately, enforcing standards isn't about control for control's sake—it's about building a resilient, scalable delivery pod that prevents errors before they happen.
From Inconsistent Views to Predictable Outcomes
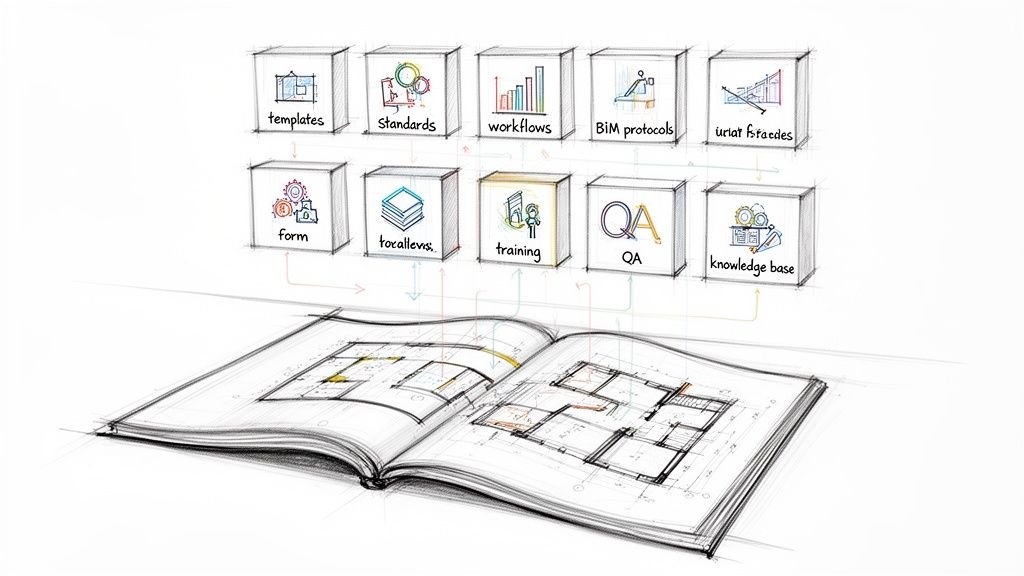
Firms that master their documentation standards just operate differently. They don't just create templates; they maintain them with version control, conduct documentation audits, and build a culture where standards are the default, not the exception. This system becomes the central nervous system for your entire production output.
The goal is to eliminate guesswork. Every plan, section, and detail should be governed by a template that locks in its scale, detail level, visibility settings, and filters. Well-structured Revit documentation standards have a proven impact on project timelines. For instance, research shows a well-built Revit template can boost productivity by 20% to 40% in project creation workflows. You can learn more about how templates improve AEC productivity.
Templates are not about limiting creativity; they are about automating repetition. By systemizing the 80% of documentation that is standard, you free up your team to focus on the 20% that requires deep design thinking.
By establishing this backbone of consistency, you directly address the root cause of so many production headaches. Instead of fixing errors one by one, you build a system that prevents them, solidifying your firm’s reputation for reliable delivery. This discipline is essential for anyone looking to improve their drafting standards or streamline their QA/QC processes.
Build Your Master Template from Real Production Data
The best Revit documentation standards aren’t dreamed up in a conference room—they’re extracted from your archives. If you want scalable, consistent graphics, the first step is to audit your firm's most successful projects. Look at the ones that sailed through QA, needed minimal redlines, and got rave reviews from clients. Your best work holds the DNA of your future master template.
This approach grounds your standardization efforts in what actually works, not some abstract ideal. Instead of chasing a perfect, theoretical standard, you're codifying what your team already does well. It’s a process of extraction and refinement, which makes the whole task feel achievable and directly tied to your real-world BIM workflows.
Deconstruct Your Best Drawing Sets
Start by picking two or three recently completed projects known for their clarity and quality. These are your data sources. The goal is to identify the recurring patterns and settings that make up your firm’s unofficial graphic standard.
Begin by digging into the core view types that make up the bulk of any drawing set:
- Floor Plans: What detail levels (Coarse, Medium, Fine) do you consistently see for different plan types, like schematic design versus construction documents?
- Building Sections: How are cut patterns, lineweights, and beyond lines handled? Are there common filters being used to simplify complex conditions?
- Elevations: What settings control shadow, ambient light, and depth cueing to create a consistent look across all facades?
This initial analysis isn't about finding a single "right" way to do things. It's about identifying the common denominator. You're hunting for the 80% solution—the settings that work for most conditions. These will become the foundation of your core Revit view templates.
Identify the Graphic Elements That Matter
As you comb through these projects, zero in on the settings that have the biggest impact on clarity and consistency. The idea is to build a hierarchy of templates, starting with the broad-stroke settings and then narrowing down to more specific, task-oriented ones.
Keep an eye out for patterns in these key areas:
- Visibility/Graphic Overrides (VG Overrides): Are certain model categories always turned off in plans, like furniture in a structural framing plan?
- Filters: How are filters used to manage phasing, highlight fire-rated walls, or control the visibility of MEP elements? These are powerful tools for automating graphic control.
- Annotations: What annotation categories are typically visible in a 1/8" = 1'-0" plan versus a 1/2" = 1'-0" enlarged plan?
- View Range: Document the typical cut plane and view depth settings for different plan types. This helps prevent common mistakes like cropped fixtures or missing overhead elements.
By focusing on real-world data, you create a standard that reflects your firm's actual production needs. This ensures higher adoption rates because the templates feel familiar and solve known problems, rather than imposing a foreign system on the team.
This audit becomes your proof. When you propose a specific lineweight or filter setup, it’s not just a personal preference; it’s a decision backed by a history of successful projects. A data-driven approach is fundamental to building robust and maintainable Revit documentation standards. It helps define not just the look, but the entire system. You can find more insights on how these underrated tools enhance BIM workflows to dive deeper.
Establish a Logical Template Hierarchy
Once you’ve gathered your data, the final step is to organize it into a logical hierarchy. Don't fall into the trap of creating one "god" template that does everything. That never works. Instead, build a family of related templates that serve specific purposes, often inheriting settings from a common base template.
A typical hierarchy might look something like this:
- Base Templates: These are general templates for major view types (e.g., "A-PLAN-Base," "A-SECT-Base") that control fundamental settings like discipline and model display.
- Scale-Specific Templates: These are duplicates of the base templates but tailored for specific scales (e.g., "A-PLAN-CD-1-8," "A-PLAN-ENLARGED-1-2"). They primarily adjust annotation visibility and detail levels.
- Task-Specific Templates: These are specialized templates for particular tasks, like permitting or client presentations (e.g., "A-PLAN-Permit," "A-ELEV-Presentation"), which might use unique filters or visual styles.
This structured approach makes your template library manageable and intuitive. It aligns with how a project naturally evolves, giving teams the right tool at the right time. This process is also critical for establishing stronger drafting standards and optimizing Revit family performance.
Develop a Naming Convention That Prevents Chaos
A solid naming convention is the unsung hero of any scalable BIM standard. Once you've extracted the patterns from your best projects, the next job is to bring order to the chaos. Without a clear system, your library of Revit view templates will quickly become a confusing mess of duplicates and vaguely named settings, undoing all your hard work.
Think of it as a critical decision checkpoint. A disciplined approach to naming lays the foundation for maintaining order and stops your standards from drifting over time. It makes templates instantly searchable, easy for new team members to understand, and far less likely to be used incorrectly.
The Anatomy of a Scalable Naming Structure
Good naming conventions are predictable and descriptive. They should tell someone exactly what a template does without them having to dig into its settings. The goal is to create a structure that reads like a sentence, moving from the general to the specific.
A framework built on three core components works best:
- Prefix (Discipline/Phase): Start with the broadest category. A simple prefix can identify the discipline (A- for Architectural, S- for Structural) or the project phase (DD- for Design Development, CD- for Construction Documents).
- Primary Type (View Category): Next, define the main view type. Stick to clear, abbreviated terms everyone on the team will recognize, like PLAN, SECT (Section), ELEV (Elevation), or DETL (Detail).
- Modifier (Scale/Purpose): Finally, add a descriptor for scale or a specific purpose. This is where you can note the scale (e.g., 1-8 for 1/8", 1-4 for 1/4") or its function (e.g., Permit, Presentation, Working).
This layered approach creates names that are instantly understandable. For example, a user knows immediately that "A-PLAN-CD-1-8" is the architectural floor plan for construction documents at 1/8" scale. No guesswork required. This kind of consistency is just as crucial for your view templates as it is when deciding on your Revit family build vs. buy strategy.
A good naming convention acts as a form of embedded training. It guides users to the right choice and subtly reinforces your firm's documentation standards every time they create a view.
Example Naming Convention Framework
Here’s a look at how this framework translates into a practical system you can adapt for your firm. This structure provides the consistency needed for scalable delivery pods while staying flexible enough for unique project needs.
| Prefix (Discipline/Phase) | Primary Type | Sub-Type/Scale | Example Full Name |
|---|---|---|---|
A- (Architectural) |
PLAN |
CD-1-8 |
A-PLAN-CD-1-8 |
S- (Structural) |
FRAMING |
CD-1-4 |
S-FRAMING-CD-1-4 |
A- (Architectural) |
ELEV |
Presentation |
A-ELEV-Presentation |
M- (Mechanical) |
DUCT |
Coordination |
M-DUCT-Coordination |
A- (Architectural) |
SECT |
Wall-3-4 |
A-SECT-Wall-3-4 |
This table provides a clear starting point. Feel free to tweak the modifiers to fit the specific view types and scales your teams use most often.
Avoiding Common Naming Pitfalls
As you build out your system, watch out for a few common traps. A big one is using team members' names or project-specific codes in your master templates. The system needs to be universal and timeless.
Similarly, resist creating overly long or complex names. If a name needs more than four or five parts to be understood, the template itself might be trying to do too much. It's often better to break it down into more specialized, clearly named templates.
This discipline should extend beyond just Revit. To really combat disorder, it helps to explore general file naming conventions best practices so all your project assets are easy to find. When you establish clear rules for everything, operational consistency becomes the default, which directly supports margin protection and predictable delivery.
Go Beyond Graphics: Use Filters, Scope Boxes, and View Ranges
True mastery of Revit view templates isn’t just about tweaking graphic settings. The real power comes from making them work with other core Revit features to build resilient, predictable Revit documentation standards—the kind that prevent costly production errors and protect your margins from endless RFIs and rework.
A disciplined naming convention is the foundation for an organized template library. Without it, things get chaotic fast.
This simple flow shows how a structured name—moving from the general to the specific—instantly communicates a template's purpose. Once your library is this organized, you can start layering in more sophisticated controls without creating a mess.
Tame Your Views with Filters
View Filters are probably the most powerful tool you have for automating and standardizing Revit graphics. They let you control the visibility and graphic display of elements based on their parameters, which means no more manual overrides and guesswork. Forget right-clicking and using "Hide in View"—a filter does the work for you, consistently, across every project.
Think about a classic production headache: making sure all fire-rated walls are clearly marked on life safety plans. You can build a filter to find any wall with a "1-Hour" rating and automatically apply a specific color and poche pattern.
By locking this filter into a "Life Safety Plan" view template, you guarantee that every single rated wall is displayed correctly. No one on the team has to remember to do it manually. This is system-driven QA, not person-dependent.
The same logic works for countless other scenarios:
- Hiding Unwanted Categories: A filter can automatically turn off furniture in your structural framing plans.
- Highlighting Key Equipment: Use filters to color-code mechanical equipment based on its system, like supply, return, or exhaust.
- Managing Phasing: Filters are perfect for controlling the appearance of existing, demo, and new construction elements.
When managed inside a view template, filters become a core part of your firm's QA process. Critical information stops getting missed.
Enforce Consistent Cropping with Scope Boxes
Another hallmark of sloppy documentation is inconsistent view cropping. When team members manually drag crop regions around on floor plans, you end up with sheets where the plans don't align. It’s a classic sign of a rushed, undisciplined workflow.
Scope Boxes solve this problem with authority. Just create a Scope Box around a specific area, like a building wing or an enlarged core, and you can assign it to multiple views.
Once a Scope Box is assigned within a Revit view template, the view's crop region automatically locks to its boundaries. This enforces perfect alignment across all related plans, making your sheets look clean, professional, and intentional. It’s a simple but incredibly effective way to build consistency right into your sheet setup process.
Lock Down View Ranges to Prevent Errors
Few settings cause more confusion and RFIs than an incorrect View Range. A cut plane that’s too high can miss windows and doors; one that’s too low might show elements below the floor. These subtle mistakes often slip past QA and turn into major headaches on site.
Including the View Range as part of your Revit view templates is a non-negotiable step for any firm serious about its production standards.
By defining and locking the cut plane, top, bottom, and view depth for each plan type (like "A-PLAN-CD-1-8"), you eliminate the risk of human error. A team member can't accidentally change the setting and make elements disappear. This also has a direct effect on how elements are displayed, tying into the broader impact of visibility settings on Revit family performance.
Together, Filters, Scope Boxes, and View Ranges transform your templates from simple graphic presets into robust production controls. They are the technical backbone that prevents errors, cuts down on redlines, and makes your documentation predictable and scalable.
Maintain and Scale Your Documentation Standards
Creating a solid set of Revit view templates is a major win for consistency, but the real victory comes from maintaining them. A mature production environment isn't defined by the templates it creates. It’s defined by how it governs, updates, and scales those standards over time without blowing up active projects.
https://www.youtube.com/embed/fv7BeriyC94
This is where so many firms fall flat. A great template library gets rolled out with enthusiasm, only to slowly decay as project-specific needs lead to one-off changes and "template drift." The trick is to treat your standards not as a static document, but as a living system that needs deliberate management. It's a continuous process that protects your margins and makes scalable project delivery a reality.
The Master Container File as Your Single Source of Truth
By far, the most reliable method for version control is creating a master Revit "container" file. This isn't a design file. Its only job is to house your firm’s approved, gold-standard Revit view templates. It becomes the undisputed single source of truth.
When a change is needed, it happens here first—never inside a live project. This move centralizes control and creates a clear checkpoint for any decisions. We’ve seen firms slash their CD turnaround time simply by getting teams on board with this governance model. It completely eliminates the confusion about which template is the "right" one to use.
This container file should include:
- All approved view templates, following your established naming conventions.
- The associated filters, line styles, and fill patterns that make them work.
- Standard drafting views and schedules that complement the templates.
By isolating your standards in a dedicated file, you establish a clear boundary between development and production. It’s the difference between a controlled factory and a chaotic workshop.
A Clear Process for Proposing and Rolling Out Changes
Change is going to happen. New project types or software updates will force you to adapt your standards. The goal isn't to stop change but to manage it with a clear, predictable process that doesn't derail active projects.
A solid update workflow usually looks something like this:
- Proposal: A team member flags a need for a template change and shoots it over to the BIM lead for review.
- Testing: The proposed change is made and tested inside the master container file, not a live project. This is critical.
- Approval: Once it’s validated, the change gets the green light and is documented in a version history log.
- Deployment: The updated template is pushed to active projects using Revit's "Transfer Project Standards" tool. This step requires clear communication with project managers so they know what’s coming.
This structured approach prevents the chaos of team members creating their own template variations on the fly. It ensures every update to your Revit documentation standards is deliberate, vetted, and deployed consistently. This also highlights the need for strong internal training. The widespread adoption of Revit has pushed many firms to develop in-house training programs, ensuring everyone understands proper template management. You can find more insights on the market impact of Revit expertise and why this skill has become so critical.
Training as a Cultural Cornerstone
At the end of the day, your standards are only as good as your team's commitment to using them. Effective training and onboarding are non-negotiable. Every person, from a new hire to a seasoned project architect, must understand the "why" behind the standards, not just the "how."
Training shouldn't be a one-and-done event. It should be an ongoing conversation that reinforces the value of consistency. Explain how standardizing Revit graphics directly prevents RFIs, shortens QA cycles, and protects the firm’s bottom line. When your team sees templates as tools that make their jobs easier—not just restrictive rules—you build a culture of discipline. This is absolutely essential for maintaining your internal QA/QC processes and supporting scalable growth.
Your Blueprint for Predictable Project Delivery
Let's be clear: Revit view templates aren't about making things look pretty—they are the backbone of predictable and profitable project documentation. When you shift from constantly putting out fires to using a proactive system built on your firm's real production data, you will see a massive drop in redlines, slash your QA time, and bring clarity to your entire drawing set. Taking control of your templates is a direct path to operational consistency and protecting your margins.
A disciplined system for standardizing Revit graphics completely changes how your teams work. It allows you to build scalable delivery pods that churn out reliable, consistent results every single time. This approach ensures your documentation is an asset, not a liability, and contributes to broader project success. Of course, this fits right in with general project management best practices, which are all about creating that same kind of consistency.
The goal here is to feel confident that your systems can deliver, project after project. This isn't just some nice-to-have target; it's an operational necessity for any firm serious about growth and quality.
Once your views are locked in and standardized, the next logical step is to streamline your output. After all, a consistent set of drawings is far easier to manage, especially when you need to batch export Revit sheets without pulling your hair out over mismatched settings.
To help you get started on the right foot, we've put together a master view template checklist and a framework for building a version-controlled template library. It’s the same logic we use to help firms build more predictable delivery models. Feel free to reach out to get your copy.
Got Questions? We’ve Got Answers.
Even with the best system in place, questions always pop up in the middle of a project. Here are a few common scenarios we've helped firms work through when it comes to managing their Revit view templates.
How Do You Handle Template Updates Across Active Projects?
This is a big one. Whatever you do, avoid making one-off changes directly inside a live project. It’s a recipe for chaos. The best approach is to maintain a master 'Container' Revit file that acts as the single source of truth for all your approved templates.
When a template needs an update, make the change in that master file first. Then, use Revit’s "Transfer Project Standards" tool to push the updated version into your active projects. This isn't a stealth operation, though—you'll need to communicate clearly with the project team to manage the change and keep a log of the version history.
What’s the Best Way to Manage Templates for Different Clients?
It’s tempting to create entirely separate, monolithic templates for each client, but resist the urge. You’ll just create a maintenance nightmare for yourself. A much smarter way is to build a core set of "base" templates that cover about 80% of your firm's typical Revit documentation standards.
From there, you can create client-specific variations by simply duplicating and tweaking these base templates. Just be sure to use a clear naming convention (e.g., 'A-PLAN-CD_ClientX'). This inheritance model makes life so much easier. When you update a base template, you can systematically roll out the changes to its variations, keeping everything consistent.
By applying a template, you automatically disable manual changes to the properties it controls. This forces discipline and prevents the slow erosion of your standards over time.
Can You Actually Lock a View Template to Prevent Changes?
You can't password-protect a template, but you can build a workflow and a culture that discourages unauthorized changes. When you apply a Revit view template, it effectively "locks" all the settings it controls, preventing team members from making manual overrides.
The real key is training. Your team needs to understand that detaching a template for a "quick fix" isn't the right move. If a view needs a different look, the proper process is to either create a new, specific template for that condition or to evaluate whether the master template itself needs an update. This enforces accountability and keeps your drawings looking sharp and consistent.
At BIM Heroes, we help firms build and maintain the systems that drive predictable project delivery. If your team is struggling with inconsistent documentation, let's talk about creating a scalable template strategy.
Learn more about our BIM consulting and production services.