Lighting Fixture Detailing in BIM Projects
Lighting fixture detailing in BIM (Building Information Modeling) is all about creating precise 3D models that incorporate lighting systems, allowing for better placement, energy efficiency, and collaboration. Unlike 2D drawings, BIM integrates materials, dimensions, and lighting properties into a centralized model, helping teams avoid errors and reduce costs.
Key Takeaways:
- Why it matters: Accurate lighting documentation prevents costly mistakes, improves energy efficiency, and enhances comfort. For instance, daylight analysis in BIM can lead to better window placement, saving energy by up to 20%.
- BIM vs. Traditional Methods: BIM offers real-time visualization, clash detection, and centralized collaboration, unlike outdated 2D workflows.
- Standards to follow: Compliance with ASHRAE/IES 90.1, IECC 2021, and NEC ensures safety, efficiency, and adherence to local codes.
- Tools to use: Software like Autodesk Revit, ElumTools, and DIALux simplifies lighting design and analysis, while platforms like BIM 360 boost team coordination.
- Best practices: Combine 2D and 3D documentation, keep models updated, and conduct regular clash detection to resolve conflicts early.
BIM transforms lighting design by integrating disciplines, improving accuracy, and enabling smarter workflows. Dive into the full article for detailed tools, workflows, and tips to streamline your lighting fixture detailing process.
Standards and Documentation Requirements
Lighting Standards and Codes You Need to Know
In the United States, there’s no single national lighting code. Instead, lighting regulations are shaped by a mix of state and local codes, creating a complex patchwork of rules.
It’s important to distinguish between codes and standards. Lighting codes are mandatory and enforceable regulations, while lighting standards are suggested practices that may or may not carry legal weight.
One of the most prominent standards is ASHRAE/IES 90.1, which serves as the foundational energy guideline for buildings across the country. The U.S. Department of Energy (DOE) has designated it as the national energy standard, and it’s updated every three years to reflect advancements in technology and field practices. The latest version is ASHRAE/IES 90.1-2022.
Similarly, the International Energy Conservation Code (IECC) is another widely used framework, also revised every three years. The most recent edition is ICC IECC 2021. Notably, the IECC allows for the use of ASHRAE/IES 90.1 as an alternative model, giving designers flexibility in their compliance strategies.
For electrical safety, the National Electrical Code (NEC), also known as NFPA 70, establishes requirements for safe electrical wiring and equipment use. Meanwhile, the Illuminating Engineering Society (IES) offers recommended foot candle levels for specific tasks and spaces, aiding designers in selecting appropriate lighting levels.
Local codes, such as California’s Title 24, often exceed federal standards, so it’s essential to consult the most stringent regulations that apply to your project. These various codes and standards directly influence the documentation requirements for lighting fixtures, which we’ll explore next.
Required Documentation Elements for Lighting Fixtures
Staying compliant with these standards is critical for accurate Building Information Modeling (BIM) documentation. Proper BIM documentation ensures electrical safety, meets regulatory demands, improves energy efficiency, and aligns with building codes.
The National Electrical Manufacturers Association (NEMA) has developed specific BIM data guidelines to enhance coordination and efficiency throughout a project’s lifecycle. These guidelines define three levels of BIM product data:
| NEMA BIM Level | Description | Key Elements |
|---|---|---|
| Level 1 | General Product Data | Basic details like product name, ID, model, and dimensions |
| Level 2 | Basic Electrical Properties Data | Electrical specifications such as voltage, current, and performance data |
| Level 3 | Extended Product Performance Data | Advanced properties for electrical system design, lighting design, and compliance verification |
To meet NEC compliance, documentation must address several critical areas:
- Luminaire Classification: Fixtures must be classified based on type and intended use, as outlined in NEC 410.3.
- Installation Guidelines: Documentation should confirm that luminaires will be installed per manufacturer instructions and NEC 410.10.
- Wiring Methods: Acceptable wiring approaches, including cables, conduits, and devices, should be detailed according to NEC 410.21.
Fixture schedules are another essential component of BIM documentation. These schedules, generated directly from model elements within BIM software, must include photometric data, mounting details, and energy efficiency specifications to demonstrate compliance with energy codes.
Photometric data plays a crucial role in energy analysis, allowing for comparisons between expected and actual lighting performance. Comprehensive documentation is essential not only for meeting local and national requirements but also for satisfying inspections conducted by state and local agencies.
Bear in mind that lighting codes and standards can vary depending on whether the project involves commercial or residential construction, as well as whether it’s new construction or a renovation.
BIM Tools and Workflows for Lighting Fixture Detailing
Standard BIM Workflows for Lighting Documentation
Detailing lighting fixtures in BIM involves a well-organized process that takes projects from initial design concepts to finalized construction documents. It all starts with gathering essential information – project requirements, lighting standards, and architectural constraints – which forms the foundation for the design phase.
Next comes model integration, where lighting fixtures are added to the central BIM model alongside architectural and MEP components. Here, the Level of Detail (LOD) requirements play a crucial role. At LOD 200, fixtures are represented as simplified shapes in approximate locations, while at LOD 300, they evolve into detailed assemblies with precise specifications, ready for construction and clash detection.
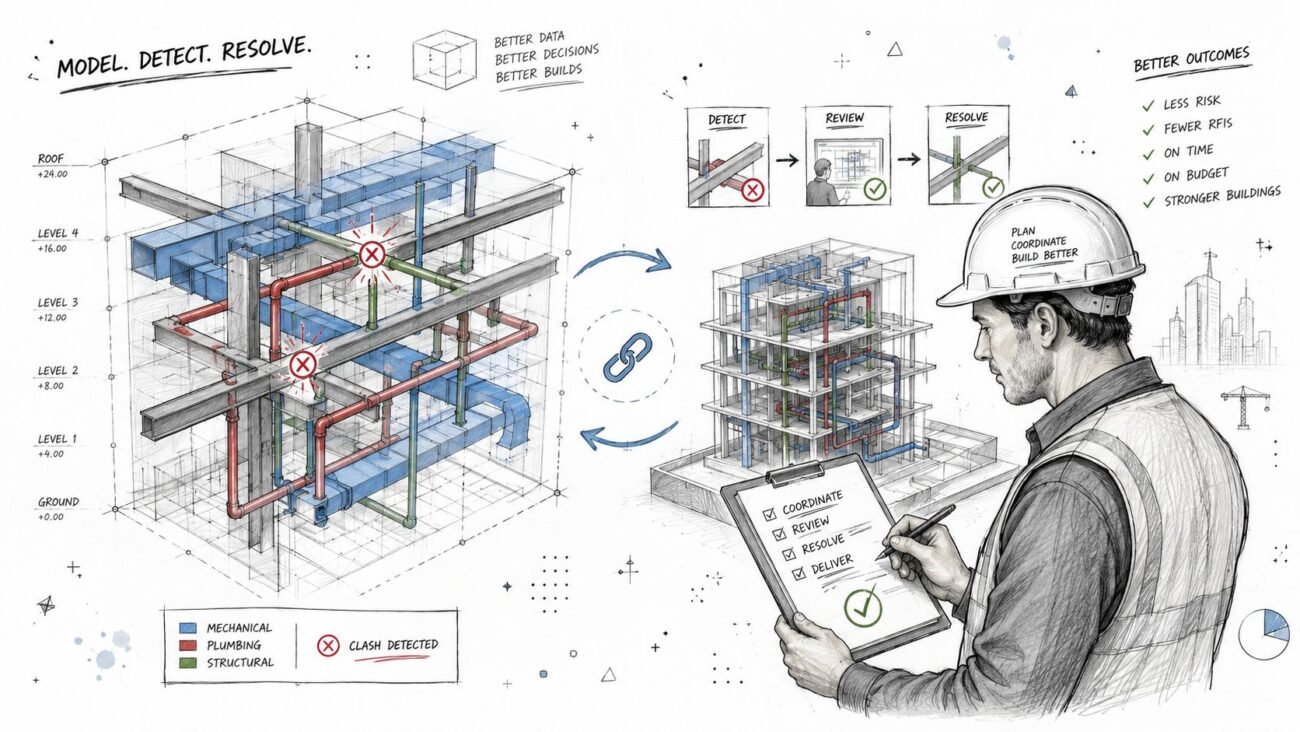
Clash detection is a key step, identifying potential conflicts between lighting fixtures and other systems before construction begins. This process should follow a phased approach: address major system conflicts first, then dive into detailed component interactions.
The final stages involve resolving identified issues and documenting the updates. Problems are categorized, assigned to team members, and tracked until resolved – all within set deadlines. Regular coordination meetings ensure that the consolidated model is reviewed by all disciplines, with issues tagged and monitored until they’re fully addressed. This collaborative workflow ensures lighting documentation stays accurate and in sync with other building systems.
These steps set the stage for integrating tools and coordinating projects, which are discussed in the following sections.
Software Tools for Lighting Fixture Detailing
Once workflows are established, specialized software tools take lighting fixture detailing in BIM to the next level.
Autodesk Revit is the go-to platform for lighting fixture detailing. It offers robust design features, parametric modeling, and documentation tools tailored for lighting applications. Within Revit, lighting fixtures are managed as families – parametric objects containing both geometry and data. Consistent naming conventions and standardized parameters across these families are critical for streamlined teamwork. Storing them centrally ensures everyone on the team works with the latest versions.
ElumTools, a Revit add-in, simplifies lighting calculations by allowing designers to perform illuminance analyses directly within the BIM environment. This eliminates the need to export geometry to separate tools, saving time and effort.
For more advanced lighting design, DIALux is a free tool that supports planning, calculating, and visualizing lighting solutions for both indoor and outdoor spaces.
Dynamo, a visual programming tool, integrates with Revit to automate repetitive tasks like placing or modifying lighting fixtures. This boosts efficiency and simplifies complex workflows.
MagiCAD focuses on MEP systems within Revit, offering specialized tools for designing and analyzing lighting systems alongside other building services. This ensures lighting fixtures are properly coordinated with electrical systems.
To validate models and detect clashes, Solibri plays a vital role. It identifies conflicts between lighting systems and other building elements, preventing costly issues during construction.
Cross-Discipline Coordination in BIM
Beyond tools and workflows, successful lighting fixture detailing relies on seamless collaboration across disciplines.
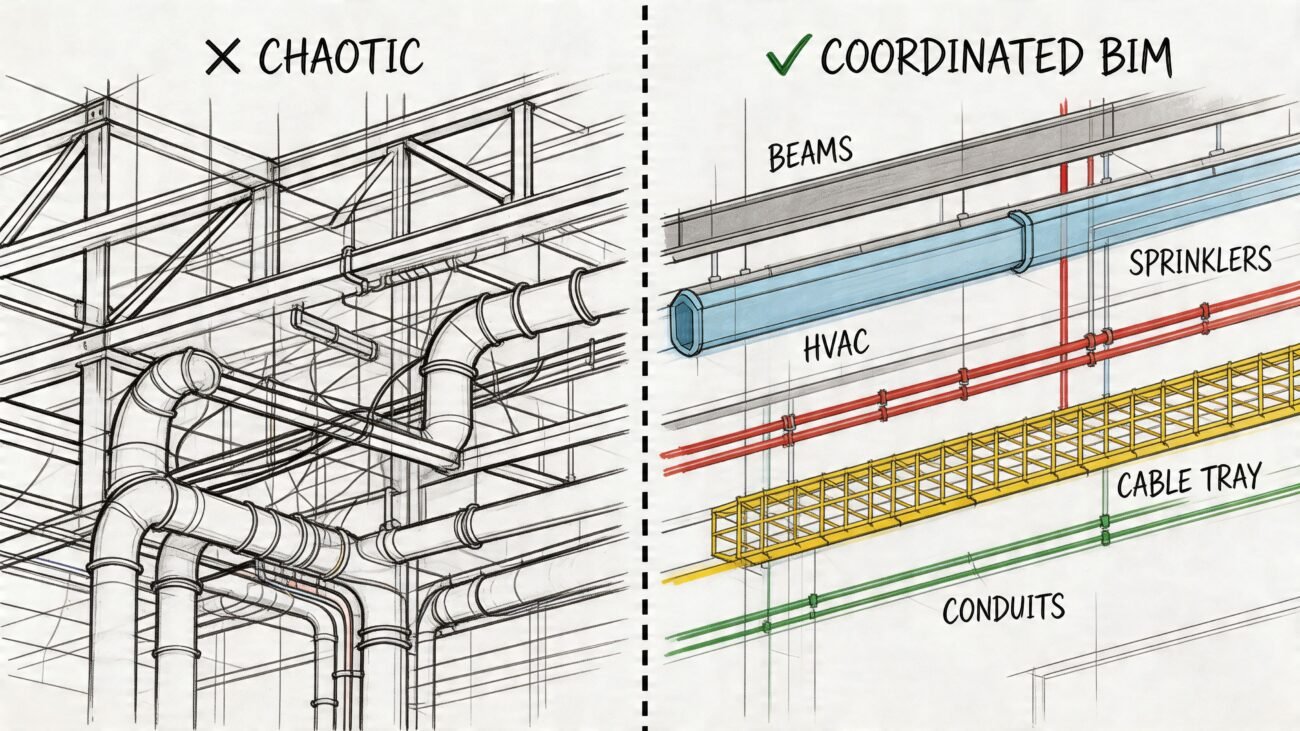
BIM’s strength lies in its ability to bring together various teams – especially for MEP systems, where lighting, HVAC, electrical, and plumbing need to work in harmony. This starts with a Model Coordination Plan or BIM protocol document. Such a plan standardizes model sharing, defines team responsibilities, and specifies the required level of detail.
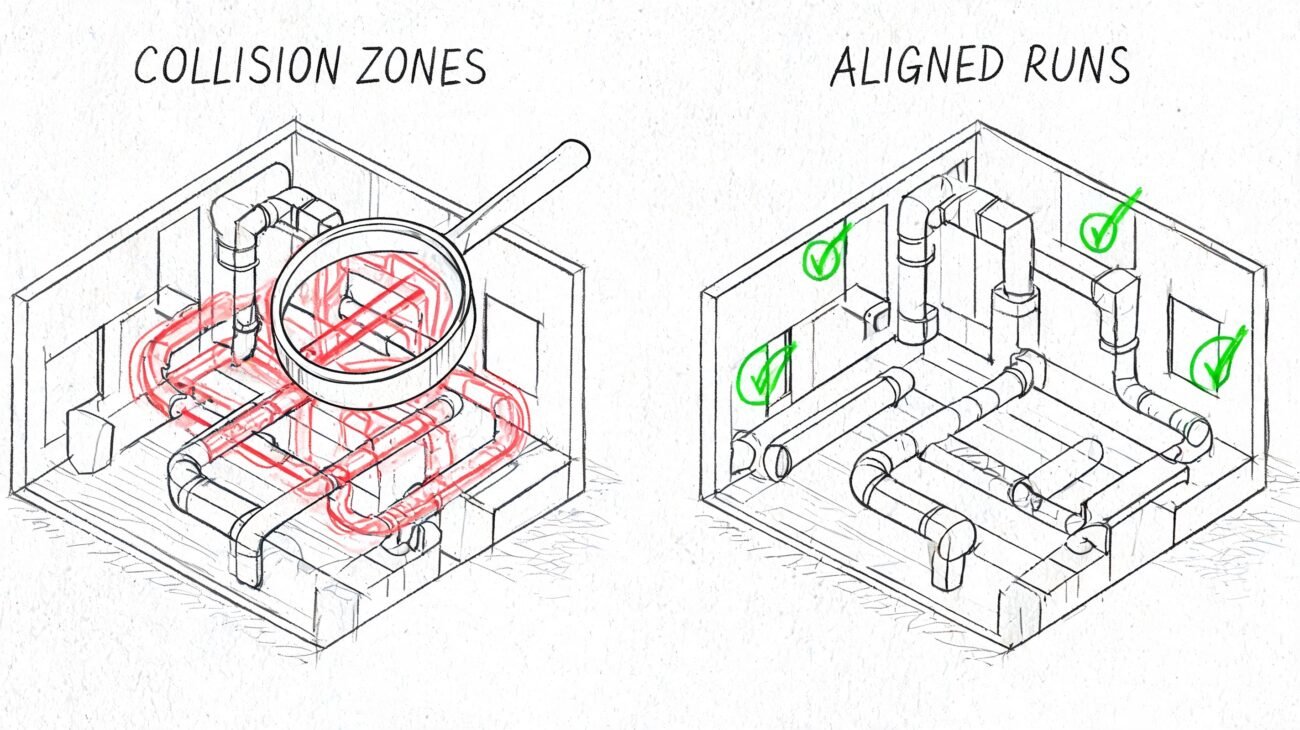
In a coordinated BIM environment, clash detection becomes even more effective. The 3D visualization of systems makes it easier to spot and resolve conflicts that would be challenging to identify in 2D drawings. Regular clash detection sessions should be scheduled, with results reviewed in meetings where teams collaborate to address issues.
Cloud-based platforms like BIMcollab and Trimble Connect enhance collaboration by enabling teams to manage BIM issues and share data in real time. These tools ensure transparency and keep everyone informed about project changes.
The benefits of strong coordination are clear: BIM can cut MEP project costs by an estimated 20–30% and improve productivity by up to 58%. These gains come from better communication, less rework, and more efficient problem-solving throughout the project.
Platforms like Autodesk Construction Cloud (ACC) and BIM 360 further support coordination by linking design activities to project management workflows. This ensures that BIM models remain connected to project delivery processes.
Maintaining the right level of detail is essential for effective collaboration. The model should be updated promptly to reflect any changes, followed by clash detection to ensure no new conflicts arise. This iterative approach keeps lighting fixture documentation accurate and aligned with the evolving project.
How to make a Lighting Shop Drawing using Revit MEP pt.1
sbb-itb-0af4724
Best Practices for Lighting Fixture Documentation
Creating effective lighting fixture documentation in BIM requires a structured approach. It’s all about balancing technical precision with practical usability while maintaining consistency from the outset.
How to Conduct Lighting Assessments for BIM Models
Thorough lighting assessments in BIM begin with meticulous data preparation. Start by verifying the geometry, assigning appropriate material properties, and ensuring all lighting data is complete. Then, define the project scope, adhere to relevant standards, and select the right analysis software.
Use Revit’s lighting analysis tools to evaluate natural light conditions and determine the best placement for artificial fixtures. Pair these tools with lighting simulations – either through built-in features or compatible plugins – to test how the proposed fixtures perform under different real-world scenarios. Based on the simulation outcomes, refine fixture specifications and explore energy-efficient options. Collaboration with MEP teams is also essential during this phase to ensure lighting fixtures integrate seamlessly with electrical systems and other building services.
These steps lay the groundwork for effectively combining 2D and 3D documentation techniques.
Combining 3D and 2D Documentation Methods
Building on the insights from lighting assessments, an effective documentation strategy combines 2D and 3D methods. Early on, use 2D drawings to outline initial concepts and provide detailed instructions for builders and contractors. As the project progresses, transition to 3D models to better understand spatial relationships, materials, and lighting effects. This hybrid approach allows stakeholders to visualize the design more clearly.
For instance, in March 2024, Studio Arc in Boston revolutionized its workflow by integrating mobile 3D CAD tools with an interactive whiteboard system. This enhanced process – featuring secure cloud storage for 3D models, AR walkthroughs, and streamlined digital feedback – cut review cycles by 60%, improved client satisfaction by 27%, and accelerated approvals by 76%.
"The mix of 3D visualization and real-time markup completely changed how we work with clients. What used to take weeks of back-and-forth now gets resolved in a single session."
– Sarah Chen, Lead Architect, Studio Arc
Use 3D renderings for client presentations and marketing, where visual appeal is key, and reserve 2D drawings for detailed construction documentation. This flexible approach ensures each stakeholder receives the information in the most suitable format.
Keeping Documentation Updated and Accurate
Once assessments are complete and documentation methods are in place, keeping records updated is critical for project success. Centralize all project data in BIM to streamline workflows and maintain consistency . Real-time visibility of design changes allows team members to adapt quickly, reducing the likelihood of costly change orders.
"With BIM, everyone sees the information and changes in real time and can respond to any alterations needed before the shovel hits the ground. This improves build times, waste, and expensive change orders in the field."
– Patrick MacLeamy, FAIA, Chairman of buildingSMART International
Set clear BIM protocols early on to define roles, procedures, and approval workflows for changes. Use dynamic Revit features – like type catalogs and shared parameters – to modify fixture specifications while safeguarding data integrity. Regular clash detection, precise annotations, and consistent naming conventions further enhance documentation quality. Additionally, structured training programs ensure the team stays proficient with BIM tools and processes throughout the project lifecycle.
Common Challenges and How to Solve Them
Even with well-established workflows and detailed documentation, projects often encounter challenges that can disrupt schedules and inflate costs. Recognizing these common hurdles and having solutions ready can make all the difference in keeping a project on track.
Resolving Coordination Conflicts and Missing Data
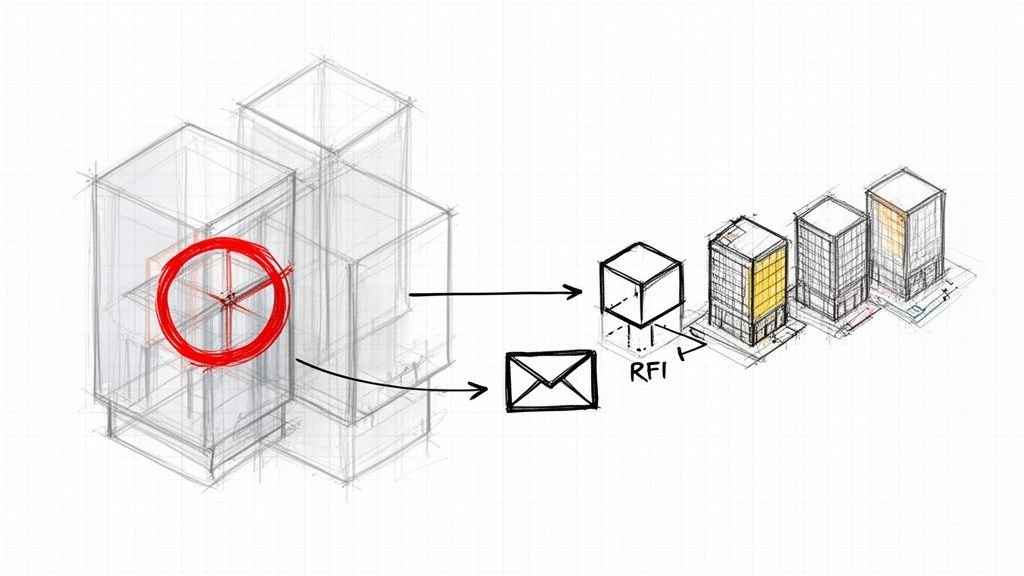
Clash detection is a powerful way to address coordination conflicts. Common issues include structural beams interfering with light fixtures, HVAC ducts blocking planned lighting locations, and electrical conduits overlapping other MEP elements. These problems often arise when teams work independently without proper coordination.
Take this example: a real estate firm managing a hospital project used BIM to coordinate over 15 design consultants. Early clash detection uncovered conflicts like medical gas lines interfering with structural bracing and ductwork. By resolving these clashes digitally within 48 hours, the team avoided weeks of delays and saved about $10,700 in redesign and material costs.
To streamline the process:
- Address structural and architectural clashes first, then focus on major MEP systems, and finally, resolve lighting details.
- Ensure models align properly from the start by mastering coordinate systems in Revit.
- Remove unnecessary elements before running clash detection to minimize false positives.
- Use collaborative tools that support the BIM Collaboration Format (BCF) for better reporting and issue tracking.
Centralized BIM platforms also help identify and address missing data quickly, ensuring smoother workflows.
Meeting Standards and Code Requirements
Code compliance issues often emerge late in projects, making them costly to fix. To avoid this, integrated analysis tools can identify performance issues before installation begins.
Here’s how to stay ahead:
- Conduct regular audits to catch compliance problems early. Weekly model reviews focused on specific code requirements can help, along with assigning team members to monitor areas like emergency lighting or fixture spacing.
- Bring in outside experts, such as lighting consultants or electrical engineers familiar with local codes, to spot potential issues your internal team might miss.
- Clearly define data exchange protocols to ensure smooth communication of electrical and lighting information between stakeholders. Document these protocols in your BIM execution plan so everyone understands their role in maintaining compliance.
Once compliance is under control, managing changes effectively becomes the next priority.
Handling Changes and Updates
Projects evolve constantly, with client requests, code updates, and design changes creating a steady stream of adjustments. Without a structured approach, these changes can disrupt lighting documentation and lead to errors.
To keep things running smoothly:
- Implement quality control processes to maintain accuracy. For example, require approval workflows so changes are reviewed before being added to the model.
- Hold weekly coordination meetings with clear agendas and follow-up tasks to ensure alignment across teams.
- Use cloud-based platforms for real-time collaboration and model synchronization, so updates are visible to all disciplines immediately.
Regular training is also essential. As software evolves, training sessions can help teams stay up to date with new features and workflows, reducing the risk of errors.
"BIM Heroes transformed our workflow with their expertise. Their team delivered exceptional quality on a tight deadline, and their attention to detail was impressive. They’ve become an invaluable extension of our design team."
- Michael Thompson, Principal Architect
Standardized workflows are another key tool for managing changes. Document step-by-step procedures for common updates, such as fixture substitutions, circuit modifications, and emergency lighting adjustments. This ensures team members can handle changes efficiently throughout the project lifecycle.
"BIM Heroes standardized our processes and reduced coordination issues."
- Sarah Johnson, Project Manager
Working with BIM Professionals for Better Results
Modern lighting systems and evolving building codes require expertise that only skilled BIM professionals can provide. As lighting technology becomes more sophisticated and regulations grow stricter, these professionals play a key role in ensuring high-quality outcomes.
Why Skilled BIM Professionals Matter
Construction companies using BIM processes and tools report impressive results. Over 61% see fewer construction errors, while nearly 75% achieve significant cost savings. Skilled BIM professionals bring a lot to the table, especially when it comes to lighting design. They carefully plan the placement and quantity of light fixtures during the early stages of design, incorporating critical details like lighting values for switches, daylight sensors, occupancy sensors, and various light types. They synchronize artificial lighting with natural daylight, perform energy analyses using photometric data, and enable real-time coordination across industries to finalize decisions earlier in the process. These abilities help ensure precision and smooth collaboration, as discussed earlier.
How BIM Heroes Elevate Your Projects

When it comes to leveraging these benefits, partnering with BIM Heroes can make a world of difference. Their team specializes in lighting fixture detailing, addressing the challenges that often arise in complex projects. With a deep understanding of U.S. building codes, BIM tools, and industry best practices, BIM Heroes focuses on delivering "Peace of Mind" and "Value" through their commitment to quality, speed, and a consultative approach.
Their track record speaks for itself: BIM Heroes achieves cost estimation accuracy within 3% and reduces project timelines by up to 80%. They go beyond basic documentation, creating detailed BIM models from sketches, drawings, point cloud scans, or even PDFs. This adaptability is particularly useful for projects involving existing buildings or when working with multiple design teams.
BIM Heroes also provide expert consulting services to develop and implement BIM Execution Plans. These plans ensure that lighting documentation stays consistent across team members and disciplines while meeting client-specific requirements. Their flexible engagement models make them suitable for projects of any size, whether you need dedicated long-term support, fixed-price services for defined tasks, or hourly assistance for evolving needs.
Their team is proficient in software like Autodesk Revit, BIM 360, Navisworks, and ArchiCAD, equipping them to handle lighting models and coordination tasks with efficiency. They also ensure compliance with standards set by organizations such as ASTM, ACI, and CRSI, helping to maintain quality and control costs.
FAQs
How does BIM help design energy-efficient lighting systems compared to traditional methods?
BIM plays a key role in boosting energy efficiency in lighting design. By providing tools for detailed analysis and optimization, it allows architects and designers to carefully plan where to place fixtures, what types to use, and their intensities. This ensures spaces are well-lit without wasting energy.
On top of that, BIM incorporates simulation tools and real-time analysis, making it possible to predict and refine energy performance. The results can be impressive – energy consumption can drop by as much as 20% when energy-efficient fixtures and advanced lighting controls are used.
What standards and codes should be followed for accurate lighting fixture detailing in BIM projects?
For BIM projects in the United States that involve lighting fixtures, it’s crucial to align with established standards like the National BIM Standards, OmniClass, and Uniformat. These frameworks offer a structured approach to organizing and managing BIM workflows efficiently.
When focusing on lighting-specific elements, pay attention to aspects like lamp type, photometric data, and electrical properties. Standards such as the NEMA BIM Data Requirements and other electrical BIM guidelines play a key role in ensuring safety, performance, and compatibility across systems. Following these guidelines helps your project meet both regulatory demands and functional needs.
What are the best software tools for detailing lighting fixtures in BIM, and how do they improve the design process?
When it comes to detailing lighting fixtures in BIM, some of the most widely used software tools include Autodesk Revit, Graphisoft ArchiCAD, DIALux evo, ReluxCAD for Revit, and Visual Lighting. These programs simplify the design process by offering precise lighting analysis, crafting realistic visualizations, and ensuring smooth integration into BIM workflows.
With these tools, designers can work with greater precision and efficiency while improving collaboration across teams. This leads to well-documented lighting plans and better project outcomes, making them indispensable for professionals who need to align with contemporary design and construction standards.