It’s a moment that makes every project manager's stomach drop: a frantic call from the site. The specified high-performance window units have arrived, but they won’t fit the structural openings. This isn’t a simple field mistake; it's a coordination failure that started months ago in the digital model. Glazing decisions look simple on paper but are one of the most coordination-heavy elements in a building envelope, where a small miss can cascade into major budget and schedule overruns.
Getting window systems right isn't a construction problem. It's a BIM problem—one that requires production discipline, template-driven workflows, and a clear understanding of how buildings are actually assembled. For small-to-mid-sized firms, mastering this is a direct path to protecting margins and delivering predictable outcomes.
Why Glazing Is More Complex Than It Looks
The gap between a window spec and a buildable detail is filled with hidden complexities. Each layer of information must align perfectly across disciplines, or you risk costly RFIs and rework. It’s not just about getting the glass right; it’s about coordinating the entire system within the surrounding assembly.
Here’s where the details matter:
- Structural Rough Opening vs. Window Unit Dimensions: A classic conflict. The structural engineer models a header for a standard opening, but the architect specifies a window with a much thicker frame, leading to a clash that’s only discovered during installation.
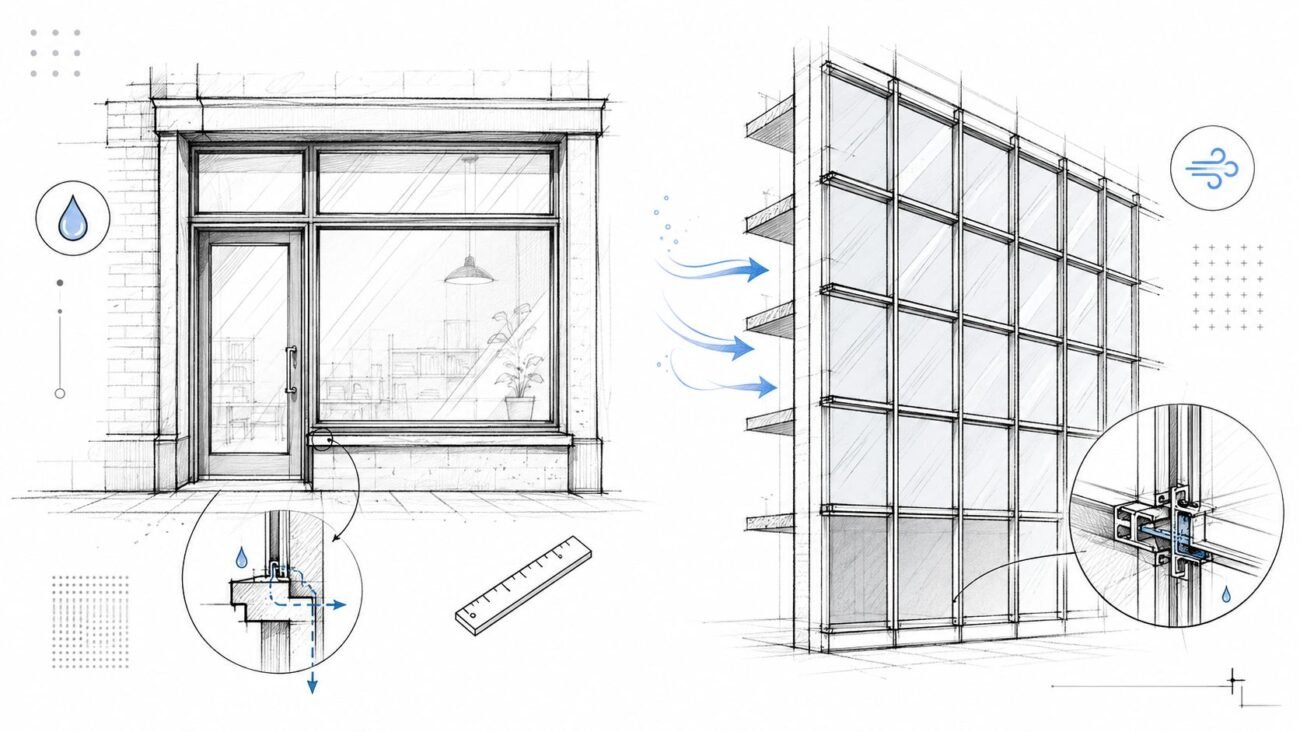
- Frame Depth Conflicts with Wall Assembly: A high-performance window frame can be several inches deeper than a generic one. Does it sit flush with the interior finish? Does it push past the exterior insulation? Without an accurate model, you’re just guessing.
- Sill and Head Detail Alignment: The window’s sill must integrate perfectly with the wall’s weather-resistive barrier and flashing. A detail drawn in 2D might look fine, but a 3D model reveals the true build sequence and potential waterproofing failures.
- Thermal Performance Specs (U-value, SHGC): The energy model assumes a certain U-value, but if the Revit family isn't updated to reflect the specified product, the window schedule might list incorrect data, putting code compliance at risk.
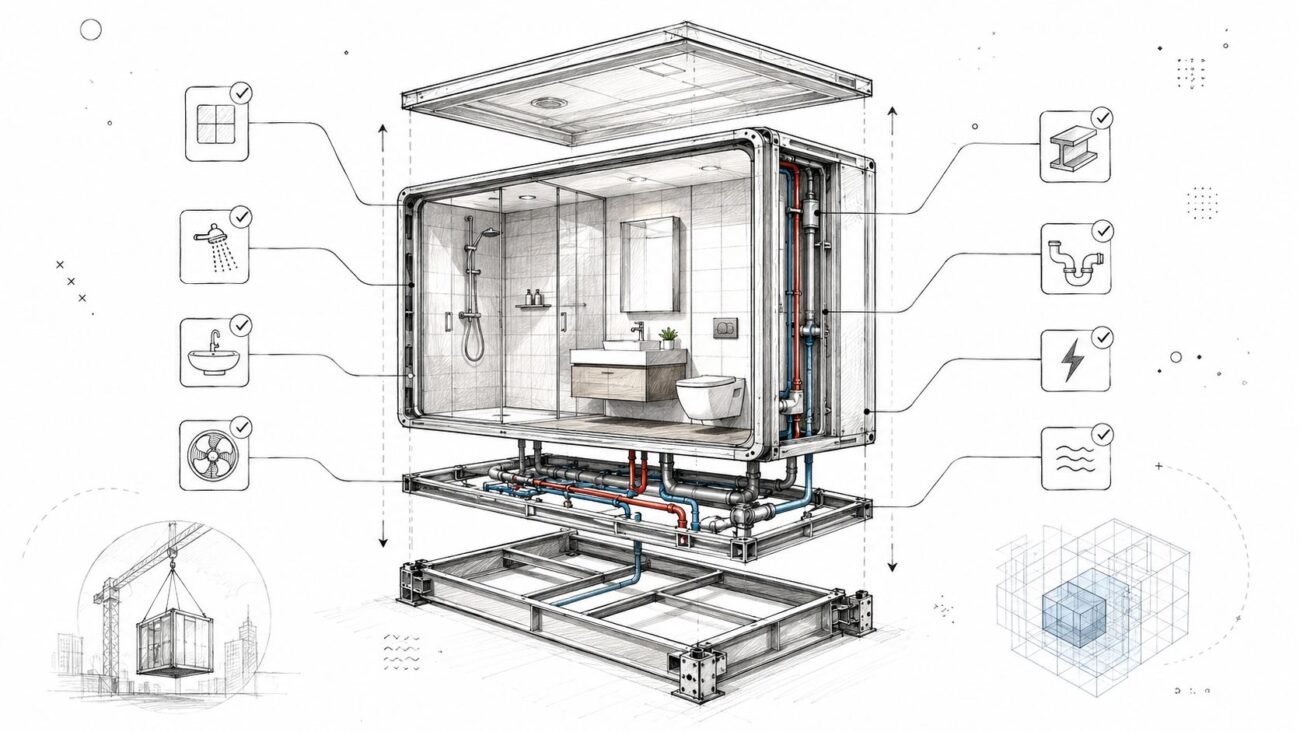
- Manufacturer-Specific Installation: Every window manufacturer has unique requirements for shims, sealants, and anchoring. These details affect the adjacent framing and finishes and must be accounted for in the model to prevent field guesswork.
Each of these is a decision checkpoint. When they are managed within a mature BIM workflow, they become opportunities to de-risk the project. When ignored, they become sources of delay and margin erosion.
Where Coordination Typically Breaks Down
If you've ever dealt with a window-related field issue, these failure points will sound familiar. They aren't isolated mistakes; they are symptoms of a broken process, where design information lives in disconnected silos—specs, drawings, and models that don’t talk to each other.
Common failure points in a typical CAD-to-BIM evolution include:
- Generic Revit Window Families: Using out-of-the-box families with incorrect or placeholder dimensions is a primary source of error. The model shows a window that fits, but it bears no resemblance to the actual product being ordered.
- Specs Divorced from the Model: The specifications call for triple-glazing, but the model still shows a double-glazed unit. This disconnect leads to inaccurate schedules, incorrect wall sections, and ultimately, the wrong product being ordered.
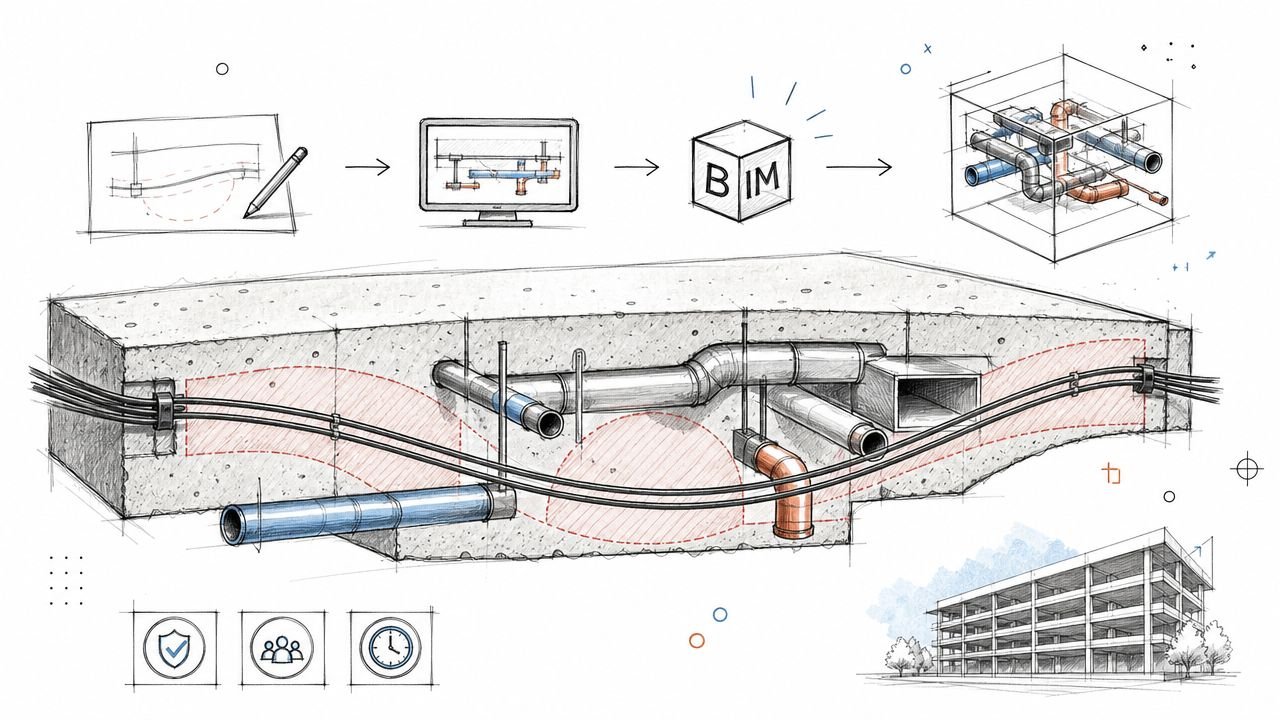
- Uncoordinated MEP Penetrations: A conduit or pipe run is planned near a window opening without accounting for the true frame depth, forcing costly and time-consuming rerouting on-site.
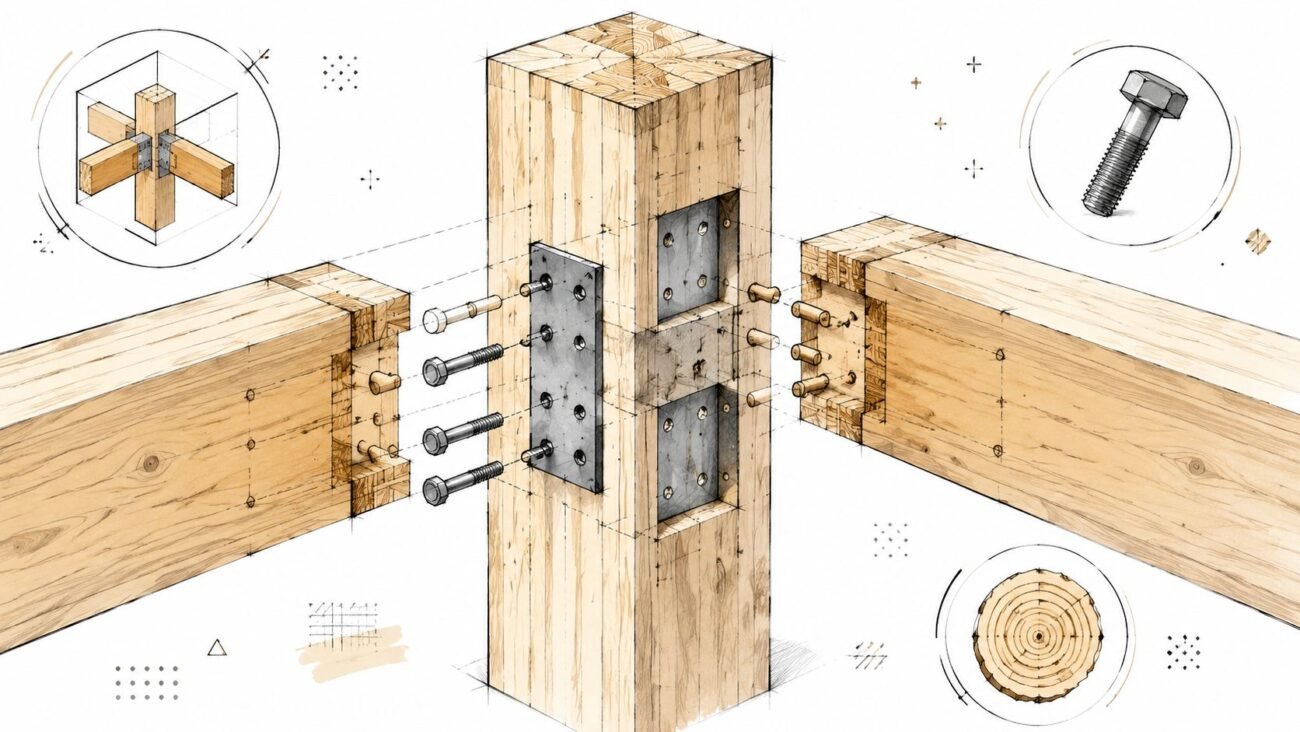
- Inaccurate Structural Modeling: Headers and sill plates are modeled as simple extrusions without accounting for the actual lumber dimensions or the tolerances needed for installation, creating clashes that stop framers in their tracks.
- Late-Stage Glazing Substitutions: The owner requests a different window manufacturer late in the design phase. If this change isn't rigorously run back through the model for a full coordination check, it’s almost guaranteed to cause problems.
These are systemic issues that erode predictability and trust. The goal isn’t to find someone to blame; it’s to build a production system that prevents these errors from happening in the first place.
What Proper BIM Coordination Looks Like for Glazing
A robust, model-first workflow turns window systems from a liability into a well-managed asset. This isn’t about aspirational BIM; it’s about a disciplined, production-focused process that ensures clarity and prevents RFIs. This is how you protect your margins and deliver operational consistency.
Here’s what a well-coordinated glazing workflow looks like in practice:
- Accurate Revit Window Families: The process starts with building or sourcing window families that contain real manufacturer data. This includes precise frame depth, mullion profiles, and parametric controls for rough opening tolerances. This isn't just drafting; it's building a data-rich component that carries its own installation requirements.
- Model-Driven Window Schedules: Window schedules are generated directly from the model, not typed manually in a separate program. Performance data like U-value, SHGC, and glazing type are embedded as parameters in the Revit families. If a window is changed, the schedule updates automatically, eliminating the risk of data entry errors and ensuring the specs and drawings are always in sync.
- Detailed Wall Assembly Sections: Wall sections aren't just 2D drawings; they are live views of the 3D model. This allows you to visualize the complete build-up—sheathing, air barrier, insulation, and finishes—and confirm the window frame aligns perfectly. It’s a critical QA process for validating waterproofing and air-sealing details.
- Targeted Clash Detection: Before issuing documents for permitting or construction, specific clash detection routines are run as a formal QA checkpoint. Key tests include window-to-structure (frame vs. header/sill) and window-to-MEP (frame vs. nearby conduits/pipes). This isn't a "run-all" approach; it's a surgical strike on high-risk interfaces.
- Embedded Performance Parameters: Energy performance data (U-value, SHGC, VLT) is embedded in the window families and linked to the specifications. This allows for quick verification against energy model assumptions and ensures compliance with codes like the IECC.
- Modeled Flashing and Waterproofing: While you don't model every screw, critical flashing and waterproofing components are modeled in detail views. This forces the team to think through the actual construction sequence, ensuring the design is buildable and the building envelope is robust.
- Rigorous Review Checkpoints: The workflow includes formal decision checkpoints to review glazing coordination before key milestones (e.g., DD, 50% CD, 95% CD). This catches late spec changes and ensures that any modifications are fully vetted and coordinated across all disciplines before they can cause issues.
This systematic approach delivers clarity. It ensures that by the time a project gets to the field, the toughest glazing coordination problems have already been solved.
High-Performance Glazing Specifically: Extra Coordination Demands
Specifying high-performance windows amplifies the need for rigorous BIM coordination. These advanced systems—with their thicker assemblies and specialized components—introduce a new layer of complexity that can easily trip up a standard workflow. Getting this right demonstrates a deep understanding of modern building science, not just drafting.
Here’s what to watch out for:
- Triple Glazing and Thicker IGUs: A triple-pane Insulated Glass Unit (IGU) is significantly thicker and heavier than a standard double-pane unit. This requires a deeper frame and a wider rough opening. If the Revit family isn't updated from a generic double-pane placeholder, you’re baking a dimensional clash into the model that will become a major field issue.
- Thermally Broken Frames: These frames are essential for preventing thermal bridging, but their complex profiles and specific installation sequences affect how they integrate with the wall’s air barrier and continuous insulation. The model must accurately reflect these details to ensure the thermal envelope is truly continuous.
- Low-E Coating Orientation: For solar control, a Low-E coating needs to be on the correct glass surface (typically surface #2) to be effective. A sophisticated BIM model can include a parameter that flags the specified coating orientation, providing a crucial QA check to ensure the manufacturer fabricates the unit correctly.
- Integration with Continuous Insulation (ci): Anchoring a window through several inches of exterior insulation is a major structural and thermal challenge. A coordinated model goes beyond just showing the window in the opening; it details the specific blocking, clips, or brackets required to provide a secure anchor without creating a thermal bridge. This is a key detail for permitting prep and RFI prevention.
- Coordination with Shading Devices: External shading devices like overhangs or fins are critical for managing solar gain. These elements must be modeled accurately to validate their effectiveness in shading the glass during peak sun hours, ensuring the high-performance glazing can do its job.
Mastering these details is what separates firms that simply use BIM from those that leverage it for scalable delivery and superior project outcomes.
The Cost of Getting It Wrong vs. The Cost of Getting It Right
The financial impact of poor glazing coordination is not theoretical. It’s a real and painful cash burn that directly erodes project margins. An RFI about a window that doesn't fit isn't just an inconvenience; it’s the start of a cascade of delays and unbudgeted costs.
- RFIs and Field Modifications: Every on-site question stops work. The time spent waiting for an answer while trades stand idle is lost forever. If reframing is required, that's hundreds of dollars in labor and materials for just one opening.
- Glazing Replacements: Ordering the wrong window unit is a catastrophic error. The cost to replace a single high-performance window can run into the thousands of dollars, not to mention the weeks or months of lead time to get a new one.
- The Multiplier Effect: Now, multiply that cost across a 40-unit residential project or a light commercial building. A seemingly small coordination miss can quickly escalate into a five- or six-figure problem that jeopardizes the entire project's financial viability.
The cost of getting it right in BIM is a fraction of the cost to fix it in the field. Upfront coordination isn't an expense; it’s an investment in predictability. It also protects the schedule. With window lead times often stretching for months, catching a mistake in the model prevents a delay that could stall the entire project, protecting the timeline and ensuring a smooth path to close-out.
How BIM Heroes Approaches Window Coordination
Our role is to bring production maturity to your design process. We don’t just model what’s drawn; we build a reliable system for delivering coordinated, buildable documents. We act as an extension of your team, embedding our production discipline directly into your workflow. We don’t sell hours; we sell clarity.
Here’s how we approach window coordination:
- Disciplined Family & Schedule Creation: We build accurate, data-rich Revit window families based on your specified products. Window schedules are always model-driven, creating a single source of truth that eliminates spec-to-model discrepancies.
- A Proactive Review Process: Our QA process is designed to catch conflicts before they become problems. We run targeted clash detection at key decision checkpoints and verify that details like frame depth, rough opening tolerances, and air barrier integration are correct.
- Deep US Market Experience: We have extensive experience with the US residential and light commercial window systems, building codes (including IECC energy compliance), and construction methods common in your projects.
- Embedded Production Pods: We work as a scalable delivery pod within your existing team structure. We integrate into your workflow, providing the production horsepower and technical oversight needed to ensure consistency and prevent RFIs.
Our goal is to give you the confidence that your window systems are fully coordinated before they ever reach the permitting desk or the job site.
Closing / Takeaway
Glazing coordination is where many of a building’s most expensive problems begin. From structural clashes to waterproofing failures, these issues are almost always preventable with a disciplined, model-first approach. By treating window systems as a critical BIM coordination challenge, you can transform a major source of risk into a predictable and reliable part of your projects.
As buildings become more performance-driven, the demands on glazing will only intensify. Firms that build this level of production maturity into their standard workflow will not only protect their margins but will also build a reputation for delivering clarity and excellence. They will be the ones that thrive.
Working on a project with complex glazing or high-performance window systems? Let's talk about how we can support your production documentation.