Meta description: Learn how to write a clash detection report for design review that drives decisions, assigns ownership, and tracks resolution. Practical Navisworks reporting steps for BIM coordinators, architects, and MEP teams.
The meeting starts with good intentions. Someone opens a Navisworks HTML export on a shared screen. The list is long, the names are vague, and nobody can tell within the first few minutes which items need a design decision and which are just modeling noise.
That’s the moment a lot of teams confuse clash detection with coordination.
A software export tells you that elements intersect. A design review report tells the team what matters now, who owns it, what can wait, and what has already been resolved. If the report can’t do that, the meeting turns into live triage. Architects defend walls they haven’t reviewed yet. MEP engineers scroll through clashes that should have been filtered out before the meeting invite went out. The BIM coordinator ends the call with a longer action list than the one they started with.
A useful report is built. It isn’t generated.
Beyond the Export Button The Problem with Raw Clash Data
Most failed coordination meetings have the same pattern. The team receives a “clash report,” but what they got was a raw export with every interference Navisworks found, including duplicates, accepted conditions, and low-value items that shouldn’t be in front of the design team in the first place.
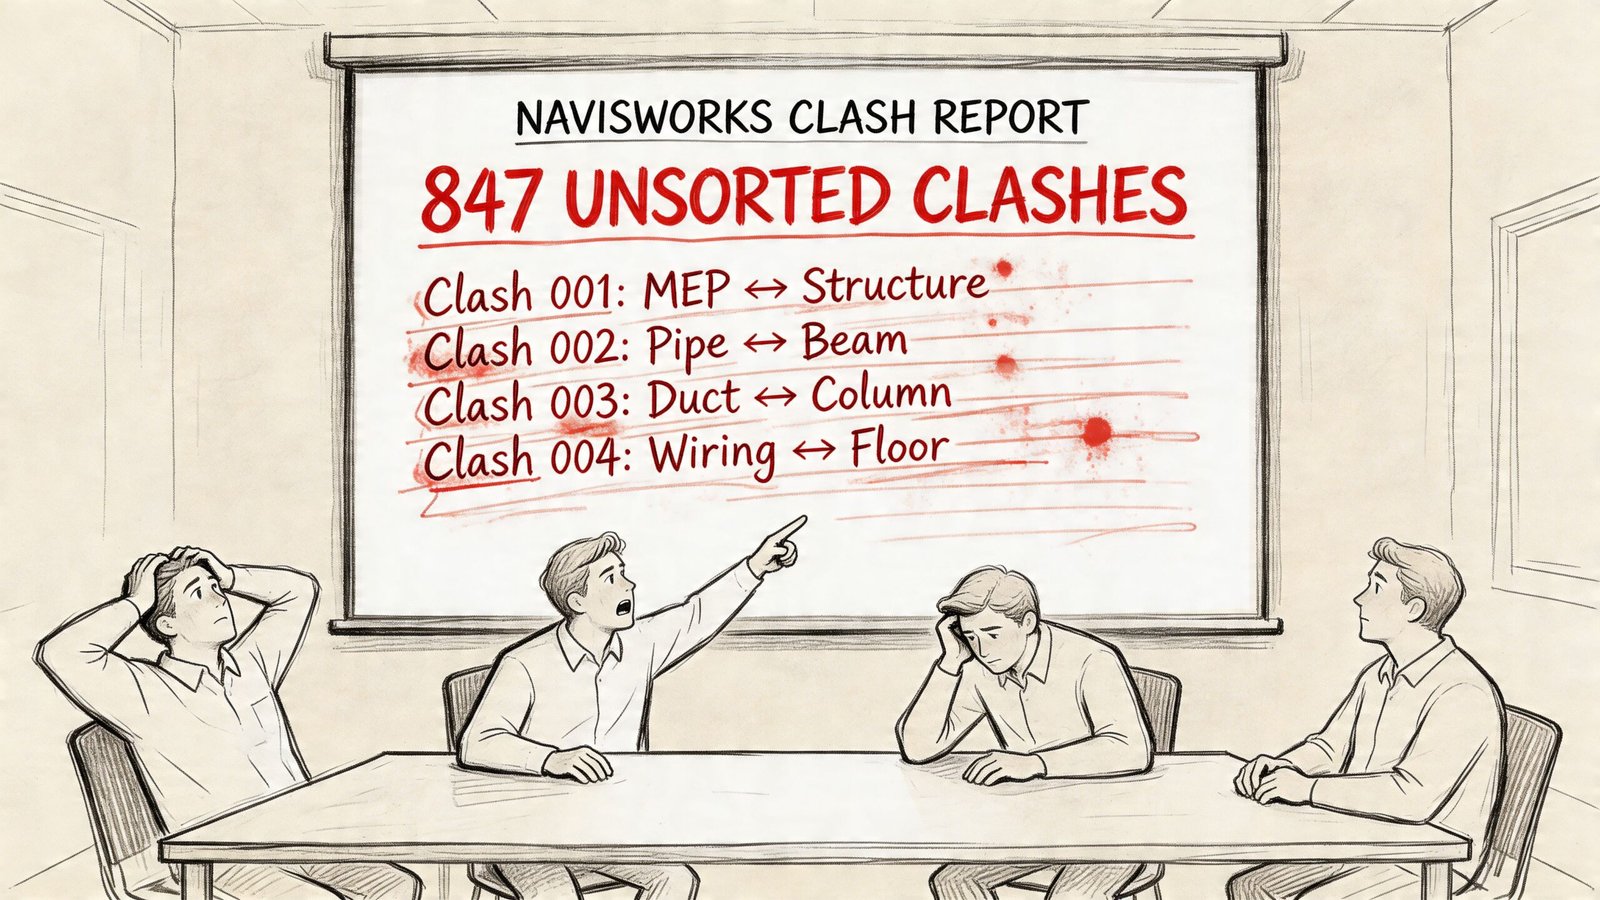
That difference matters. A design review meeting has limited time and expensive participants. If the report forces architects, structural engineers, and MEP leads to sort noise from signal in real time, the report has already failed.
Smaller firms feel this harder because they don’t have spare hours to waste on unstructured coordination. As BIM Corner notes in its discussion of clash matrix practice, while clash detection is mandatory in some regions, existing content rarely addresses the financial justification for adoption among smaller AEC firms in the USA, and most publications focus on technical implementation rather than business questions around workflow cost versus prevented rework. That gap shows up in reporting quality. Teams run the software, but they don’t build the decision framework around it.
Raw clash data is inventory. A design review report is management.
The coordinator’s job isn’t to show everything the software found. It’s to deliver a curated package that protects meeting time, design momentum, and project margin.
Define the Report's True Purpose for Design Review
A proper BIM coordination report for design team use has three jobs. If it misses any one of them, people talk a lot and resolve very little.
Decision support
Some clashes need a real design call. A main duct through a beam web, a pipe through a shear wall, an electrical panel with no working space, those items need agreement across disciplines. The report must isolate those conflicts so they can go straight onto the meeting agenda.
Other items don’t belong in the room. If one discipline can fix the issue without changing another team’s design intent, that item should be assigned and tracked, not debated in a full review.
Ownership assignment
Unowned clashes linger between model cycles. That’s the pattern behind “we saw this last week” comments that never lead to closure.
Every open item needs a responsible party. Sometimes that owner is the discipline expected to move. Sometimes it’s the BIM coordinator because the clash needs clarification before assignment. But “TBD” is not a workflow.
Progress tracking
Coordination has to show movement. A report should tell the team which items are new, which remain active, which are in review, and which are resolved. Otherwise every meeting feels like starting over.
A useful report answers these questions fast:
- What needs a design decision today
- Who is responsible for each unresolved issue
- What changed since the last run
If the report can’t show progress between cycles, the team will keep re-discussing the same geometry.
That’s the baseline for how to write a clash detection report for design review. Format comes after purpose.
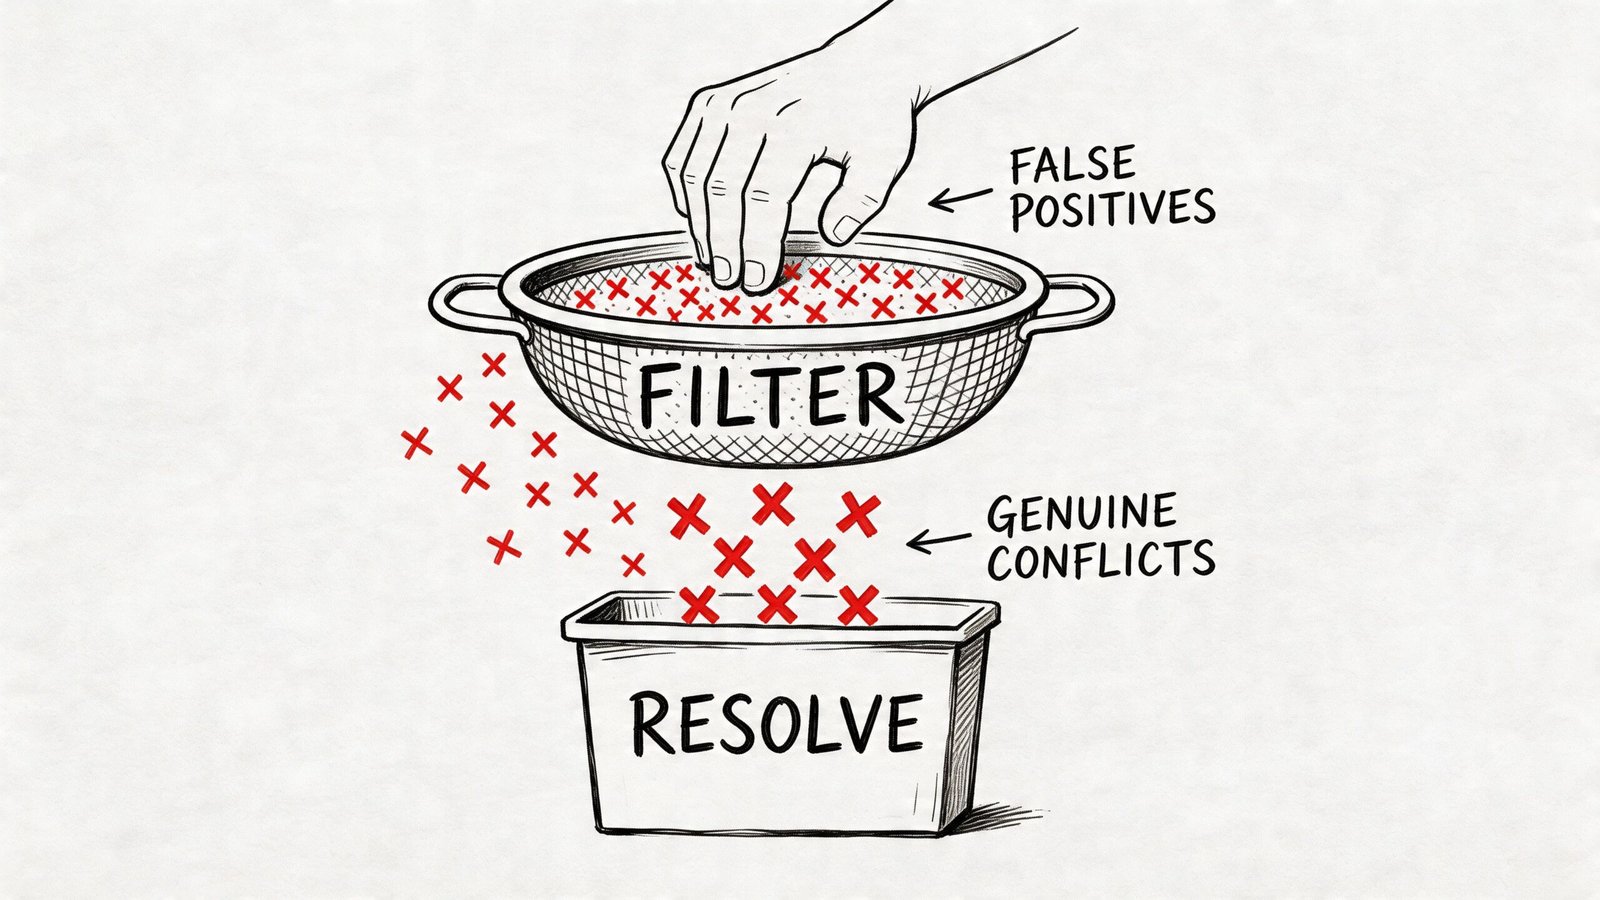
Filter and Isolate Genuine Conflicts Before Reporting
The fastest way to destroy a coordination meeting is to send it unfiltered results.
Before worrying about screenshots, color coding, or report layout, clean the clash set. Most bad reports fail before formatting starts. They include intentional intersections, same-discipline model errors, tiny tolerance issues, and low-value objects that generate noise but not decisions.
Remove the items that never belonged in review
Start with the obvious false positives.
- Intentional intersections: Door frames inside walls, sleeves through slabs, and modeled structural connections often read as hard clashes. If they are intentional, mark them accepted during setup or suppress them before reporting.
- Below-threshold penetrations: Many projects define threshold rules in the BIM Execution Plan. If small penetrations are not modeled with separate openings by agreement, don’t make the design team review those clashes every cycle.
- Same-discipline internal issues: Architectural families clashing with architectural hosts, or MEP content colliding within one discipline model because of family behavior, are production QA problems. They should be fixed before federation.
- Tolerance artifacts: Zero-tolerance tests create junk. Slight overlaps from model precision or export behavior can flood the report without representing field risk.
In their role, coordinators either act like editors or archivists. Editors protect the team from noise. Archivists just pass everything along.
Build your tests from a clash matrix
A single all-against-all test is easy to run and hard to manage. It produces an undifferentiated list that still needs manual triage after export. That’s backwards.
Use a BIM clash report clash matrix instead. Pair disciplines intentionally and name the tests so the output already carries context. The VBIM Global guidance on clash detection workflows recommends prioritizing high-impact pairs such as architecture versus structure, excluding low-value elements like small fittings, and running zone-specific tests. That grouping and filtering approach can cut coordination time by 40% in cloud-federated models.
A practical matrix often looks like this:
| Test group | Typical purpose | Reporting value |
|---|---|---|
| Architecture vs Structure | Walls, floors, openings, framing conflicts | Early envelope and core alignment |
| Structure vs MEP | Beam, slab, shaft, and riser coordination | Usually the highest-value review set |
| Architecture vs MEP | Ceilings, devices, fixtures, soffits | Strong for room-level coordination |
| MEP vs MEP | Duct, pipe, tray, conduit, sprinkler interactions | Trade routing and installability |
| MEP clearance tests | Access zones and working space | Soft clash review, not just hard intersections |
For the actual test names, don’t write “Test 1” or “HVAC-STR.” Write something a PM can understand in a report list, such as MECH-STRUCT L3 Corridor or ARCH-MEP Level 2 Exam Rooms.
Filter by zone, not just discipline
Zone-based testing keeps large projects from collapsing into one unreadable log. Split by floor, wing, shaft, plant room, or corridor segment where practical. That makes clash review closer to the way design teams think.
It also helps in meetings. Teams can close out one zone cleanly instead of touching fifty unrelated issues across the whole building.
Practical rule: If a clash test name doesn’t tell the reader the disciplines and the location, rename the test before you export anything.
For teams refining their setup process, this deeper look at Navisworks clash detection workflows is a useful companion to reporting standards.
What to keep in the final report set
After filtering, the remaining clashes should meet three conditions:
- They are real
- They are unresolved
- They involve cross-discipline coordination or clear approval logic
That reduced set becomes the working pool for classification. Everything else belongs in model cleanup, accepted conditions, or suppressed rule sets. Not in a design review packet.
Classify Clashes by Severity and Assign Ownership
A filtered report is cleaner. It still isn’t actionable until every clash is classified and assigned.
This is the point where many reports fall apart. Teams export a shorter list, but every item still carries the same visual weight. The duct through a beam and the conduit nicking a wall edge sit side by side with no distinction. In a meeting, that flattens priority. The loudest voice wins instead of the most important issue.
The answer is a disciplined clash report priority classification system applied before distribution. Structured reporting standards matter here. Prairie Electric’s explanation of 3D coordination clash reporting notes that structured reporting can reduce clash noise by 60% and help resolve 85% of issues before installation, while without that structure, up to 70% of clashes can remain unresolved pre-construction.
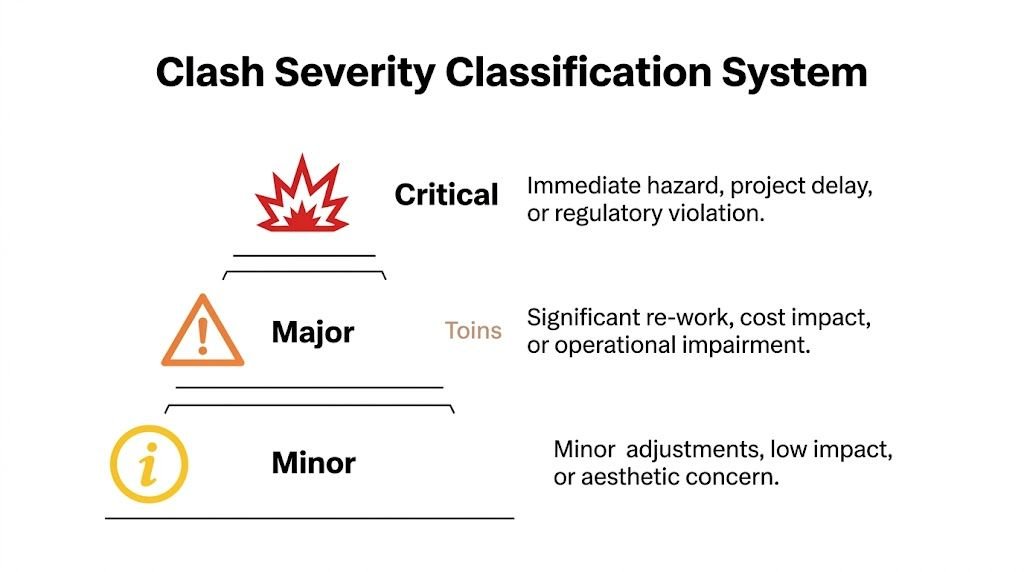
Use a three-tier severity model
You don’t need an elaborate scoring formula. You need a system the whole team can understand and repeat.
Critical
Use this for clashes that require a design decision before the next model issue.
Examples include a primary duct cutting through structural steel, a vertical riser conflicting with a major transfer beam, or equipment clearance that compromises code-required access. These items usually involve at least two disciplines and often need an engineer’s formal direction.
Critical items belong in the meeting agenda, not buried in an appendix.
Major
These are serious, but the path to resolution is clear and typically owned by one discipline.
A branch duct can step under a secondary beam. A conduit bank can reroute to another cavity. A sprinkler branch line can shift around a flange. The change still matters, but it doesn’t need a room full of people to decide who moves.
These items should be assigned with a due date tied to the next model submission.
Minor
This category covers accepted conditions, deferred items, or low-impact issues that should be monitored but not escalated.
That might include intentional conditions documented by the team, threshold-based exceptions, or clashes deferred to later contractor coordination under agreed scope limits. The key is to record why the item is minor, accepted, or deferred so it doesn’t come back as a fake emergency next cycle.
Put the severity on every line item
Don’t hide classification in a summary page only. The status of each clash should be visible wherever the item appears.
A MEP clash detection report template should include severity directly in the row, screenshot callout, or issue card. If people have to jump to another page to understand whether an item matters, they won’t use the report properly during live review.
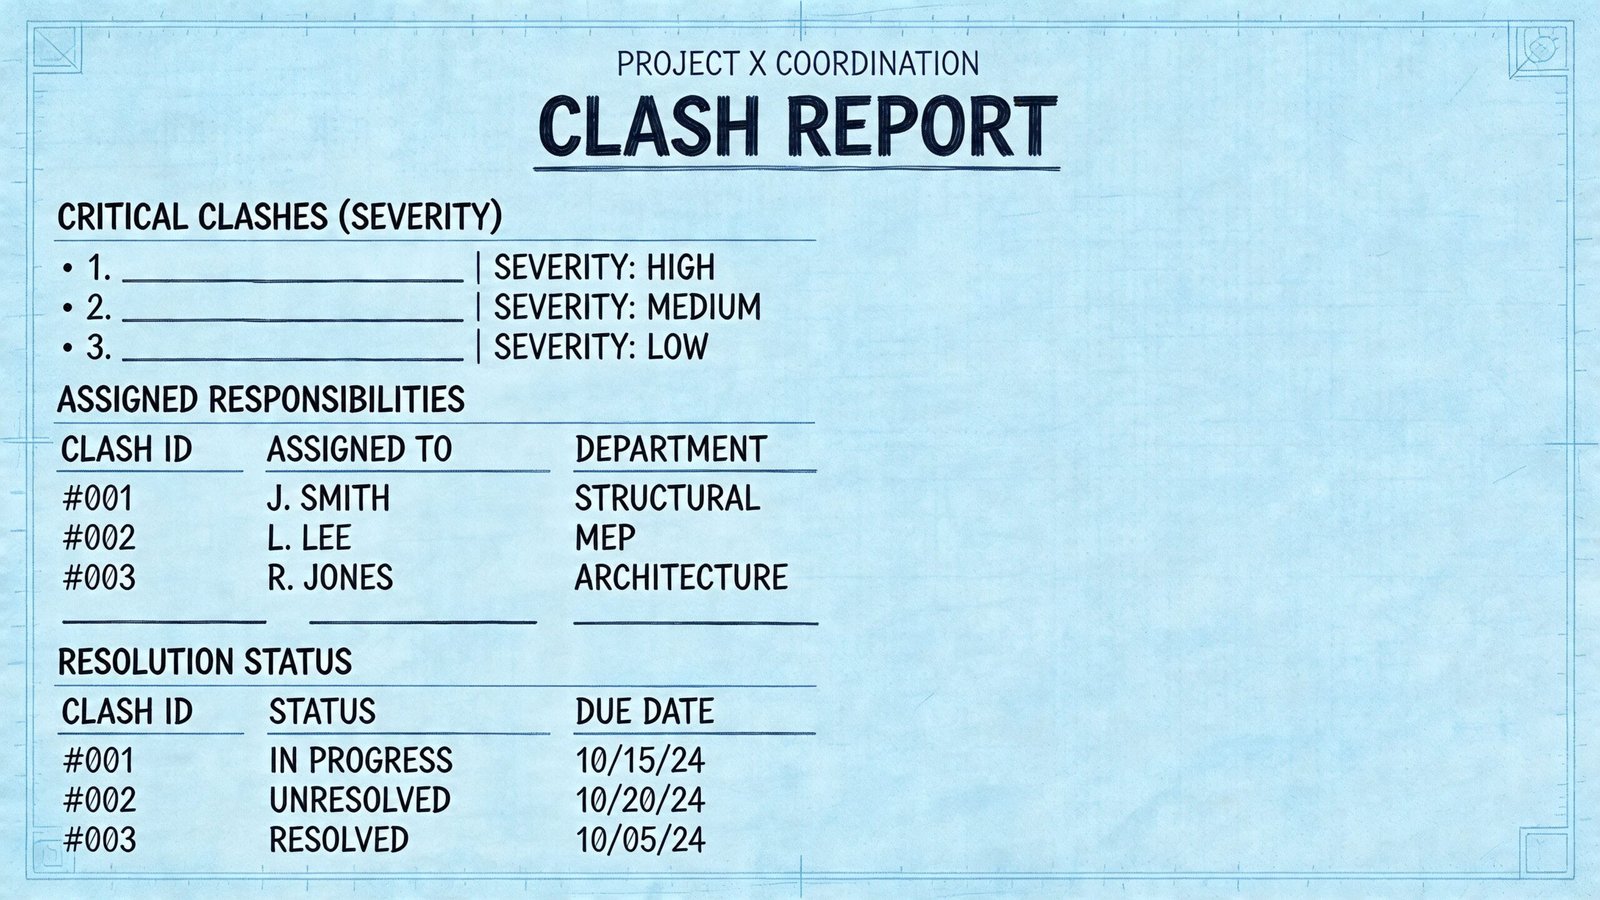
A clean line-item structure often includes:
- Clash ID
- Test name
- Location
- Disciplines involved
- Severity
- Assigned owner
- Status
- Due date
- Resolution note
Assign the owner based on movement hierarchy
Ownership works best when it follows an agreed routing hierarchy from the BIM Execution Plan or project coordination standard.
A typical hierarchy might keep structure fixed, preserve gravity drainage where possible, then require mechanical, electrical, or fire protection rerouting around those constraints. The exact sequence varies by project, but the principle doesn’t. The owner is usually the discipline expected to move.
That sounds simple until it isn’t.
Some clashes need a decision before ownership can be finalized. A major duct crossing a beam may prompt a structural opening review, a duct reroute, or an architectural ceiling adjustment. In those cases, assign temporary responsibility to the BIM coordinator and flag the item for design input rather than pretending the trade owner is obvious.
Ownership should answer one question clearly. Who must return with the next action, not who happened to be in the model when the clash was found.
Use status labels that mean something
Status values need to reflect workflow, not mood. Keep them limited and consistent.
| Status | Meaning | When to use it |
|---|---|---|
| New | First appearance in current cycle | Newly detected after latest run |
| Active | Assigned and unresolved | Work is required before closure |
| In Review | Waiting on design decision or validation | Resolution path under review |
| Resolved | Verified closed in updated model | Clash no longer exists or is formally accepted |
This continuity is why clash IDs matter. If an item appears for three straight cycles, the ID exposes drift in the process. It tells the PM this issue hasn’t just “stayed open.” It has consumed repeated coordination time without resolution.
For firms tightening multi-discipline workflows, this overview of clash detection in BIM practice pairs well with a formal reporting standard.
Assembling an Effective Clash Detection Report Document
Once the clashes are filtered, classified, and assigned, the report can finally be assembled as a working document. At this stage, clash detection report format BIM decisions start to matter.
The document should guide the meeting. It shouldn’t force attendees to hunt for basic context.
Start with a header that locks the report to a model state
The cover or header needs enough information to remove any doubt about what was reviewed.
Include the project name, report date, model issue date, discipline model versions, coordinator name, and distribution list. If model versions are missing, the team can’t tell whether the report reflects current work or an older federation. That creates avoidable arguments before anyone discusses the actual clashes.
Keep the executive summary to one page
Project leaders need a quick read. A strong first page should show:
- Total clashes by severity
- Totals by discipline pair
- Items resolved since the previous cycle
- Items newly introduced
- Critical clashes requiring a decision at this review
That page is not decoration. It sets the agenda and tells the PM whether coordination is moving forward or stalling in place.
The summary page should let a principal understand coordination health in a few minutes, not after reading every line item.
Separate critical issues from bulk coordination items
Critical clashes deserve individual treatment. Give each one a viewpoint image, concise description, location reference, severity, owner, and the specific decision required. Use isometric or section-based screenshots that show both elements clearly and include a readable grid or level reference.
Major clashes can sit in a structured table. They still need location, assignment, status, and due date, but they don’t all need a printed screenshot if the coordinated NWD or issue-tracking environment carries the viewpoint.
A simple structure works well:
| Report section | What it contains | Why it matters |
|---|---|---|
| Header and version record | Project and model references | Prevents version confusion |
| Executive summary | Counts, trends, critical agenda | Gives leadership a fast read |
| Critical clashes | Detailed item cards with viewpoints | Drives meeting decisions |
| Major clashes | Tabular action list | Supports disciplined follow-up |
| Resolved log | Closed items with notes | Creates audit trail |
Keep a resolved log
This section is often skipped, and that’s a mistake.
A resolved log proves coordination progress and records how items were closed. If a similar issue shows up later in the field, the team has an audit trail showing whether the original clash was resolved, accepted, or changed by later model revisions.
For teams using open issue workflows instead of static PDFs, Autodesk’s Navisworks Clash Detective documentation is the most credible external reference for tool behavior and export options. The document itself, though, still needs human judgment. Navisworks can write a report. It can’t write one that a design team can effectively use without curation.
Common Pitfalls and Best Practices in Clash Reporting
Most bad reports are bad in familiar ways. They aren’t failing because the software is weak. They’re failing because the reporting habits are loose.
The first habit to break is shipping the raw export. That pushes coordinator work onto the design team, which is exactly backwards. The second is unstable numbering. If clash IDs reset every cycle, progress tracking disappears and nobody can tell whether an issue is new or just newly renumbered.
Another common problem is poor viewpoints. A top-down image of a duct crossing structure rarely tells the engineer enough to make a decision. Use an isometric or section view that shows the interference clearly and anchors it to level or grid.
The meeting rhythm matters too. Teams that only run coordination at major milestones usually find problems when options are already narrowing. At minimum, clash review should happen at 50% DD, 100% DD, 50% CD, and 90% CD. On active projects, biweekly runs keep issues from compounding. If a previously coordinated zone gets a major model revision, rerun that zone instead of waiting for the next full project cycle.
A disciplined process pays off. A study across 5 commercial construction projects found that effective BIM clash detection led to an average 42% reduction in the cost of Change Orders, a 50% reduction in Requests for Information, and a 5% reduction in overall project costs, as summarized by VIP Structures’ review of clash detection cost history and technology.
For teams trying to make meetings more productive, these BIM coordination meeting practices help connect reporting quality to actual decision-making.
A short field checklist helps:
- Keep IDs stable: Maintain continuity across cycles so unresolved items are visible.
- Reference model versions: Every report should tie to specific discipline submissions.
- Show only actionable views: Screenshots must explain the problem, not just prove it exists.
- Separate agenda from backlog: Critical decision items should never be buried in the main list.
- Issue reports on a cadence: Regular runs beat milestone-only surprise detection.
Conclusion From Data Dump to Decision Tool
A clash detection report earns its value before anyone opens the file in a meeting. The value is in the filtering, the naming, the severity call, the ownership assignment, and the discipline to track items across cycles.
That’s why how to write a clash detection report for design review isn’t really a software question. It’s a production question. Teams that treat reporting as a management tool make faster decisions, protect design time, and create cleaner handoffs into documentation and coordination. Teams that treat reporting as an export task keep re-litigating the same model problems.
The best reports are selective, readable, and hard to misunderstand. They tell the team what needs a decision now, what has an owner already, and what changed since the last review. That’s what turns clash detection from a long list into a reliable coordination system.
If your team is tightening BIM coordination standards and wants practical frameworks instead of generic advice, BIM Heroes shares the kind of production-minded checklists, workflows, and reporting structure that help turn clash review into a repeatable decision process.