Commercial permit reviews rarely fail because the stair is missing. They fail because the stair documentation permit package doesn't let the reviewer verify compliance without making assumptions. The plan shows the stair. The life safety sheet counts it in the egress path. Then the stair section is thin, the handrail is generic, the landing depth isn't dimensioned, and nobody can tell whether headroom was measured from the nosing or from a convenient spot.
That's where avoidable comments start. Then the redlines spread into architecture, interiors, structural coordination, and sometimes electrical if accessible egress items were left hanging. The result isn't just delay. It's unplanned production time, broken sheet coordination, and margin leakage on work that should have been clean before submittal.
For teams producing commercial or multifamily CDs under the IBC, stairs need to be documented as a system, not as a symbol on plan. The code is prescriptive enough that the drawing set can either prove compliance or expose gaps immediately. Good production teams treat stairs the same way they treat rated assemblies, door schedules, and accessible toilet rooms. They build them into templates, model standards, and QA checklists early.
Introduction
Most plan reviewers look at stair drawings with one question in mind: can they verify compliance directly from the set, without calling for clarification? If the answer is no, the stair will get flagged even when the design intent is correct.
That's why stair review belongs in production QA, not just in life safety code study. A permit-proof set needs dimensions and details that close the loop between plan, section, enlarged views, and referenced details. If one piece is missing, the reviewer has to infer. That's exactly what triggers comments.
In practice, stairs are one of the most consistently under-documented parts of a commercial set. Teams often stop at showing location, travel direction, and basic width. What's usually missing is the verification layer: riser height, tread depth, landing geometry, handrail profile, extensions, guard conditions, and headroom. Those items aren't decorative annotations. They're the evidence.
Production rule: If the stair section can't answer the reviewer's question on its own, the set isn't ready.
For production architects, the issue isn't academic. It's operational. Stair coordination affects permitting, structural openings, shaft walls, door locations, BIM consistency, and downstream field interpretation. When the stair is documented clearly, the project moves predictably. When it isn't, RFIs and permit comments show up in a cluster.
Core IBC Stair Dimensional Requirements
A stair can look clean in plan and still fail review because the set never proves the geometry. That usually shows up late, after the stair opening is framed, door swings are fixed, and the structural engineer does not want to move a beam. At that point, a code issue is no longer just a code issue. It becomes a redesign cost.
For IBC work, the baseline dimensional requirements come out of Section 1011, and they need to be documented as measurable conditions across plan, section, and enlarged views. Stair width, riser and tread geometry, landing intervals, and headroom are not just design inputs. They are permit submittal data. If the egress width depends on occupant load, coordinate that early with the calculation method used in your occupancy load calculations for egress sizing.
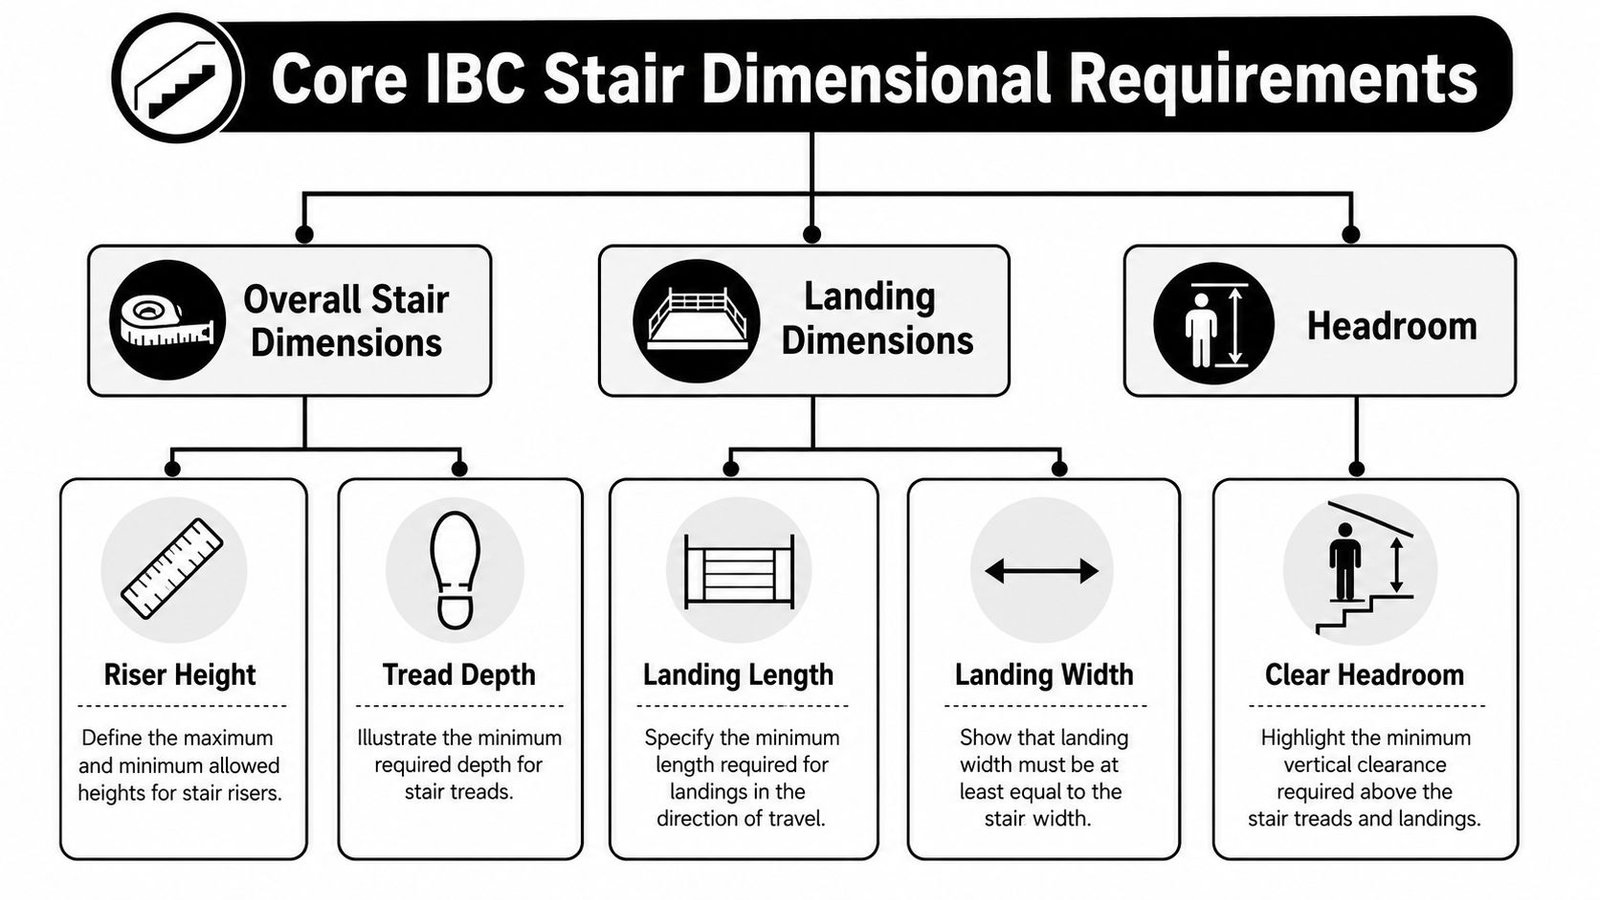
A typical egress stair is often documented at 44 inches clear, with narrower conditions permitted where the calculated occupant load is small enough. The code also limits rise between landings, sets bounds on riser height and tread depth, and requires headroom to be maintained through the full run. Those values need to be pulled into the model and then shown in the sheets in a way the reviewer can verify without cross-referencing half the set.
The production risk is simple. If the stair was modeled as a generic assembly and code dimensions were left for annotation later, the set will drift. Width changes after handrails are added. Floor-to-floor heights produce awkward riser counts. Landings collide with doors or rated walls. Headroom disappears under a transfer beam that was never shown in the stair section.
Lock down these items early:
- Clear width assumptions so the plan, wall types, and rail locations stay coordinated.
- Floor-to-floor height and riser count so the stair resolves to buildable dimensions before CDs.
- Landing geometry and locations so door maneuvering, structural framing, and rated separations do not conflict.
- Headroom envelope so soffits, beams, and slab edges are checked in section, not discovered in plan review.
Reviewers need to verify the stair from the drawings, not from intent. A generic note such as “stair to comply with IBC” creates work for the reviewer and usually creates comments for the team.
A permit-proof stair package answers these questions directly:
| Review question | Drawing that should answer it |
|---|---|
| Is the width compliant for the calculated occupant load? | Floor plan and enlarged stair plan |
| Are risers and treads within allowable geometry? | Stair section |
| Does the stair exceed the allowable rise before a landing? | Stair section |
| Is headroom maintained through the run? | Stair section with beams, soffits, and overhead elements shown |
One more coordination point matters. These dimensional rules are for IBC projects. If part of the job falls under the IRC, or if a mixed-use or multifamily building has different code paths in different areas, tag that distinction early in the life safety set and in the stair details. Residential dimensions copied into a commercial stair sheet are a reliable way to get a correction notice.
Handrail and Guardrail Documentation
If the stair geometry is usually under-dimensioned, the railing package is usually under-detailed. That's why handrails and guards generate so many comments. The drawing may show a line at the stair edge, but a line isn't a compliant detail.
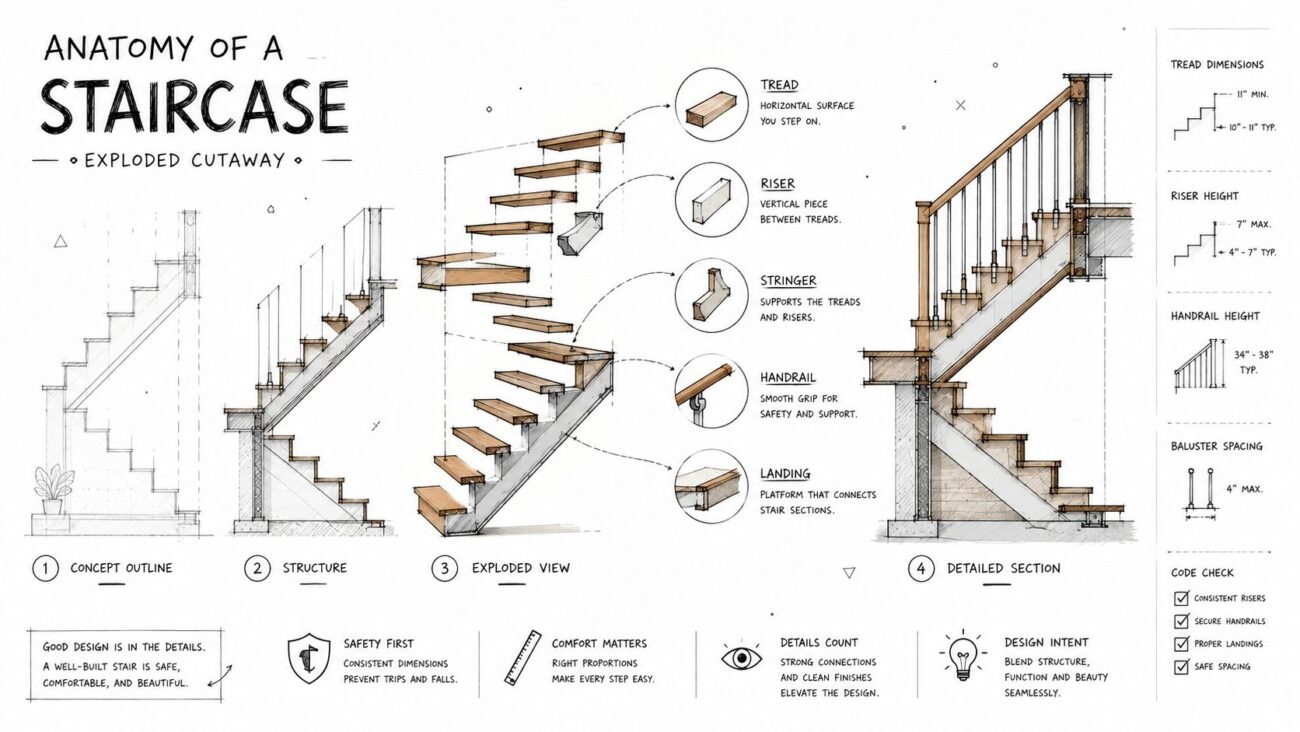
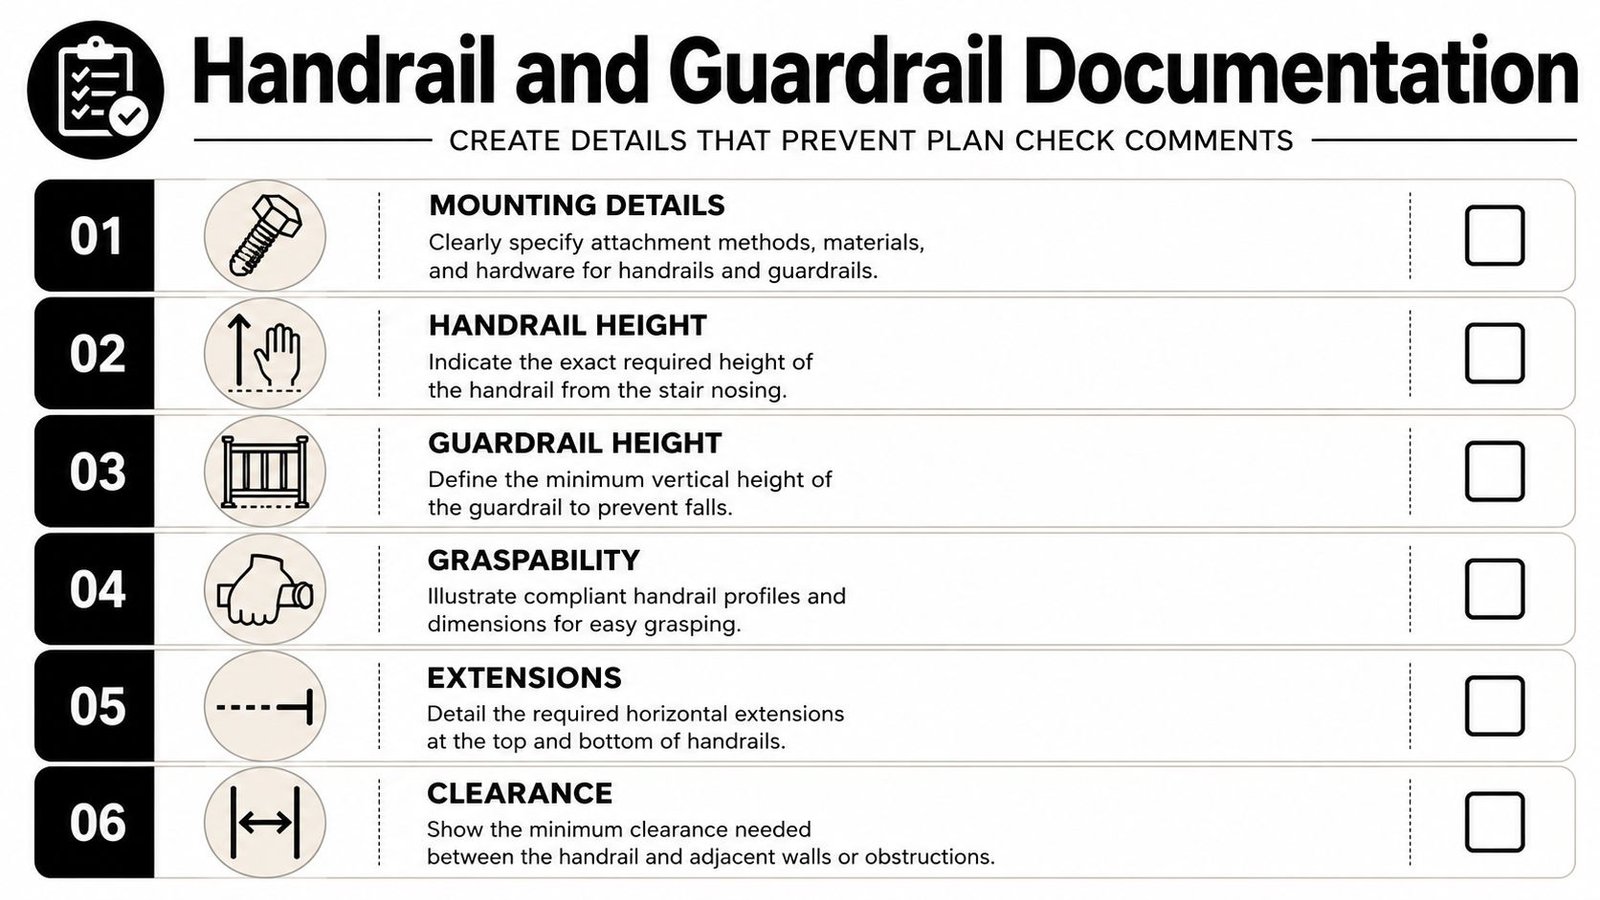
The IBC framework commonly places handrails 34 to 38 inches above the stair nosing, and in many commercial guard applications openings are limited so a 4-inch sphere cannot pass through (commercial stair compliance summary). Those numbers only help if the section and details show how the assembly is built.
Why generic rail details fail
A generic “metal handrail per spec” note leaves too many open questions. Reviewers need to know whether the rail profile is graspable, where the top of rail is measured, how the extension terminates, and whether the guard condition at landings is distinct from the handrail condition at the run.
That's where permit sets break down. One detail gets copied from an old project, another sits in a legend, and the stair section references neither clearly.
What should be explicit in the set:
- Handrail height measured from tread nosing, not from finish floor or stringer.
- Profile geometry called out in a detail or enlarged section, not left to spec inference.
- Extensions shown at top and bottom, because this is one of the most common omissions.
- Guard height at landings documented separately from handrail height.
- Opening limitations coordinated with the selected guard type.
A stair can be dimensionally correct and still fail review because the rail detail is too vague to verify.
Good documentation versus risky documentation
Good documentation ties the section, enlarged detail, and keynote together. Risky documentation spreads those decisions across sheets without a clear chain of references.
For commercial stair details IBC review, the cleanest approach is simple: one stair section, one handrail profile detail, one guard detail, and clear tags that connect them. If your team has to explain the rail in an email after submittal, the sheet set didn't do its job.
Organizing Stair Documentation in a CD Set
A coordinated stair package works best when each drawing has a defined job. Problems start when teams expect one plan view to do everything.
The floor plan should establish the stair's location, orientation, and relation to egress flow. It should show the stair outline, travel direction, width, and riser count notation where appropriate. But that isn't the best place to prove compliance. Trying to cram all stair dimensions onto a floor plan usually creates clutter without resolving the key review questions.
The hierarchy that works
A strong stair drawing permit set usually distributes information across four layers.
- Floor plans handle placement, pathing, and coordination with adjacent rooms, corridors, and doors.
- Enlarged stair plans show landing dimensions, wall relationships, and clearance conditions around doors and enclosure lines.
- Stair sections prove the core geometry.
- Details resolve the pieces the section can't show at a legible scale, especially handrails, nosings, and edge conditions.
This structure matters because it mirrors how reviewers think. They locate the stair first, then verify the life safety relationship, then look for the enlarged views that confirm dimensional compliance.
Where production teams usually lose control
The most common failure isn't that one drawing is wrong. It's that the hand-off between drawings is incomplete.
Typical gaps include:
- Plan shows width, section shows a different clear width
- Section references a nosing detail that doesn't exist
- Enlarged plan shows a door at landing but no depth dimension
- Life safety plan labels a stair as egress, while architectural sheets treat it like an open communicating stair
A mature BIM workflow closes those gaps with view templates, standard stair sheet modules, and pre-submission QA that checks references, not just graphics. If the stair lives in Revit but the critical dimensions are added manually in drafting views, consistency gets fragile fast.
Crafting a Bulletproof Stair Section Drawing
Plan review often turns on one stair section. The life safety plan may identify the stair correctly, and the enlarged plan may look coordinated, but the section is where the reviewer checks whether the geometry is documented well enough to approve. If the section leaves room for interpretation, expect a correction, an RFI, or both.
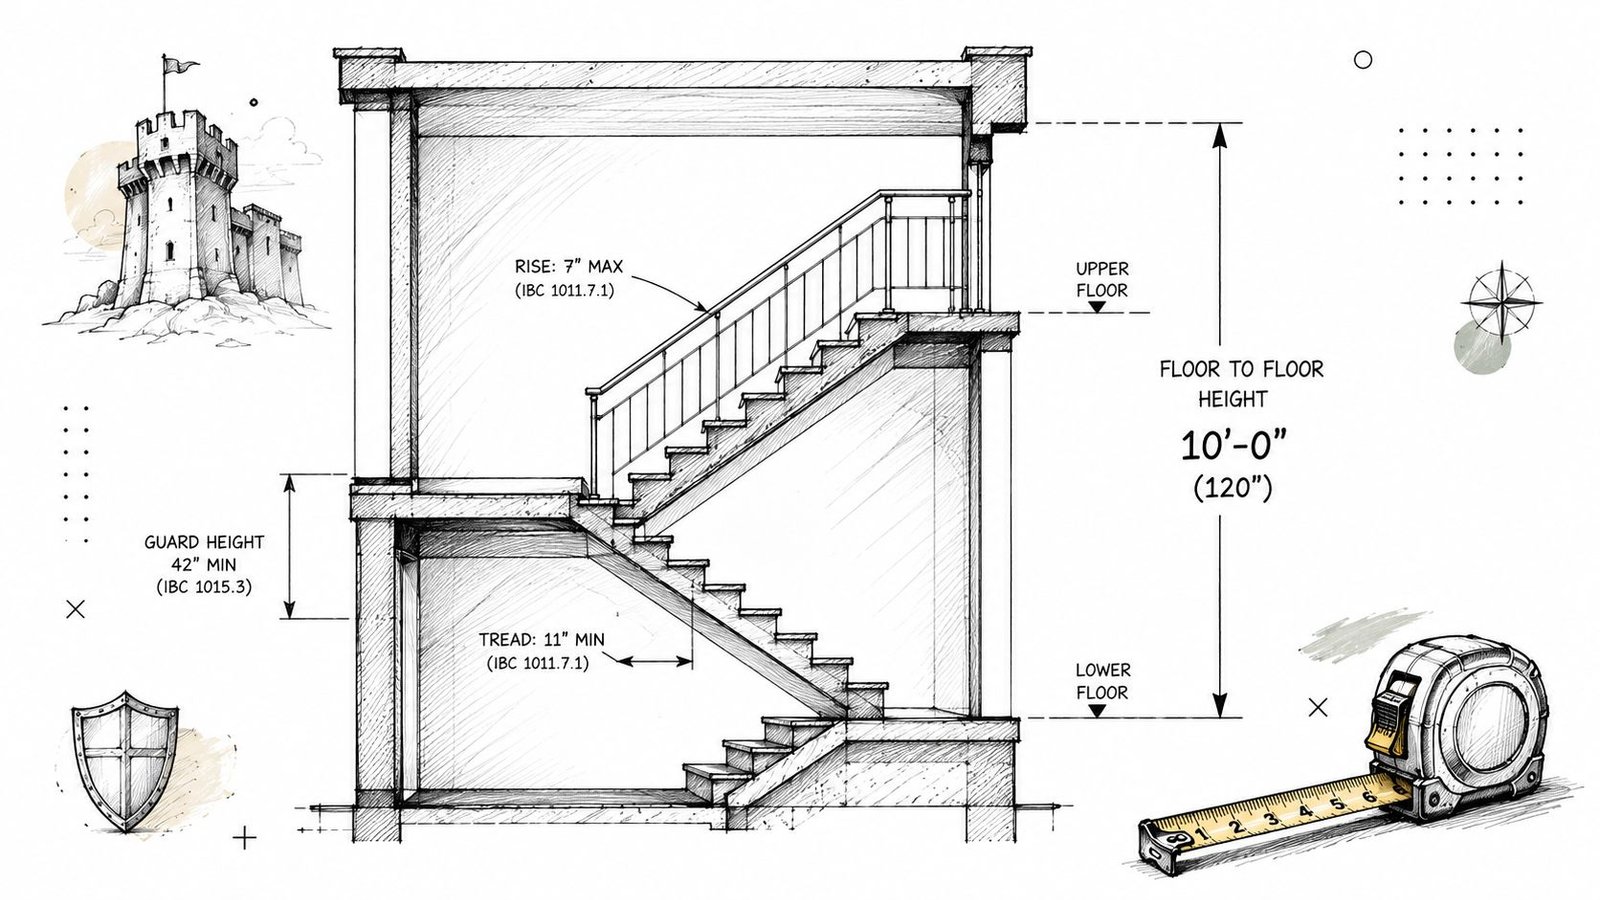
One production mistake shows up repeatedly. Teams add a slope note or discuss stair angle as if that proves compliance. It does not. Stairs are reviewed through risers, treads, landings, headroom, handrail relationships, and nosing configuration, as explained in this dimension-based stair angle explanation. In a permit set, the section needs measurable dimensions, not shorthand.
A permit-ready stair section should show the items below in a way that matches the built condition and can be checked without cross-referencing half the sheet set:
- Floor-to-floor height
- Number of risers and individual riser height
- Tread depth measured nosing to nosing
- Landing depth in the direction of travel
- Handrail height measured from the nosing line
- Headroom at the controlling point
- Any framing, soffits, or slab edges that reduce clearance
- Nosing profile, or a clear reference to the detail that resolves it
The nosing note is where many CD sets lose credibility. A generic section with a hard line at the tread edge is not enough if the detail set never shows the profile being referenced. Reviewers catch that. Contractors catch it later and price the uncertainty.
In BIM, the best practice is to treat the stair section as a controlled documentation object, not a one-off drafted view. Build a standard view template. Lock in the dimension strings your office requires. Use detail callouts that are tied to actual families, assemblies, or drafted details that already exist in the sheet index. That approach cuts inconsistency between modeled geometry and annotation, which is where many permit comments start.
I review stair sections with one question in mind. Can the contractor build it, and can the examiner verify it, from this sheet without asking what was intended?
That standard changes how the section is drawn. Show the beam if it affects headroom. Show the slab edge if it changes the last riser condition. Show the landing thickness if it matters to riser math. Show the handrail return if the rail detail is not visible anywhere else at readable scale.
A clean stair section protects more than code compliance. It reduces field interpretation, limits substitution arguments, and keeps the stair package from becoming a late coordination problem that burns fee during CA.
Documenting Egress vs Convenience Stairs
Not every stair in a commercial building carries the same permitting burden. Treating them all the same adds unnecessary work. Treating them as interchangeable creates risk.
An egress stair forms part of the required means of egress system. A convenience stair does not. The distinction affects enclosure strategy, life safety labeling, and how much supporting documentation has to appear in the permit set.
Side-by-side documentation impact
| Stair type | Documentation burden |
|---|---|
| Egress stair | Full life safety coordination, dimensional compliance, and related enclosure documentation |
| Convenience stair | Dimensional stair compliance still applies, but enclosure requirements are different |
In practice, the biggest cost issue is misclassification. If a stair is part of required egress, that needs to be obvious on the life safety package and aligned with the egress path documentation approach. If it's a convenience stair, the set still needs complete stair geometry and rail documentation, but it shouldn't be accidentally documented as though it requires the same enclosure strategy.
Why this matters late in CDs
Late-stage stair reclassification is expensive. If an open stair gets pulled into the required egress strategy too late, the design team may be forced to rework shaft walls, rated doors, door hardware, ceiling coordination, and adjacent floor layouts. That isn't just a code correction. It's a production disruption.
The cleanest sets identify stair type early on the life safety sheets and keep that classification coordinated across architecture, code notes, and consultant backgrounds. If one sheet calls it “exit stair” and another presents it like a communicating stair, expect comments.
Documenting Accessible Means of Egress Stairs
Accessible means of egress adds another layer to stair documentation. In this aspect, architectural teams often lose coordination because some requirements sit between architecture and electrical, while others affect stair width and egress planning.
For buildings with four or more stories, areas of refuge may be required above and below the level of exit discharge unless exceptions such as sprinkler conditions apply. Where used, they need to be shown with two wheelchair spaces of 30 by 48 inches each, and stairs serving accessible means of egress may require 48 inches between handrails (stairway code summary with accessible egress dimensions). That documentation should be coordinated with the overall permit logic used on your site plans for permit.
What gets missed most often
The architectural set usually captures the refuge location, but misses one of these follow-through items:
- Dimensions for the wheelchair spaces
- Clear graphic relationship to the stair enclosure
- Callout for the two-way communication system
- Coordination note tying the communication device to electrical scope
- Updated stair width where accessible egress drives a larger clear dimension
That last issue causes downstream trouble because the model, the life safety diagrams, and the stair details all have to agree. If one sheet still carries the standard stair width while another assumes accessible egress width, reviewers will find the conflict.
A coordination habit worth keeping
The best QA move here is simple. Put accessible egress review on the same checklist as rated enclosure review and door hardware coordination. These items tend to fall through when each discipline assumes another team member has covered them.
Accessible egress isn't a note to sprinkle into the code sheet. It's a documented condition that affects plan geometry, details, and consultant coordination.
Common Plan Check Corrections to Avoid
Most stair comments are predictable. That's good news, because predictable comments can be prevented with a repeatable QA pass before submittal.
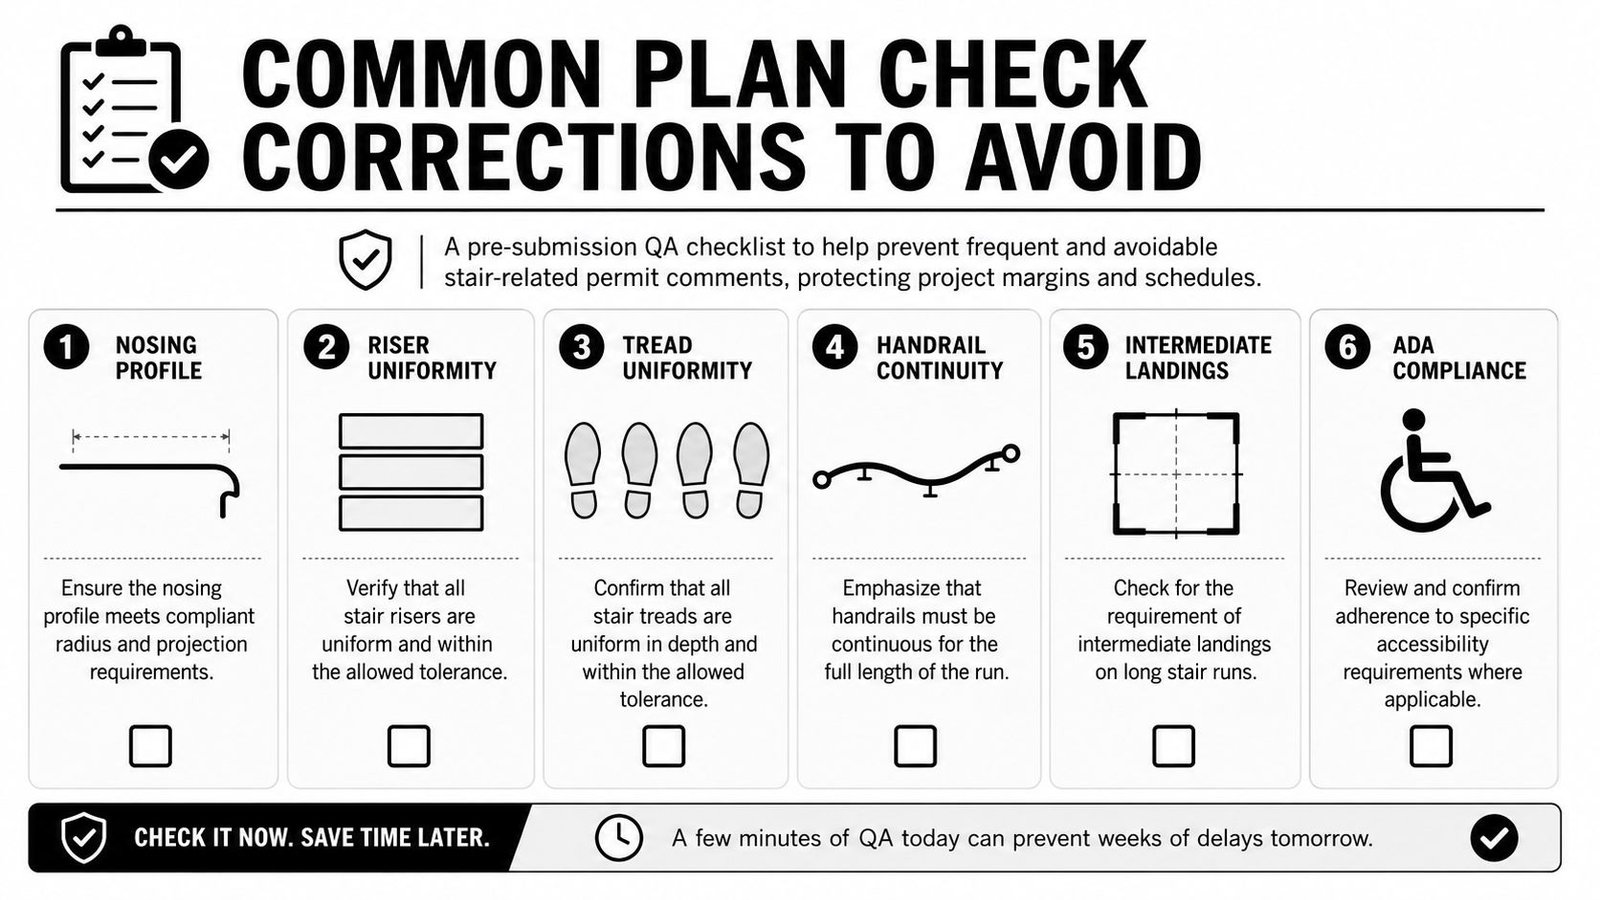
The short list that catches most issues
Use this as a final review filter for stair documentation permit quality:
- Nosing detail exists and is either shown in section or directly referenced.
- Handrail extensions are drawn, not just assumed.
- Graspability is documented in a profile detail or enlarged section.
- Headroom starts from tread nosing, not from a landing or finish floor line.
- Landing depth is dimensioned in the direction of travel.
- Riser count and riser height are both labeled on the section.
- Width is dimensioned where it matters, with clear understanding of whether the controlling dimension is between walls or between handrails.
- Stair type is consistent across life safety and architectural sheets.
If a reviewer has to jump between four sheets to verify one stair condition, expect a correction.
Turn comments into a checklist
The core production lesson is that stair quality shouldn't depend on who happened to draft the sheet that week. It should come from standards. Revit view templates, standard details, checked sheet indexes, and disciplined redline review all matter more than heroic cleanup right before upload.
For teams that want cleaner permit outcomes, the goal isn't just code knowledge. It's operational consistency. That's what keeps IBC stair code requirements from becoming late-stage redlines.
If your team is tightening CD QA or building a more predictable stair documentation workflow, BIM Heroes can support commercial architectural production with scalable BIM systems, stair detail coordination, and permit-focused documentation. If helpful, reach out through the architectural production support page and ask for a checklist or framework your team can adapt to its own CD standards.
Meta description: Stair documentation for permit review often fails because the drawing set doesn't prove IBC compliance. Learn what commercial stair drawings must show, how to organize stair sections and details, and how to avoid common plan check comments.
Category: Construction Coordination & Documentation