The glazing subcontractor called even though the window schedule already had a dozen columns. The drawings showed the window type, rough opening size, and frame material, but the questions were still basic and avoidable. What glazing is required for each type? Which units are operable? Are the windows in rated walls fire-rated? What datum is the sill height using?
That's the problem with a Revit window schedule in production. It can look complete and still fail the two people who rely on it most. The issue usually isn't missing effort. It's missing structure.
A production-ready schedule has to answer what the contractor needs, support what the reviewer needs, and stay accurate as the model changes. That means choosing the right fields, rejecting the wrong ones, and setting up Revit so the schedule behaves like a control document instead of a spreadsheet export.
Introduction
The glazing subcontractor's questions usually tell you more about the health of the drawing set than the schedule itself. If they're calling about glazing type, operability, rated assemblies, or sill height, the schedule isn't carrying enough useful information, no matter how many columns it has.
That gap matters because a Revit window schedule is supposed to reduce interpretation, not create it. In practice, it needs to communicate clearly to pricing teams, installers, reviewers, and architects checking the set before issue.
The fix isn't adding every possible parameter. It's building a disciplined schedule that includes the fields that drive procurement, compliance, and coordination, while leaving out the noise that makes the sheet harder to read. That's where most office templates either help or subtly hurt.
Who a Window Schedule Is Really For
A window schedule serves two different audiences, and they read it for different reasons.
The first is the plan reviewer. That person isn't trying to understand your family naming standard. They need to verify compliance. Depending on project type, that can mean checking glazing performance, fire-rated conditions, egress-related information, or operable area requirements. If the schedule doesn't expose those items clearly, the reviewer starts hunting through details, specifications, and enlarged plans.
The second is the glazing subcontractor. Their questions are more practical. They need frame type, glazing specification, dimensions that support fabrication, and enough clarity on operability to price and coordinate correctly. If that information is split across plan tags, keynote text, and specifications with no clear hierarchy, someone will fill in the blanks from assumption.
According to industry guidance, a window schedule is a foundational control document that links model data to construction documents, with basic information typically established during Design Development and more detailed requirements added during Construction Documents, which is especially important when managing large numbers of openings consistently across a project (Layer on the door and window schedule process).
What goes wrong in practice
Most weak schedules were built around what Revit made easy to extract. That's the wrong starting point.
Revit can generate a schedule quickly through its built-in workflow, but default parameters rarely line up with permit review or fabrication needs. If your office starts with a generic template and never rethinks the fields, you end up documenting software defaults instead of project intent.
Practical rule: Build the schedule around downstream decisions, not around the first list of fields Revit offers.
That same logic applies to the rest of the sheet set. If your documents need better hierarchy between plans, notes, and schedules, this commercial building blueprints guide is a useful reference for how information should read at the sheet level.
A better structure
For commercial and multifamily work, the cleanest approach is to put compliance-facing information first, then fabrication-facing information after. That doesn't mean duplicating content. It means ordering the schedule so reviewers and contractors can each find what they need without decoding your template.
When teams treat the schedule as a production control tool, RFIs usually show up earlier in-house, where they're cheap to fix.
The Non-Negotiable Fields for Every Window Schedule
If a Revit window schedule is going on a CD sheet, a short list of fields should be treated as mandatory. The exact office standard will vary, but these fields are essential.
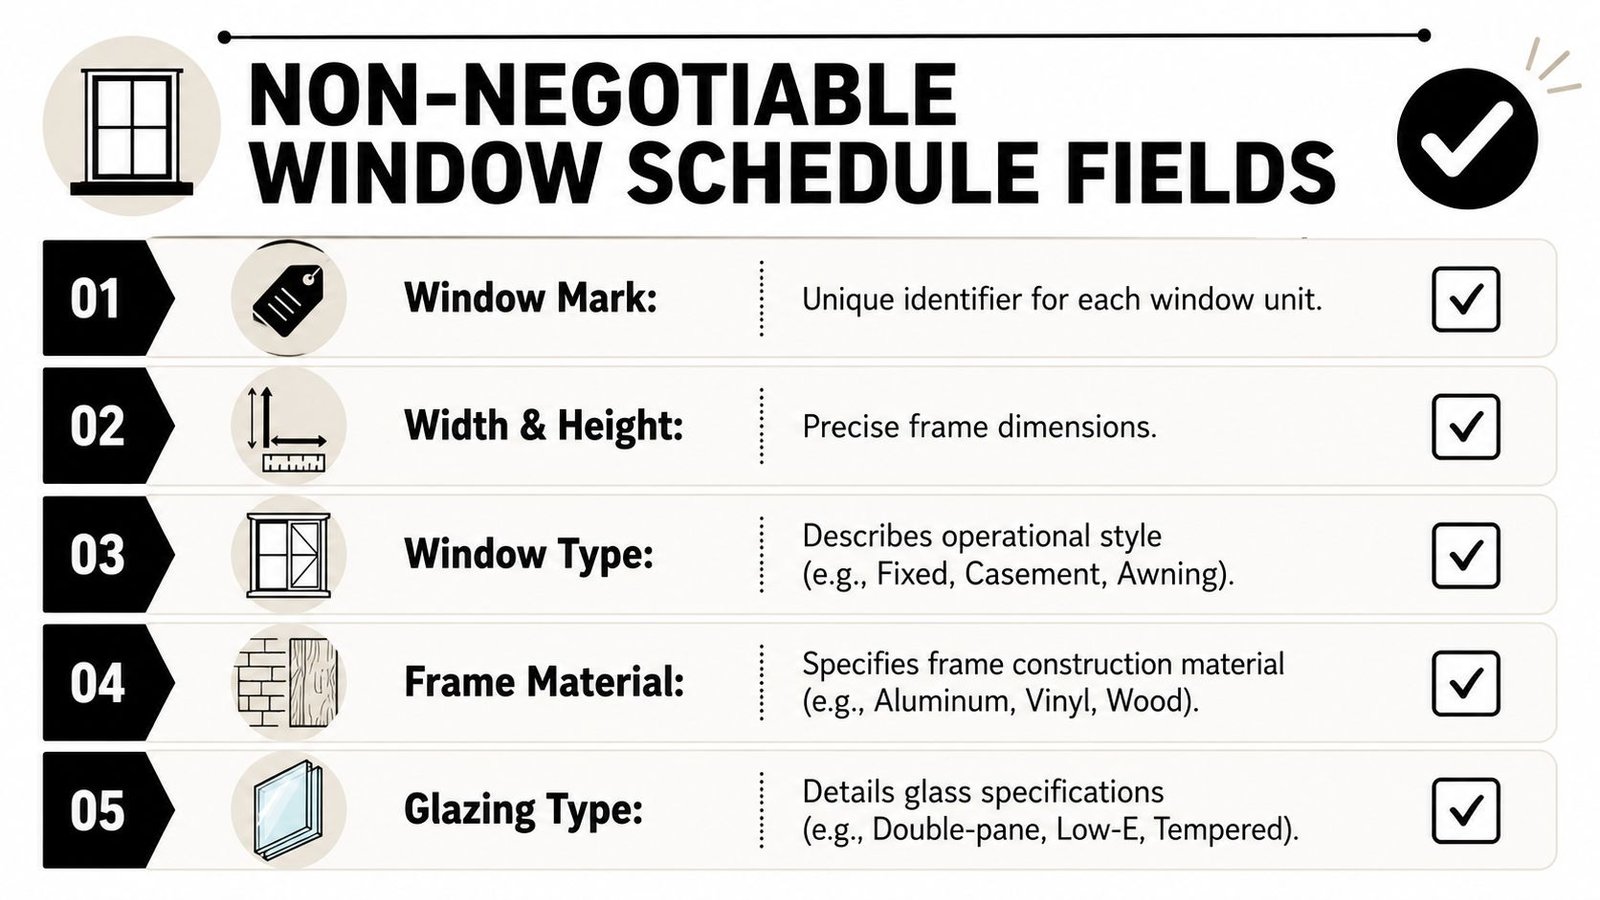
Identification and geometry
Window mark
This is the field that ties the row to the tag on plan. If the mark in the schedule and the tag in the view don't match, the rest of the information is suspect. Keep it stable and visible.Width and height
Use dimensions that support actual coordination. For most production teams, that means documenting the opening information the subcontractor can act on, not a vague nominal descriptor embedded in a type name.Sill height
This is one of the most useful and most frequently mishandled schedule fields. It supports coordination with interiors, elevations, and code review. It also exposes bad placement habits very quickly.Head height
Head height helps with façade alignment, exterior elevation checks, and interior coordination at soffits, ceilings, and lintel conditions.
Performance and material data
Practitioners regularly run into a limit here because some critical performance data doesn't exist in default families. Autodesk forum discussions highlighted in tutorial coverage point to the need for custom parameters for items like U-factor and SHGC, because those aren't reliably available in standard Revit window families (discussion reflected in this Revit tutorial reference).
That means these fields should be intentionally set up, not assumed:
| Field | Why it belongs in the schedule |
|---|---|
| Glazing type | It tells the contractor what glass assembly the design is calling for and gives reviewers a direct line to performance intent. |
| Frame material and finish | Material alone isn't enough in production. Finish matters for pricing, approvals, and coordination with exterior appearance. |
| Operability | Fixed, casement, awning, slider, and similar distinctions affect ventilation, detailing, and procurement. |
| Fire rating | For windows in rated conditions, the field should be explicit. If the condition doesn't apply, write N/A rather than leaving the cell blank. |
A clean schedule doesn't just collect data. It tells the reader which data can be trusted.
A blank field usually reads like an omission, not a deliberate non-applicable condition.
That's also why office teams should think about parameter discipline the same way operations teams think about data quality. If you're standardizing Revit window schedule parameters across templates and project pods, this guide on data validation for automated workflows is a useful parallel. The principle is the same. Bad inputs subtly break downstream outputs.
Fields That Are Frequently Missing but Always Cause RFIs
Some fields don't always make the first draft of the schedule, but they're the ones that come back as RFIs, plan comments, or late coordination issues.

Energy and compliance fields
A major underserved area in common Revit training is fenestration compliance. Basic scheduling is easy to find, but practitioners still need workflows that include code-related fields such as area and U-values for compliance reporting in the USA and Canada (tutorial reference discussing that gap).
In practice, the commonly missed items are:
- U-factor
- SHGC
- Visible light transmittance
- Area, where required by the project's compliance workflow
If those values live only in a separate energy document, the permit set becomes harder to review. If they live only in a specification section, the glazing team still has to cross-reference instead of reading one controlled source.
For teams working through glass selections and assemblies, this resource on window glazing and glass is a helpful companion because it frames the material side of decisions that should eventually resolve into schedule fields.
Residential and project-specific gaps
Commercial teams also get caught when mixed-use or multifamily work introduces residential egress checks but the schedule is still built like an office project. If the project includes dwelling units, operable windows often need more than a type description. They need a clear way to verify net clear opening and related dimensions.
Then there are the project-specific fields that aren't universal but become critical when they apply:
- Acoustic performance, where noise exposure or project requirements make it relevant
- Hardware group, especially for operable units
- Special performance notes, when a type has unusual requirements that shouldn't be buried in a keynote
Why these fields get skipped
They're often missing because they aren't built into the base family content, or because the permit and procurement needs weren't discussed when the template was built.
That's a workflow problem, not a drafting problem. A window type schedule in Revit should reflect what the project needs to answer, not just what your content library happened to include last year.
Setting Up Your Window Schedule in Revit
A strong schedule starts with parameter strategy before anyone places a large batch of windows. If you wait until the sheet deadline to decide what belongs in the schedule, you'll spend the rest of the issue cycle patching families and fixing blank columns.
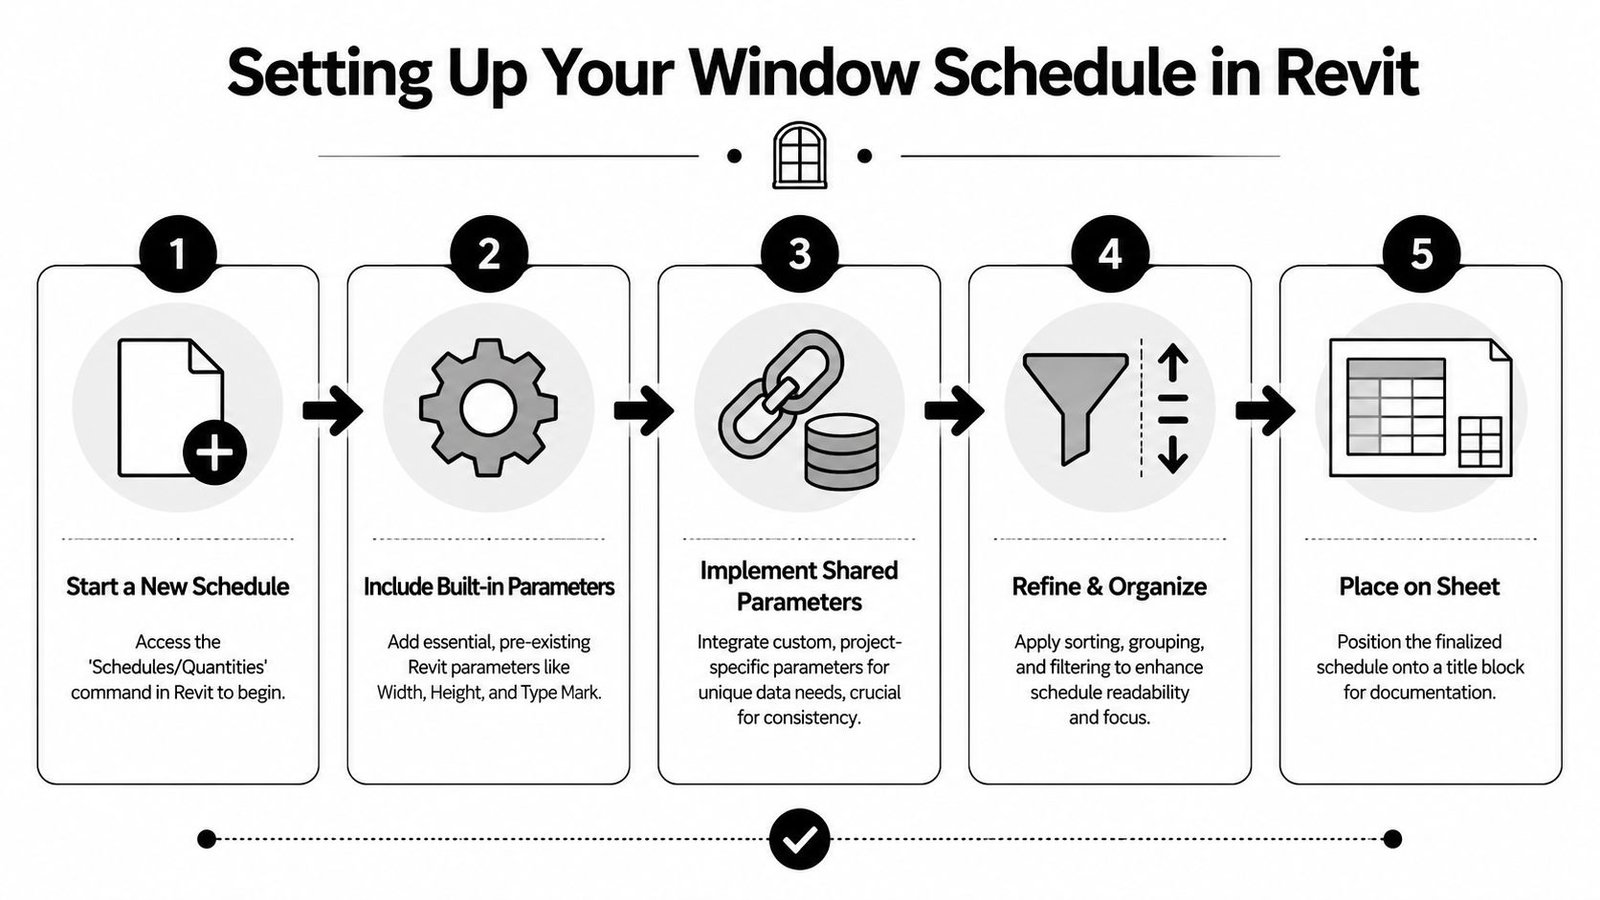
Autodesk's scheduling workflow supports creating schedules directly through View > Schedules > Schedules/Quantities, then sorting and formatting them as needed. It also supports adding shared or project parameters such as frame material, which allows the same data to appear in both schedules and tags as the model changes (Autodesk scheduling workflow).
Start with parameter sourcing
Some fields in a Revit window family schedule can come from built-in parameters. Others need shared parameters.
Use built-in parameters where they're reliable and already aligned with how the office models. Use shared parameters when the information must appear in both tags and schedules, or when the default family doesn't include the field at all.
A simple split looks like this:
| Use built-in when possible | Add shared parameters when needed |
|---|---|
| Width | U-factor |
| Height | SHGC |
| Sill height | VLT |
| Type Mark | custom finish designation |
| family/type references | project-specific compliance fields |
If your family library is inconsistent, fix that first. This guide on families in Revit is relevant because poor family standards always surface in schedules before they surface anywhere else.
Organize for readability, not just extraction
The most reliable production pattern is straightforward:
- Use Type Mark for identification
- Sort and group by the reporting logic you need
- Turn off Itemize every instance when you want like windows collapsed into one line item
That grouped output is usually easier for fabrication review and quantity checks than a schedule listing every opening individually.
Grouped schedules are easier to audit because you can compare plan tags, types, and quantities without scrolling through instance noise.
Handle special calculations intentionally
If the project needs egress or performance reporting, don't rely on a note that says “verify in field” or “see code sheet.” Build calculated values where Revit can support them, and decide early which fields are type-based versus instance-based.
This is also where teams get burned by late changes. If performance values were added after windows were already loaded and placed, check whether the parameter was added at the correct level and bound correctly in the project.
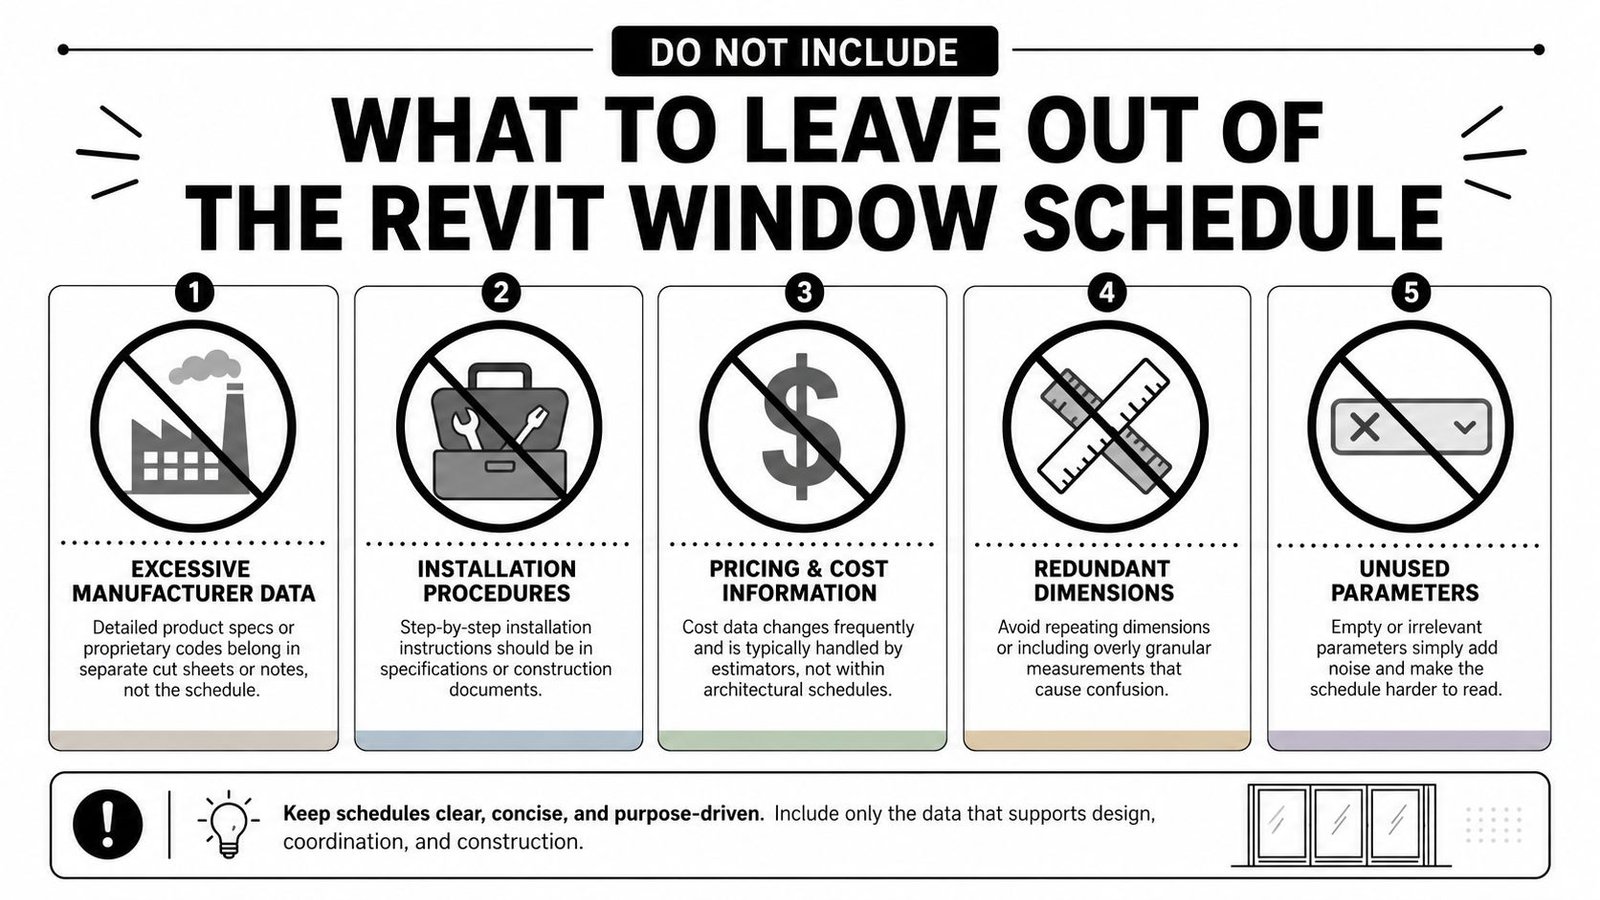
What to Leave Out of the Revit Window Schedule
A crowded schedule doesn't communicate more. It hides the important information in a layer of low-value text.
Common clutter that should move elsewhere
The following items usually belong in specifications, general notes, or internal tracking tools, not in the sheet schedule:
Installation procedures
The schedule should identify and coordinate. It shouldn't become a mini specification section.Rough opening tolerances
These are better controlled in general requirements or technical specs where they can be applied consistently.Procurement tracking fields
Approval date, submittal status, purchase order information, and similar data don't belong in permit or CD issue schedules.Manufacturer model numbers at permit stage
Early-phase documents should usually describe performance intent, not lock the team into procurement language too early.
Why leaner is safer
The schedule should answer recurring questions fast. Every extra column competes with an important field. If half the rows are blank under a given heading, the reader won't treat that as a deliberate editorial choice. They'll assume the set is unfinished.
That's why I also remove fields that repeat information already clear in the tag, type naming logic, or adjacent notes. Redundancy only helps when it reduces ambiguity. Otherwise it creates conflicts the minute one place updates and the other doesn't.
One practical test
Print the schedule and ask a reviewer to scan it for a minute. If their eye can't quickly find identification, dimensions, material, glazing, and performance data, the sheet is carrying too much noise.
A good Revit window schedule parameters strategy is as much about restraint as completeness.
Keeping the Schedule Accurate Through Design Changes
Most schedules don't fail on day one. They fail after rounds of revisions, option studies, permit comments, and deadline shortcuts.
A proven best practice for production schedules is to use Type Mark for identification, then use Sorting/Grouping with Itemize every instance turned off so like windows collapse into a single row with a quantity, producing a cleaner output for coordination (Revit forum guidance on grouped schedules).
Watch for type proliferation
A manageable set of window types can turn messy fast. Designers duplicate a type for one condition, then another team member copies that type again for a small variation, and soon the schedule is carrying near-duplicates that should have been consolidated.
The fix is operational, not technical:
- Audit types before issue
- Merge duplicates where geometry and performance are effectively the same
- Keep naming and Type Mark logic stable
If you can't explain why two types are separate, they probably shouldn't be.
Check instance versus type behavior
A common schedule problem is a value that appears to update in the family but not in the project schedule. Usually the issue is one of three things:
- the parameter was created at the wrong level
- the value was edited in the wrong place
- the schedule is reading a different field than the team assumes
That's especially common with sill height, comments, finish fields, and performance data.
Audit marks before issue
Deleted windows leave mark gaps. Renamed types break tag coordination. Scope-boxed views and level-specific view settings can also hide inconsistencies until late QA. If your team is already reviewing visibility and documentation behavior in complex views, this page on Revit view range is a useful reminder that schedule quality and view quality are closely related in production.
Clean numbering and stable marks make the set feel coordinated before anyone reads a single note.
Fixing the Most Common Window Schedule RFIs
When teams do a pre-issue QA pass, I like to review the schedule as a punch list. Not a drafting exercise. A risk check.
Quick corrections that remove repeat questions
Glazing values missing
Add the glazing performance fields your project requires and populate them from the approved design criteria.Sill height missing or unreliable
Confirm the schedule is reading the intended instance field and verify placement against the project datum logic.Fire rating blank in rated conditions
Populate the rating where required and use N/A where it does not apply.Operability not shown
Add a dedicated field. Don't expect reviewers or subcontractors to decode this from family names.Tag and schedule marks don't match
Audit plan tags against the schedule before issue. This is one of the fastest confidence checks in the set.
QA questions worth asking before issuance
Ask the team these questions:
- Can a reviewer verify compliance directly from the schedule?
- Can a glazing subcontractor price the types without cross-referencing three other sheets?
- Do blank cells mean “not applicable,” or do they mean “we forgot”?
- Does the schedule still make sense after the last round of type duplication and renaming?
If those answers aren't clean, the schedule isn't ready.
Conclusion Your Schedule as a Production System
A strong Revit window schedule isn't a data dump from the model. It's a controlled communication tool. It protects permit review, supports pricing, reduces back-and-forth, and gives the team a cleaner way to spot inconsistencies before they leave the office.
That only happens when the schedule is built with intent. The right fields. The right parameter setup. The right grouping logic. And just as important, the discipline to leave out information that belongs somewhere else.
That mindset applies beyond windows. Estimating, specifications, and model-based documentation all improve when teams treat structured information as an operational system instead of an afterthought. Even outside architecture, you can see the same principle in tools like Exayard plumbing estimating software, where predictable outputs depend on clean inputs and repeatable setup.
Teams that get this right usually aren't working harder. They're working from better standards.
If you need help tightening your Revit production standards, BIM Heroes can support with architectural production workflows, schedule template thinking, and practical QA frameworks that make CD sets more predictable.