Meta description: Demolition and new work plans only work when Revit phase filters are set up for clear graphics and checked before issue. Here's a production-focused guide for renovation permit sets.
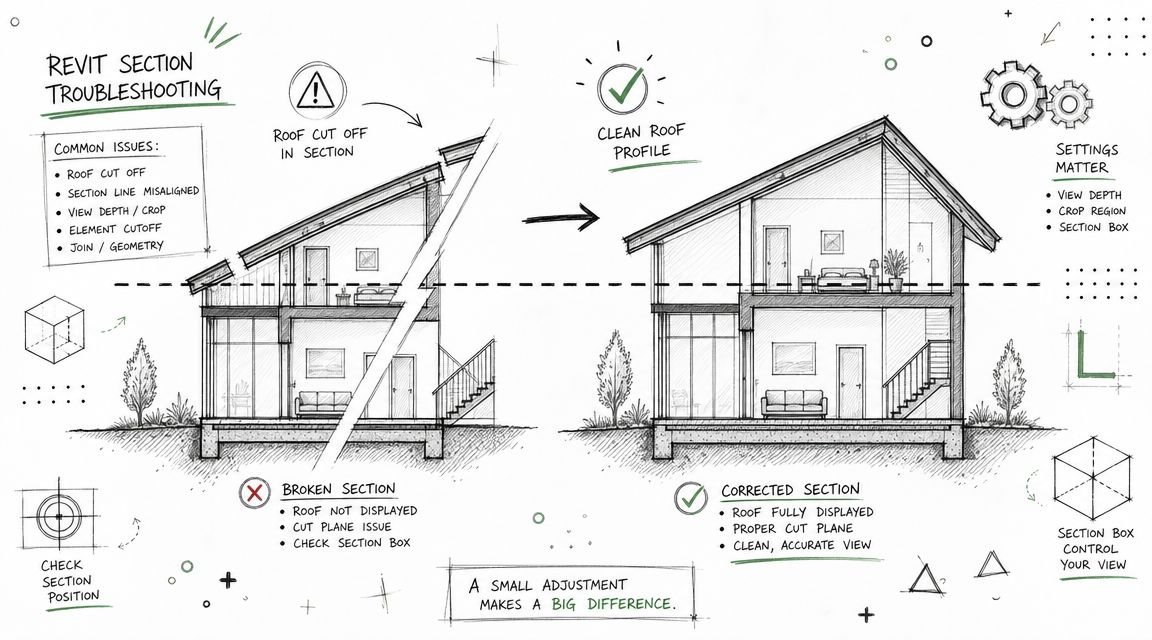
The problem usually shows up late. The demolition plan and the new work plan are both on sheets, both technically “phased,” and both graphically useless. Walls that should read as remove, remain, or new all print with the same line weight and the same visual emphasis. The contractor has to guess. The permit reviewer has to slow down. Your team starts answering questions the drawing set should have handled.
That isn't a modeling failure. It's a documentation failure.
A Revit model can have the right phases assigned and still produce bad sheets if the Revit phase filter setup is weak, inconsistent, or missing from the view template. Printed output is where this gets exposed. Existing walls don't fade back, demolished work doesn't read clearly, and new construction doesn't hold the foreground the way it should.
For renovation work, that's a margin problem. Ambiguous sheets create RFIs, rework, and plan-check friction.
Introduction
If your demolition plan and new work plan look almost identical, the issue usually isn't that the model lacks phases. It's that the phase filters aren't doing any real graphic work. Existing, demolished, and new elements are all present in the model, but nothing on the sheet tells the reader how to distinguish them quickly.
That's exactly how permit sets drift into avoidable confusion. Contractors shouldn't have to study linework to figure out what stays and what goes. A reviewer should be able to read the intent in seconds.
Good Revit phase filters solve that by making the model's timeline visible in the drawings. Existing work recedes. Demolition reads as demolition. New work carries the strongest graphic. That sounds basic, but teams miss it constantly, especially when templates get copied forward without a real phasing QA pass.
The fix is straightforward if you treat phasing as part of production control, not just model setup. The model needs the right phase assignments. The views need the right phase. The filters need clear overrides. Then the whole stack needs to be checked before issue.
How Revit Phases and Phase Filters Work Together
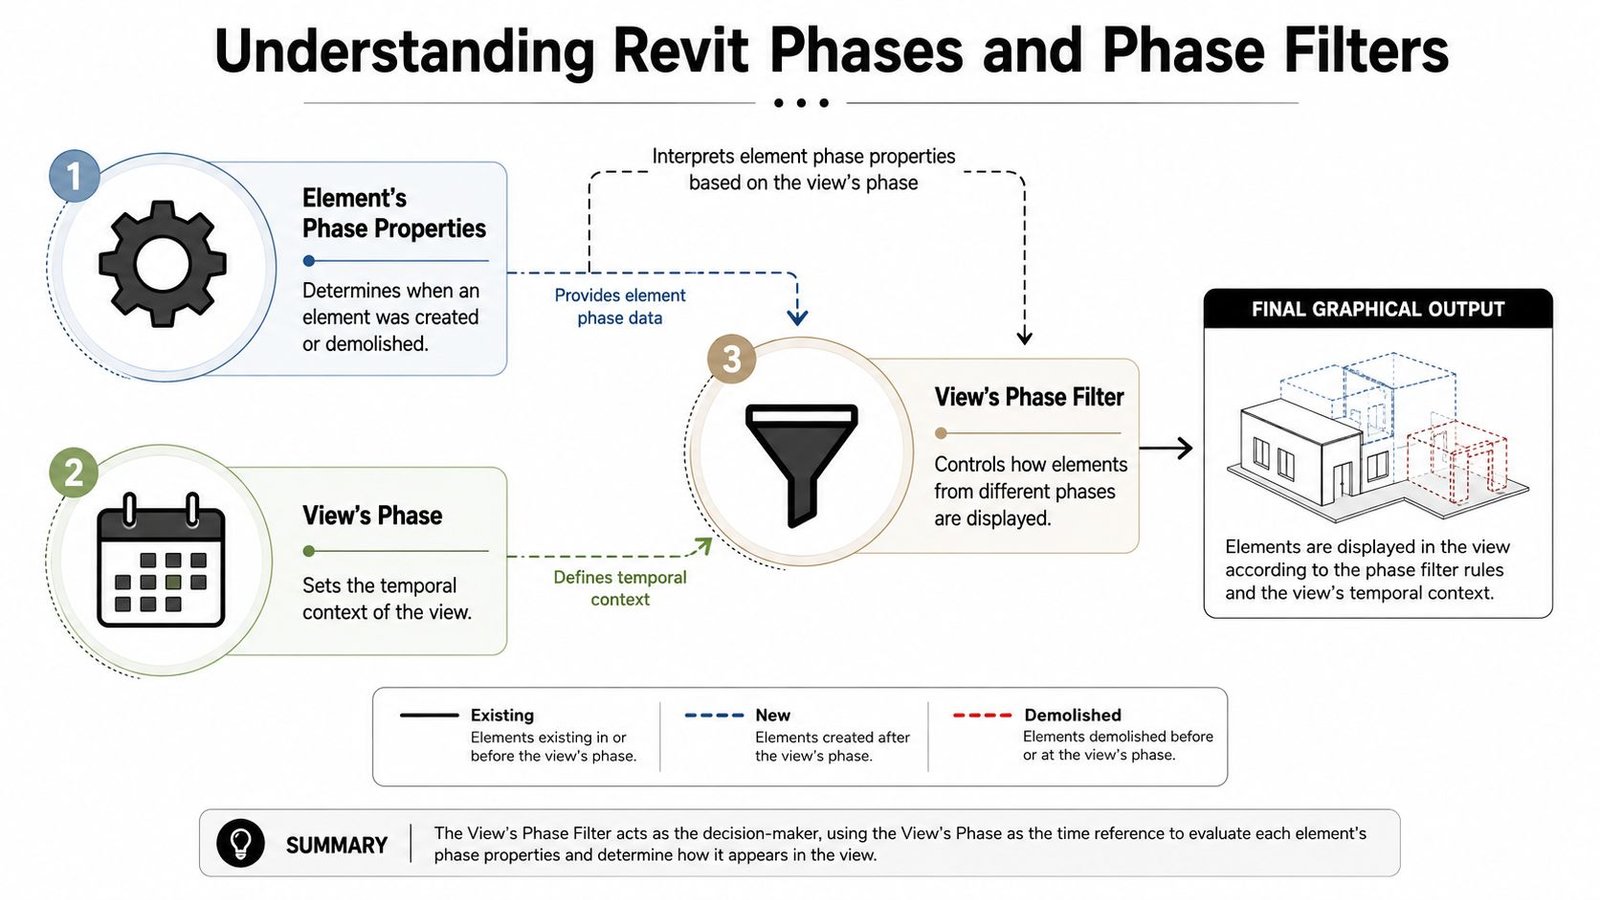
Before changing settings, get the logic straight. Revit is asking three different questions at once: when the element exists, what point in time the view represents, and how that condition should look on the sheet.
The element carries the timeline
Every modeled element has two critical parameters: Phase Created and Phase Demolished. Those are the timestamps that tell Revit whether a wall is existing to remain, existing to be removed, new work, or temporary construction.
A wall created in Existing and demolished in New Construction is demolition scope. A wall created in New Construction with no demolition phase is new work. That part is the data layer. If the data is wrong, the view will be wrong no matter how good your graphics are.
The view defines the moment you are looking at
The view's phase sets the time context. For a demolition plan, the view is typically set to New Construction because that's the point in the timeline where you need to show existing elements, items being demolished, and sometimes new work depending on office standards.
That's where people get tripped up. They expect the phase alone to solve the drawing. It won't.
The filter decides how the sheet reads
A Revit phase filter is the ruleset that tells the view what to do with each phase status. Revit phase filters control graphics by mapping four phase statuses, New, Existing, Demolished, and Temporary, to three visibility behaviors, By Category, Not Displayed, and Overridden, as described in Engipedia's explanation of phase filters in linked Revit models.
Practical rule: Phases answer when. Phase filters answer what it looks like.
If the view phase is correct but the filter leaves everything By Category, then existing, demolished, and new work can all read with nearly identical graphics. That's why teams think “phasing is set up” while the sheets still fail.
For permit work, that distinction matters more than the click path. The model can be technically correct and still communicate poorly.
Setting Up Phases for a Renovation Project
Most renovation projects don't need a complicated phase structure. They need one that people can follow without hesitation.
Use two phases unless the project gives you a real reason not to
For a standard renovation, tenant improvement, or adaptive reuse job, the most reliable setup is usually just:
- Existing
- New Construction
That keeps the logic clean. Existing is your pre-project condition. New Construction is where both demolition activity and new work are documented. That setup aligns with how Revit was built. When Autodesk launched Revit in 1999, it included foundational phasing with default filters like Show All and Show Previous + Demo, and that core architecture has stayed stable for standard renovation workflows over decades.
If your team tends to overbuild templates, this is one place to push back. More phases don't make the set smarter. They usually make it easier for production staff to assign the wrong phase.
For a deeper baseline on project phasing setup, BIM teams often keep a standard like this close to their template guidance in a resource such as Revit phasing workflow guidance.
When a third phase makes sense
A three-phase setup can work, but it should earn its place. I only recommend it when the existing conditions model is a distinct deliverable, or when the project has a real separation between survey documentation, demolition package development, and new work documentation.
That added phase can help when the existing conditions set has to stand on its own. It can also help on larger projects where multiple issue packages need tighter sequencing.
The third phase is not free. It adds view management, template maintenance, and more opportunities for the wrong phase assignment to slip through production.
Name phases so nobody has to interpret them
“Existing” and “New Construction” are clear. “Phase 1” and “Phase 2” are weak unless the entire team already knows what those names mean. On a busy production pod, unclear naming burns time because people stop and check, or worse, they guess.
Phase names should tell the truth directly. If a model has complex sequencing, the names should still reflect scope in plain language. That discipline protects quality more than often understood.
Configuring Phase Filters for Demolition and New Work Plans
Drawing clarity is constructed. If you leave the default filters alone and hope they fit your office graphic standards, you'll usually end up with sheets that are technically acceptable but operationally messy.
Build two working filters, not one compromise filter
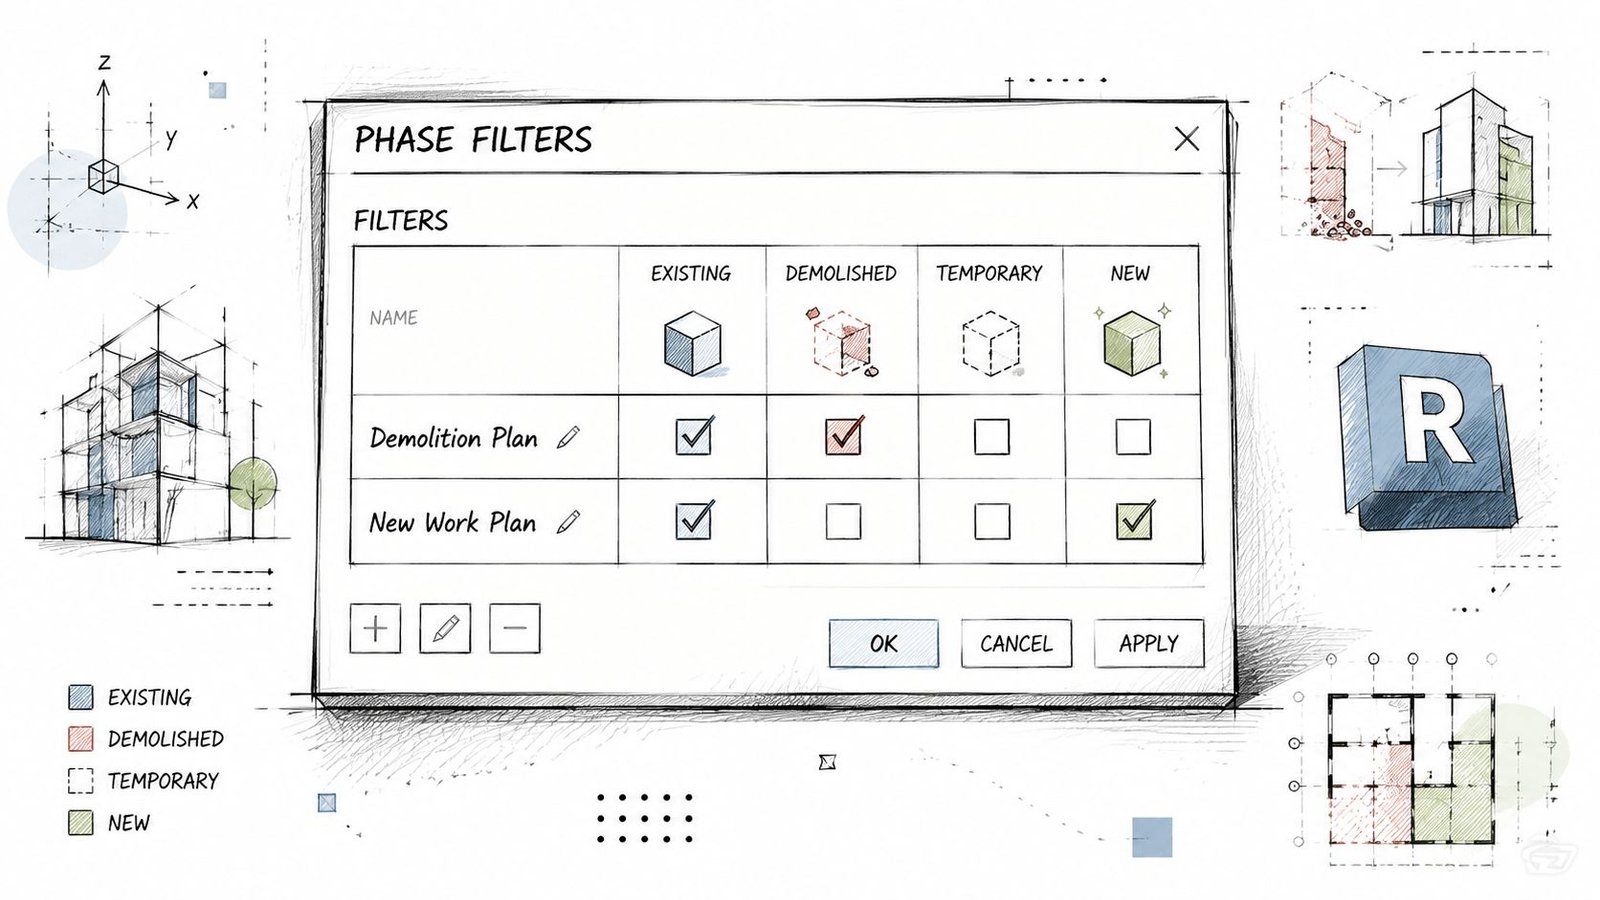
Go to Manage > Phasing > Phase Filters and create at least two custom filters for the project.
One should serve the demolition plan. The other should serve the new work plan.
A typical demolition filter should do the following:
- New set to By Category or Not Displayed
- Existing set to Overridden
- Demolished set to Overridden
- Temporary set to Overridden
A typical new work filter should do this instead:
- New set to By Category
- Existing set to Overridden
- Demolished set to Not Displayed
- Temporary set to Not Displayed
That setup keeps the purpose of each plan tight. The demolition plan explains removal. The new work plan explains what will exist after demolition is complete.
Use graphic overrides to create hierarchy
The filter table only tells Revit whether to show, hide, or override. Communication occurs in the Graphic Overrides tab.
Set Demolished to read unmistakably as remove. In most offices that means a dashed line, a screened graphic, or both. Set Existing to a lighter or grayed condition so it provides context without competing with new work. Let New carry normal category graphics so it stays dominant.
A contractor should be able to scan the sheet and read intent without decoding your office standards from scratch.
If demolition doesn't read differently at a glance, the filter is not finished.
Push the setup into View Templates
Many teams encounter issues here. They create the custom filters correctly, then assign them manually view by view. That works until somebody duplicates a plan, applies the wrong template, or forgets to swap the filter on one level.
A common pitfall is failing to apply filters through View Templates, and that can drive a 30% increase in revision time for architectural firms due to manual corrections. That's why template discipline matters on renovation sets.
If your office is tightening standards across production, a companion standard for Revit phases and project setup should connect directly to view template control. Manual phasing decisions at the view level are where inconsistency starts.
Common Phase Assignment Errors
Once the filters are working, the next source of bad output is the model itself. At this stage, production teams lose time because the view looks wrong, but the underlying problem sits in element properties.
The wall that should be new reads as existing
You open the new work plan and a partition you just modeled looks like existing-to-remain. Usually that means it was placed while the active view was set to Existing, so its Phase Created came in wrong.
The fix is simple. Select the element and change Phase Created to New Construction. Then check nearby elements placed in the same session, because these errors often come in clusters.
The wall that should be demolished never gets demolished
This one is common on fast renovation production. A wall is clearly in demo scope, but it shows as existing on both the demolition plan and the new work plan. Nobody assigned a demolition phase.
Use the Demolish tool or edit the instance property directly so Phase Demolished is set to New Construction.
A benchmark study indicates that 70% of architectural firms using only default filters encounter graphic inconsistencies, with a 25% error rate in quantity takeoffs tied to elements not being correctly assigned a demolition phase. That tracks with what production teams see. When demolition assignments are loose, schedules and sheets both suffer.
The element disappears and nobody trusts the view anymore
If an element vanishes entirely, check whether it was created and demolished in the same phase. That makes it Temporary, which may be hidden depending on the filter. This often happens when someone tries to “fix” a phase issue too quickly and edits both properties without checking the view result.
Pasted content brings bad phase data with it
Copying from another file, a linked model, or a transferred project can carry source phase assignments into your model. That can poison multiple plans, often unnoticed.
Use this as a short production check after every paste operation:
- Select pasted elements immediately
- Review Phase Created
- Review Phase Demolished
- Confirm the target view phase hasn't masked the error
Teams that skip this usually end up debugging sheets later, when the cost of the mistake is higher.
Organizing Views for a Renovation Permit Set
A clean permit set starts in the Project Browser. If browser structure is sloppy, view settings drift, and phase mistakes get harder to catch.
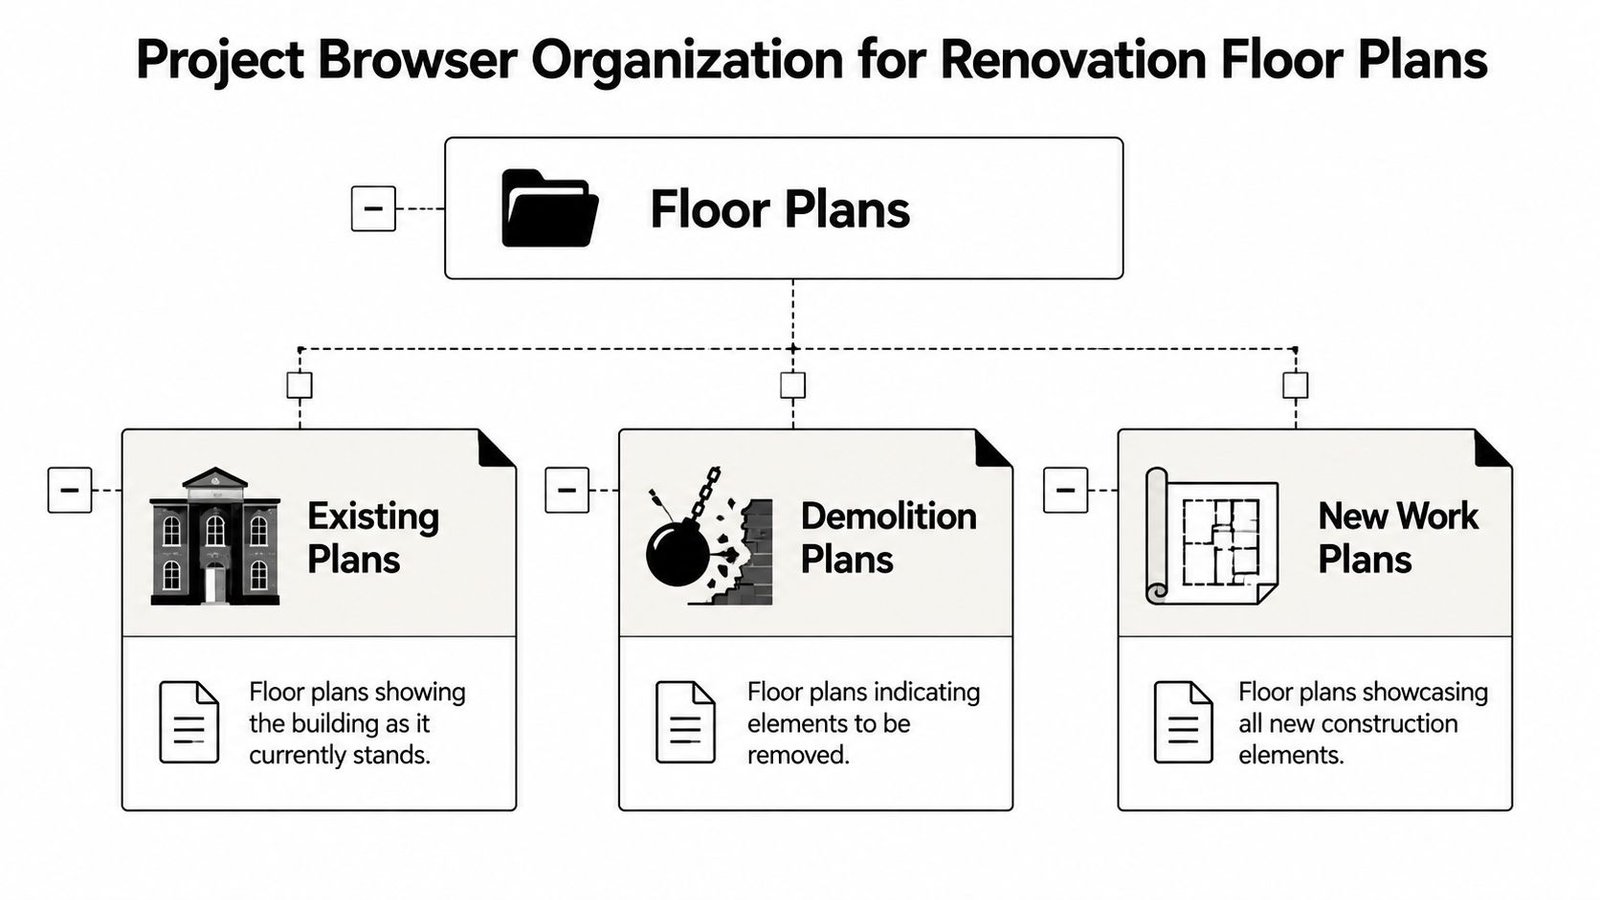
Set up the three plan types deliberately
At minimum, renovation floor plans should be organized into three clear groups.
| Plan type | View phase | Phase filter | What it should show |
|---|---|---|---|
| Existing conditions plan | Existing | Show All or equivalent existing setup | Existing conditions at full graphic weight |
| Demolition plan | New Construction | Custom demo filter | Existing-to-remain lightly, demolition clearly overridden |
| New work plan | New Construction | Custom new work filter | Existing-to-remain lightly, new work full strength, demo hidden |
This isn't just browser housekeeping. It creates repeatable defaults. Anyone duplicating or placing a view should land inside a predictable graphic system.
Keep the existing graphic consistent between demo and new work
One of the easiest ways to confuse a reviewer is to let existing-to-remain walls look different from one plan type to another. If existing partitions are gray in demolition, they should still read gray in the new work plan.
That consistency matters because the reader is mentally comparing sheets. If the context shifts visually, they spend effort re-learning your drawing language instead of understanding scope.
Good permit sets don't make the reader interpret changing conventions between sheets.
Use View Templates as the control point
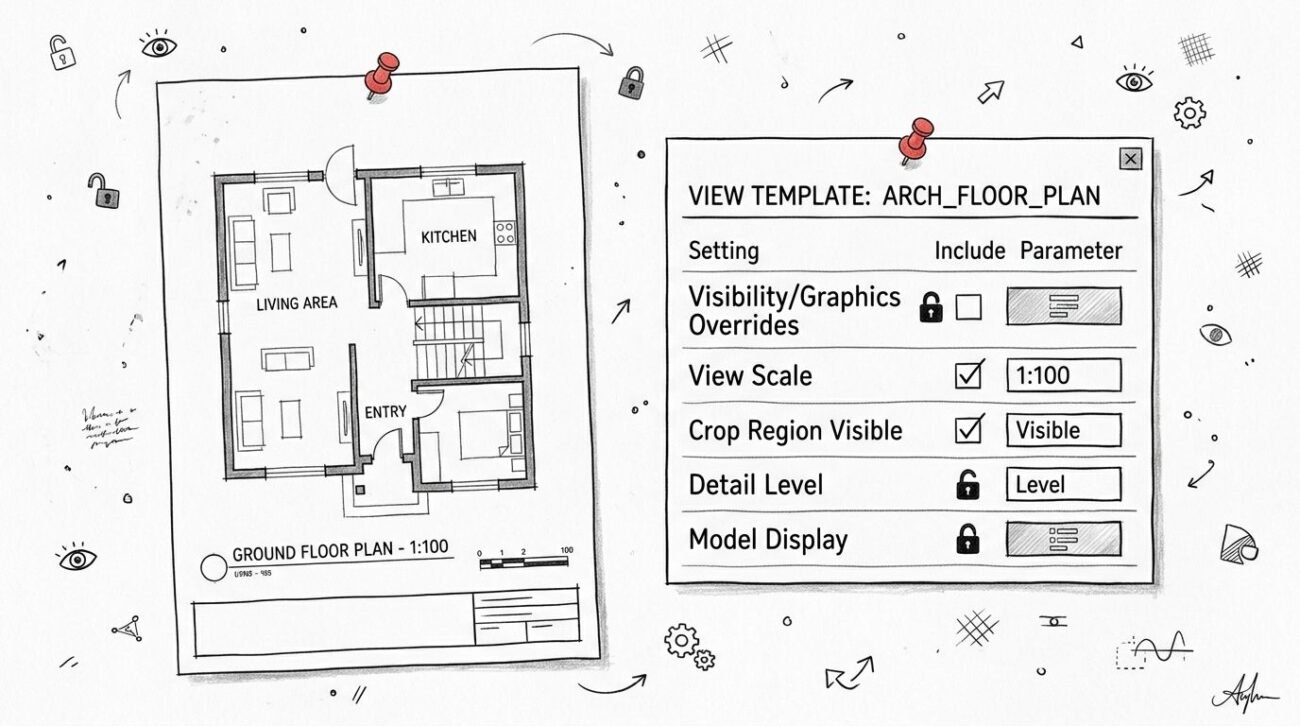
The browser structure helps, but the control mechanism should still be the template. Existing plans, demo plans, and new work plans should each have their own assigned template with the correct phase, phase filter, visibility settings, and annotation standards.
That's where Revit view template standards earn their value. They reduce decision-making at the view level and turn phased plan output into a managed system instead of an individual drafter preference.
When this is set up well, your permit set becomes easier to scale across levels, alternates, and linked disciplines without the usual graphic drift.
Verifying Phase Filter Output Before Permit Issue
Relying on a visual check is a common but inadequate approach. Sheets need a focused QA pass that tests whether the phasing reads correctly to someone who didn't build the model.
Run the stranger test
Print the demolition plan or review it in sheet view and hand it to someone who hasn't touched the project recently. Ask one direct question: which walls are coming out?
If they hesitate, your graphics are too subtle or too inconsistent. This test works because it removes project memory from the review. A team member who already knows the scope can unconsciously compensate for weak graphics. A fresh reviewer won't.
Audit a few high-risk elements on purpose
Don't audit random furniture. Audit the items that will cause the most expensive confusion if phased incorrectly.
A useful pre-issue check includes:
- Structural walls: They often carry major demolition implications and coordination risk.
- Primary partitions: These drive plan clarity and often expose accidental Existing assignments.
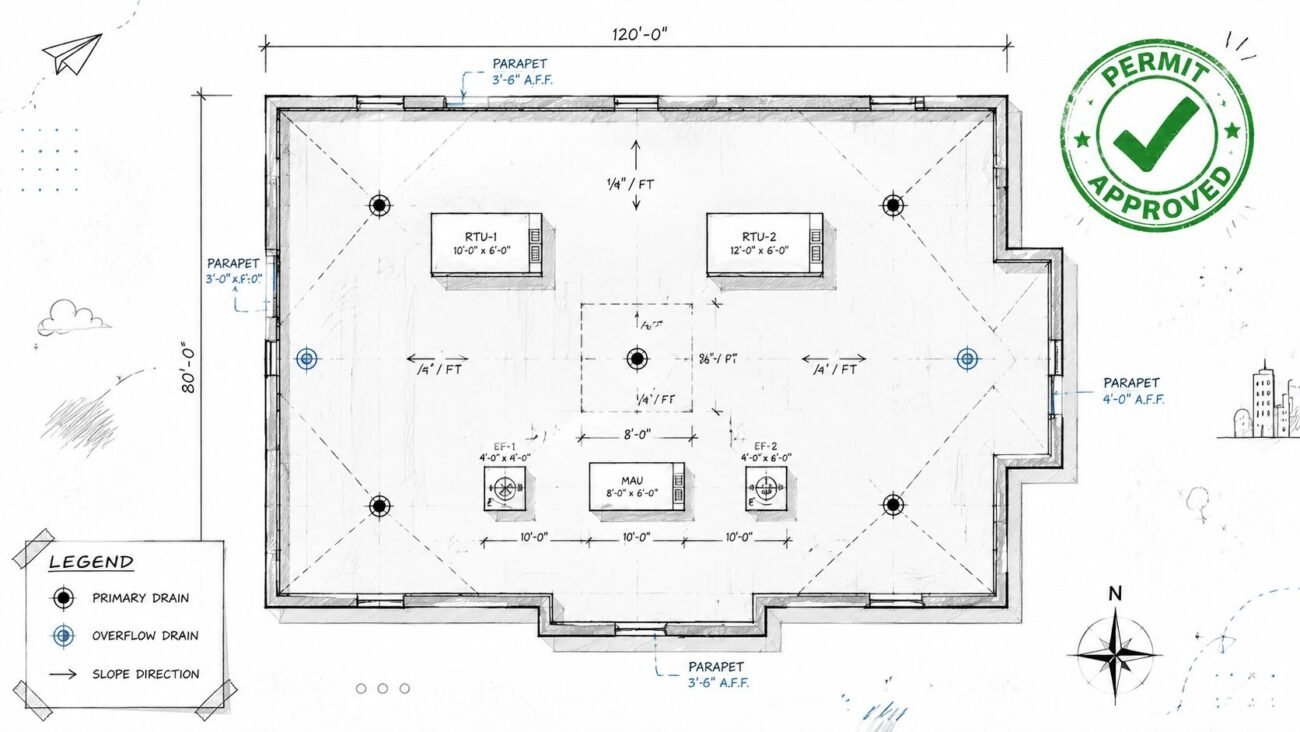
- Major mechanical elements: Large ducts and equipment can be phased incorrectly during coordination imports or revisions.
Select the element. Verify Phase Created and Phase Demolished. Then verify how it appears in the actual sheet view, not just the working view.
Check Design Options and Worksharing conflicts
This is one of the most missed QA steps on complex projects. Data from Autodesk support forums shows that over 40% of user-reported phasing problem tickets involve conflicts with Design Options or Worksharing, which makes it a real production checkpoint, not an edge case, as discussed in the AUGI forum thread on phasing visibility issues.
If your project uses options, worksets, or linked discipline models, test phased views after synchronization and after option visibility changes. What looks correct in one user session can fail in another if the visibility stack is fighting itself.
That's the kind of problem that slips past model review and shows up in a permit set at exactly the wrong time.
Common Phase Filter Failures and Fixes
When phased drawings look wrong, the problem is usually repetitive. That's good news because repetitive problems can be checked with a short troubleshooting routine.

If you see this, check that
- Demolished looks the same as existing: Your demolished override isn't strong enough. Change the override so demolition reads distinctly, typically with dashed graphics and a screened appearance.
- New work reads at the same weight as existing: Existing is probably still set too close to By Category. Push it into a lighter overridden condition.
- Everything shows at full weight: The custom filter may exist in the project but may not be assigned to the view or the active View Template.
- Demo items appear on the new work plan: Check the new work filter first. Demolished should be set to Not Displayed.
- A view looks wrong only on one level: Compare the view template assignment before changing model content. This is often a template mismatch, not a modeling error.
Add a visual QA layer in Revit 2022 and later
In Revit 2022 and later, view filters can use Phase Created as a rule-based parameter, allowing teams to color-code elements for visual QA and quickly detect modeling inconsistencies, as shown in this Revit 2022 phase-based view filter walkthrough.
That's useful during internal checks because it turns hidden phasing mistakes into obvious visual outliers. A wall in the wrong phase jumps out immediately when it carries the wrong color.
Use phase graphics for documentation. Use rule-based view filters for auditing. They solve different problems.
The teams that handle renovation work smoothly usually separate those two tasks. One setup produces clean sheets. The other exposes mistakes before the sheets go out.
Conclusion
Strong Revit phase filters aren't about mastering an obscure feature. They're about making renovation drawings readable, repeatable, and safe to issue. The model needs clean phase assignments. The views need the right phase. The filters need clear overrides. Then the whole package needs a real QA routine before permit issue.
That discipline pays off in predictable ways. Demolition reads clearly. New work holds the foreground. Existing conditions provide context without clutter. RFIs drop because the drawings are saying what the team thinks they're saying.
This is one of those workflow details that separates a production-capable Revit team from one that's constantly correcting avoidable problems at the end of the schedule. Clean phasing isn't cosmetic. It protects coordination, plan review, and project margin.
If your renovation sets still depend on individual users remembering the right settings, the system needs tightening.
If your team needs help tightening renovation documentation standards, BIM Heroes can support targeted Revit production on CD sets. If you're dealing with recurring phase graphic issues, permit set inconsistency, or overloaded internal teams, it's worth reviewing their architectural production services and asking for templates, checklists, or a practical workflow framework that your team can effectively use.
Category: BIM Technology & Workflows