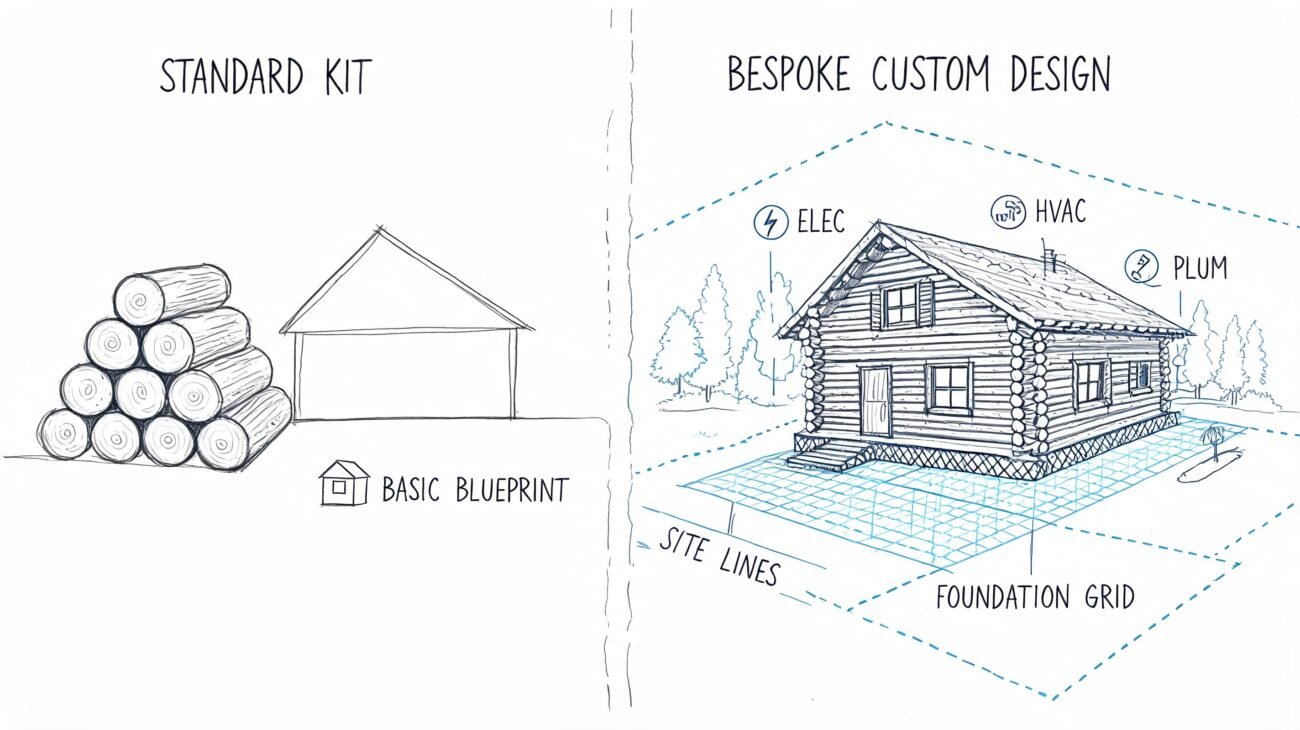
A correction notice lands in your inbox late in DD-to-CD transition. The multifamily project already shows the required accessible unit count, but the reviewer still redlines the set. Unit types aren't tagged. Bathroom turning space isn't shown. Kitchen clearances aren't dimensioned. The route from accessible parking to the unit entry disappears between the site plan and building plans.
That kind of comment set usually isn't a design failure. It's a documentation failure, and it can stall permit review fast. In production, that means extra coordination cycles, late-sheet revisions, and margin erosion on work that should have been locked before submission.
Disciplined drawing standards are essential. The set has to make compliance easy to verify, not merely possible to infer. For multifamily work, that means understanding where FHA, ADA, and IBC each apply, then translating those requirements into visible, dimensioned proof on the plans, details, schedules, and code sheets.
Meta description: A practitioner's guide to accessible unit documentation for multifamily permit sets. Learn how to show Type A and Type B units, bathroom clearances, kitchen dimensions, and accessible routes to reduce plan check comments.
Suggested category: Construction Coordination & Documentation
The Three Overlapping Accessibility Standards for Multifamily
Multifamily accessibility review gets messy when teams treat code, civil rights requirements, and permit documentation as separate conversations. They aren't. The drawing set has to show how they work together, because the reviewer is looking at the same project through multiple compliance lenses.
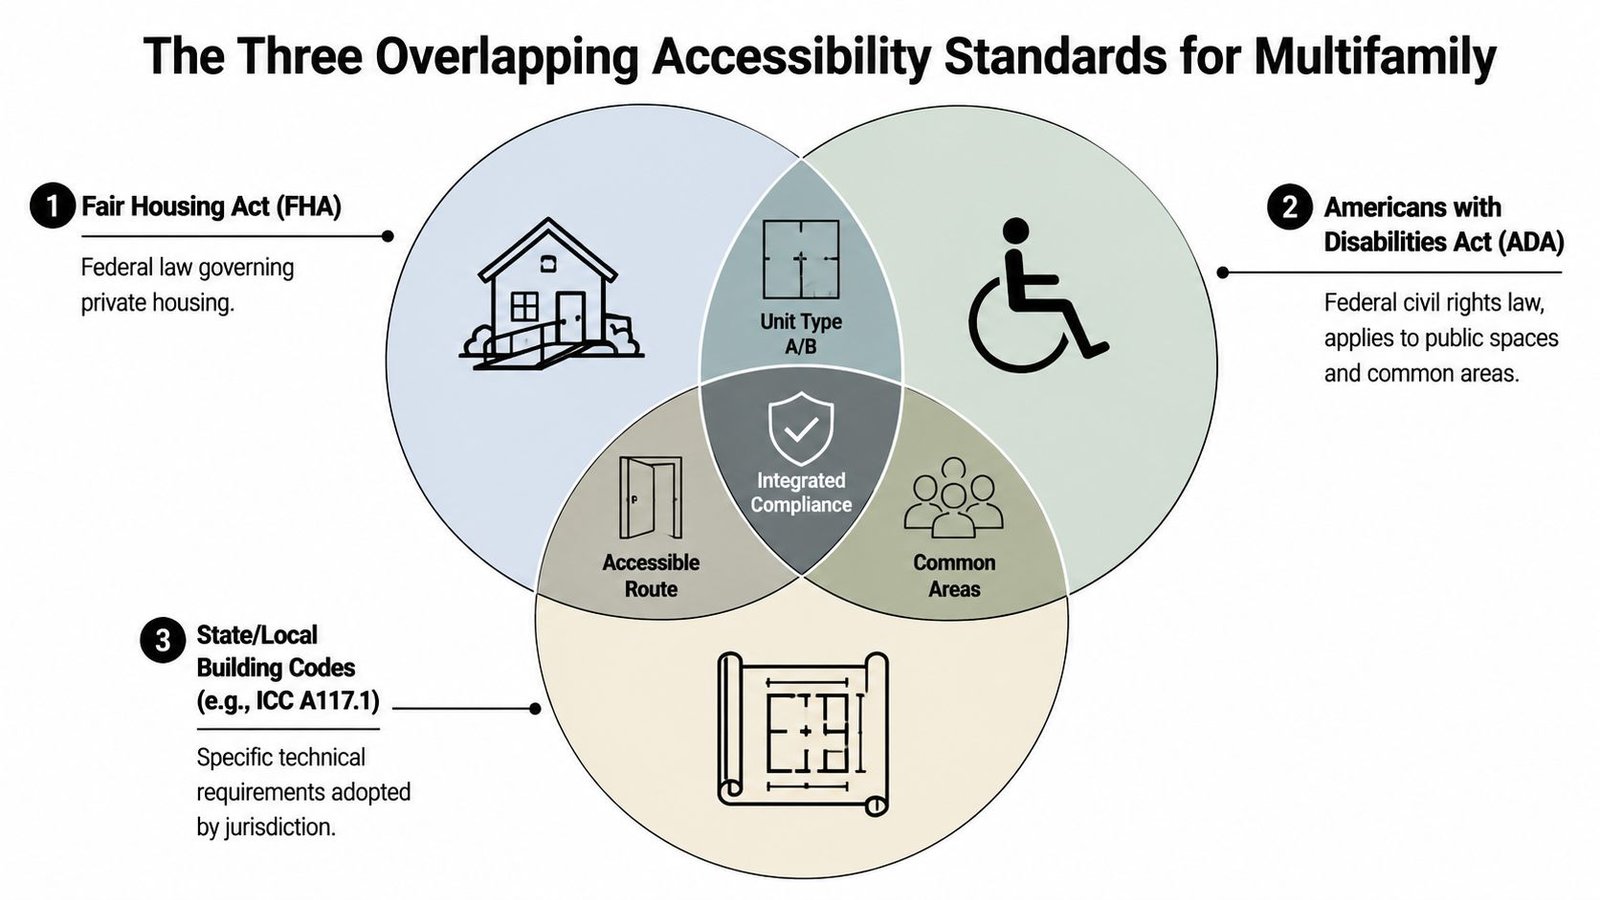
FHA governs the residential dwelling side
For multifamily buildings with four or more dwelling units built for first occupancy after March 1991, the Fair Housing Act drives baseline residential accessibility obligations. In production terms, that means your dwelling unit plans need to support accessible entrances, an accessible route through the unit, reinforced bathroom walls for future grab bars, and usable kitchens and bathrooms.
Many teams become careless, assuming FHA can be handled with broad notes and a few enlarged plans. Reviewers don't trust that approach, and they shouldn't. If a bathroom wall needs reinforcement, show it. If circulation is required, model it and dimension it. If a route exists, make it traceable on the sheet.
ADA usually hits common areas, not most private dwelling units
In a standard residential multifamily project, ADA usually applies to public and common-use spaces rather than the private apartments themselves. Leasing offices, fitness rooms, lobbies, mail areas, and other shared spaces still need accessible routes and compliant features.
Transient lodging is a different condition. Under accessibility rules cited by ICC and state housing guidance, new multifamily construction commonly requires about 5% of units to be fully accessible, and the ADA context for transient lodging often calls for roughly 2% accessible rooms, as summarized by Massachusetts accessibility unit guidance.
That distinction matters in mixed-use and hybrid residential projects. If the team doesn't clearly identify which spaces are standard dwelling units and which fall into lodging or public accommodation conditions, the set starts accumulating contradictions.
Practical rule: Put the governing standard in the room data, code summary, or unit matrix early. If the reviewer has to guess which rule applies to which space, you've already lost time.
IBC and ICC A117.1 define the technical unit types
IBC Chapter 11 and the adopted accessibility standard tell you what kind of unit has to be provided and how it must perform. Consequently, Type A and Type B become production issues, not just code terms.
The confusion is real. The ICC Building Safety Journal notes that the lack of clarity around Type B obligations has led to 30% of new multifamily projects in the USA failing Fair Housing Act audits, and that a HUD 2025 update clarified that “structure,” not “building,” determines Type B compliance, a nuance it says 75% of commercial design guides ignore in practice. That discussion appears in ICC's article on dwelling and sleeping unit classifications.
For production teams, the takeaway is simple:
- FHA affects the residential dwelling unit baseline.
- ADA affects common areas and certain non-residential uses.
- IBC with ICC A117.1 defines the technical criteria the permit reviewer will expect to see on the sheets.
Treat those three as one coordinated documentation problem. That's how you avoid contradictory notes, missing details, and late permit comments.
Type A vs Type B What Each Accessible Unit Requires
The fastest way to create permit problems is to treat Type A and Type B as interchangeable. They aren't. They are different unit categories with different expectations, and they need different drawing packages.
Type B is adaptable and still needs disciplined documentation
Type B units are the baseline accessible residential units in many multifamily conditions. They generally align with the adaptable intent production teams associate with FHA compliance. These units need an accessible route through the unit, usable kitchens and bathrooms, required door clearances, and reinforced bathroom walls for future grab bars.
That last part gets missed constantly. Teams tuck reinforcement into specifications or a generic wall note, then wonder why the reviewer marks up the bathroom plans. If the feature is required for compliance, it belongs where the reviewer can verify it graphically.
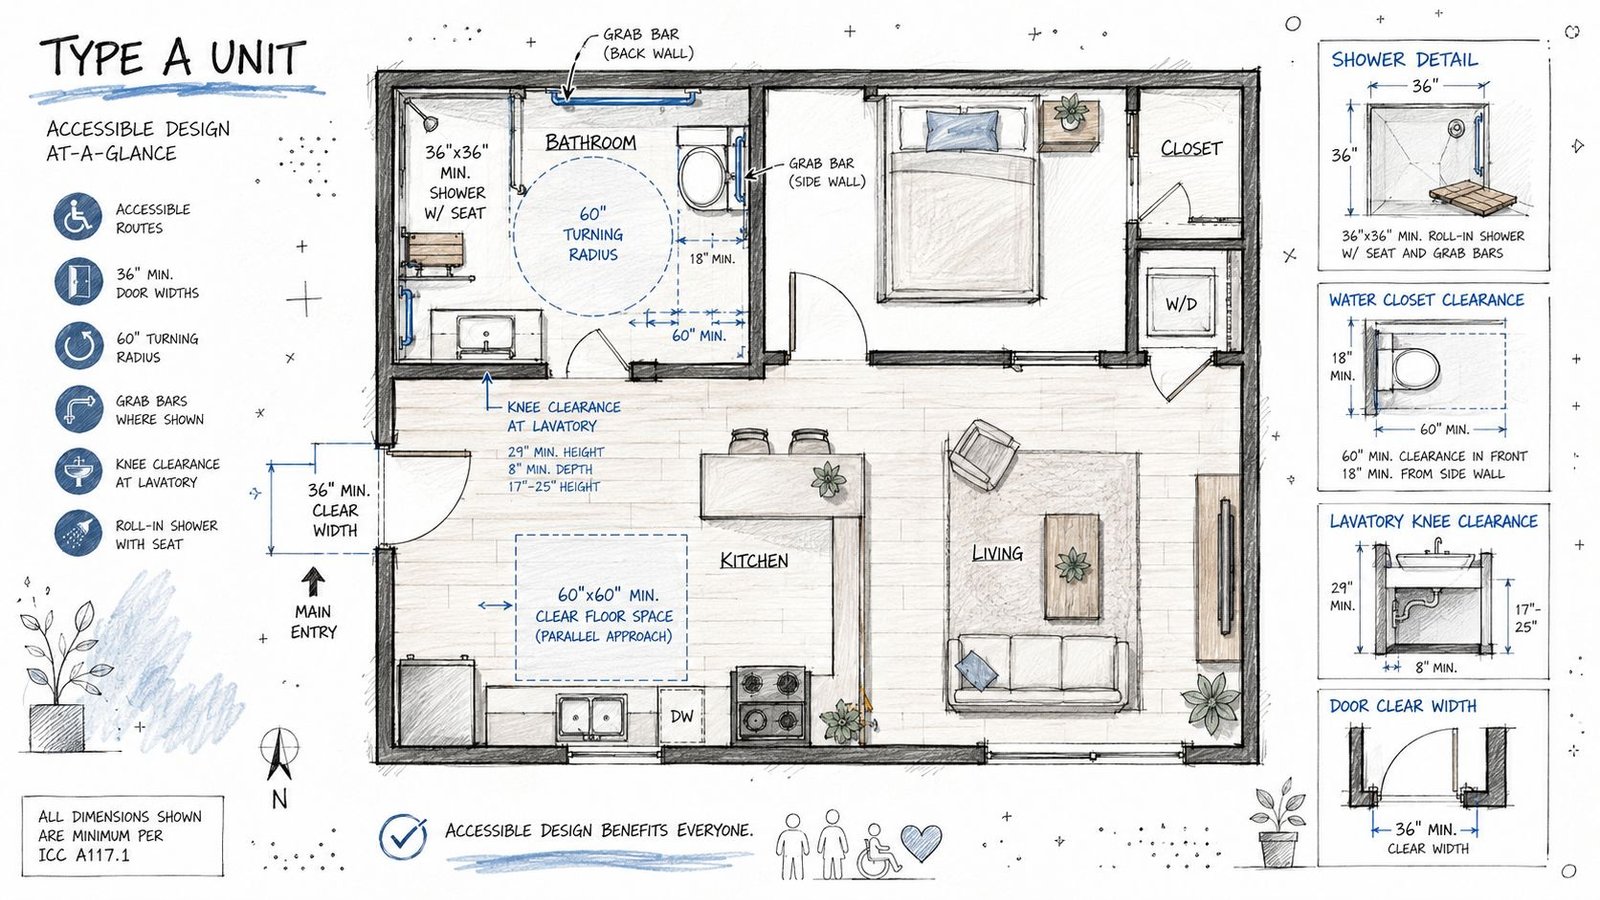
Type A is fully accessible at first occupancy
An accessible unit in ICC usage is the highest-accessibility dwelling or sleeping unit category, intended to be fully usable at first occupancy, not merely adaptable later, as explained in ICC training on accessible units and code intent. That is the logic behind Type A documentation.
Type A units need fully resolved clearances, reachable controls, compliant kitchens and bathrooms, and details that prove immediate usability. If your set only implies that these could work after field adjustments, the unit is not documented as Type A.
A production comparison that keeps teams out of trouble
| Unit type | What the reviewer expects |
|---|---|
| Type B | Clear route through unit, compliant door clearances, usable kitchen and bath layouts, bathroom wall reinforcement shown |
| Type A | Full accessibility shown at permit stage, including turning space, tighter fixture documentation, and details that prove day-one usability |
A second point matters just as much as the geometry. Type A count and distribution can't be left vague. The unit matrix, plans, and code sheet need to agree.
When teams document Type A as if it were just a better-detailed Type B, they usually underdraw the bathrooms and overstate compliance.
Documenting an Accessible Unit on Floor Plans
Floor plans are where abstract compliance either becomes permit-ready proof or falls apart. If the accessible unit isn't unmistakably documented on the plan, the reviewer will flag it even when the design team intended to comply.
Start with unit identification, not general notes
Every required Type A and Type B unit should be labeled directly on the floor plans. Don't rely on a cover-sheet statement saying accessible units are provided per code. The reviewer needs to verify count, location, and distribution from the plans themselves.
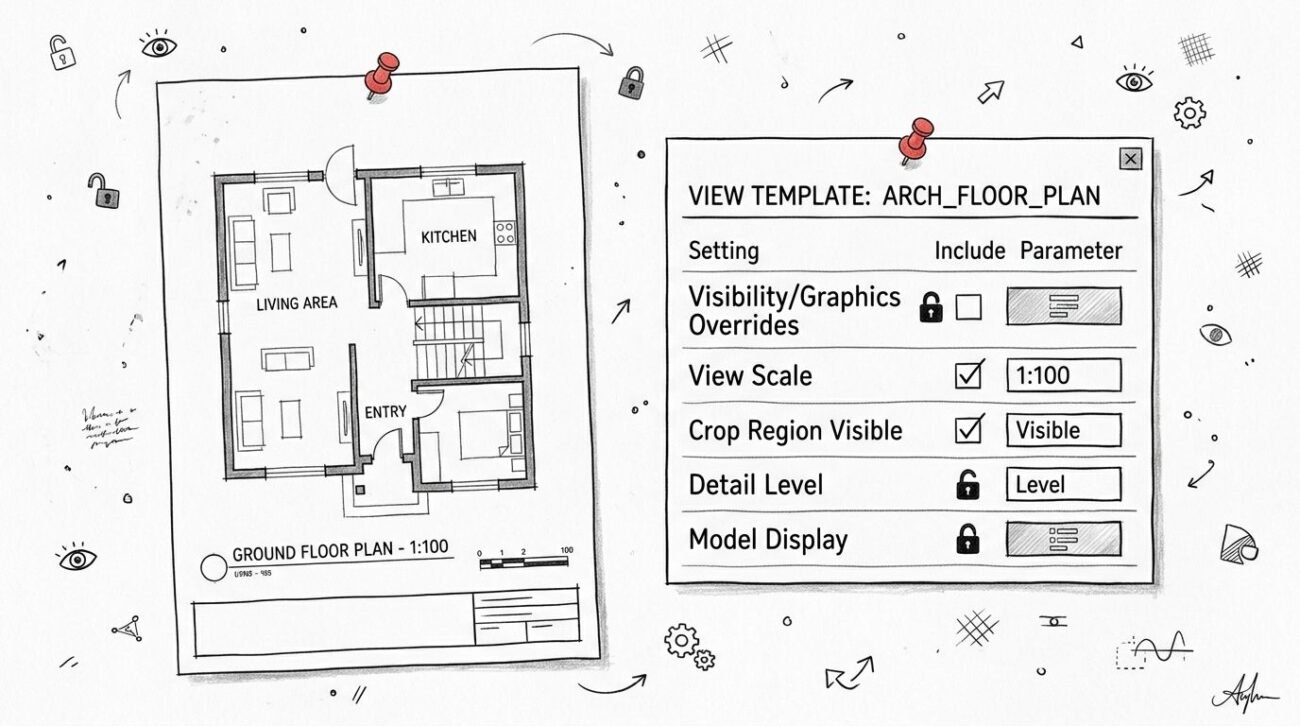
The cleanest method is a unit tag tied to a matrix. In Revit, that usually means a shared parameter for accessibility type, a dedicated unit plan annotation family, and a schedule that can be checked against the code sheet before issue. In CAD, the same discipline applies. Use one standard label, one legend, and one naming convention across all sheets.
If the floor plan doesn't identify the unit type, the reviewer has to reconstruct your compliance strategy manually. That almost always leads to comments.
Show measurable clearances, not assumptions
The neutral technical guidance typically used for baseline planning is unforgiving on dimensions. For typical accessible dwelling units, wheelchair-accessible sink areas require at least 30 in by 48 in clear floor space, interior routes are often 36 in minimum width, and doors commonly require a 32 in clear opening, according to technical guidance on Type A and Type B dwelling unit dimensions.
That means your plan should show the following clearly:
- Unit type tag with Type A or Type B designation
- Door clear width dimensions, not just nominal leaf sizes
- Circulation width where the accessible route passes through the unit
- Kitchen clearances with explicit dimensions
- Turning space in Type A locations where it is required
Nominal door callouts are one of the most common traps. A door schedule can say one thing while the plan reviewer is trying to verify actual clear opening on the plan. Put the clear width where the reviewer can see it.
Build BIM standards that make accessibility visible
The best teams don't redraw accessibility graphics from scratch on every job. They standardize them.
Use view-specific annotation families or detail items for turning circles, T-turns, clear floor spaces, and approach zones. Put those graphics on a dedicated accessibility workset or subcategory so they can be turned on in permit views and suppressed elsewhere. Pair that with a QA view template that highlights unit tags, clearances, and route overlays before issue.
A strong accessible unit documentation workflow usually includes:
- A unit compliance matrix tied to the model
- Standard enlarged kitchen and bath views for each unit type
- A pre-issue accessibility check view in Revit or CAD
- A code sheet table confirming required and provided unit counts
This isn't graphic decoration. It's a risk-control system.
Accessible Bathroom Documentation That Passes Plan Check
Bathrooms generate a disproportionate share of accessibility comments because they contain the tightest geometry and the most assumptions. In permit review, assumptions don't count.
Blocking notes belong on the drawings
For FHA-aligned and Type B conditions, bathroom walls need reinforcement for future grab bar installation. Production teams often bury that requirement in keynote lists, wall types, or specifications. Reviewers routinely push back because they want visual confirmation of location and extent.
The fix is straightforward. Show reinforcement in the bathroom plan or an enlarged detail, and tie it to a clear note. If your office uses bathroom modules or standard details, keep the reinforcement diagram in that package so it follows the unit every time.
That same standardization works well with prefabricated or repeatable bathroom assemblies. Teams already building reliable repeatable details for modular bathroom pods can apply the same discipline to accessible bathroom blocking, fixture spacing, and annotation control.
Type A bathrooms need proof of immediate usability
Because an ICC-compliant accessible unit must be fully usable at first occupancy, reviewers expect explicit documentation of clearances and controls, not a loose suggestion that the room seems generous enough. That day-one usability principle is what makes bathroom documentation so exacting.
A Type A bathroom package should usually show:
- Turning space dimensioned on plan
- Water closet clearance dimensioned clearly
- Lavatory knee and toe space where required
- Shower type and size shown with seat and grab bar locations where applicable
- Fixture relationships coordinated so one annotation set doesn't contradict another
General notes won't save a bad bathroom plan
When a bathroom fails plan check, the reviewer usually isn't debating your intent. They can't verify the requirement from the sheet.
Field-tested rule: If a compliance-critical bathroom feature can't be seen in plan, enlarged plan, or detail, expect the city to comment on it.
Use one enlarged bathroom layout per accessible condition and repeat it consistently. Don't let every project team invent its own annotation style. That variability is where missed dimensions, conflicting notes, and permit delays start.
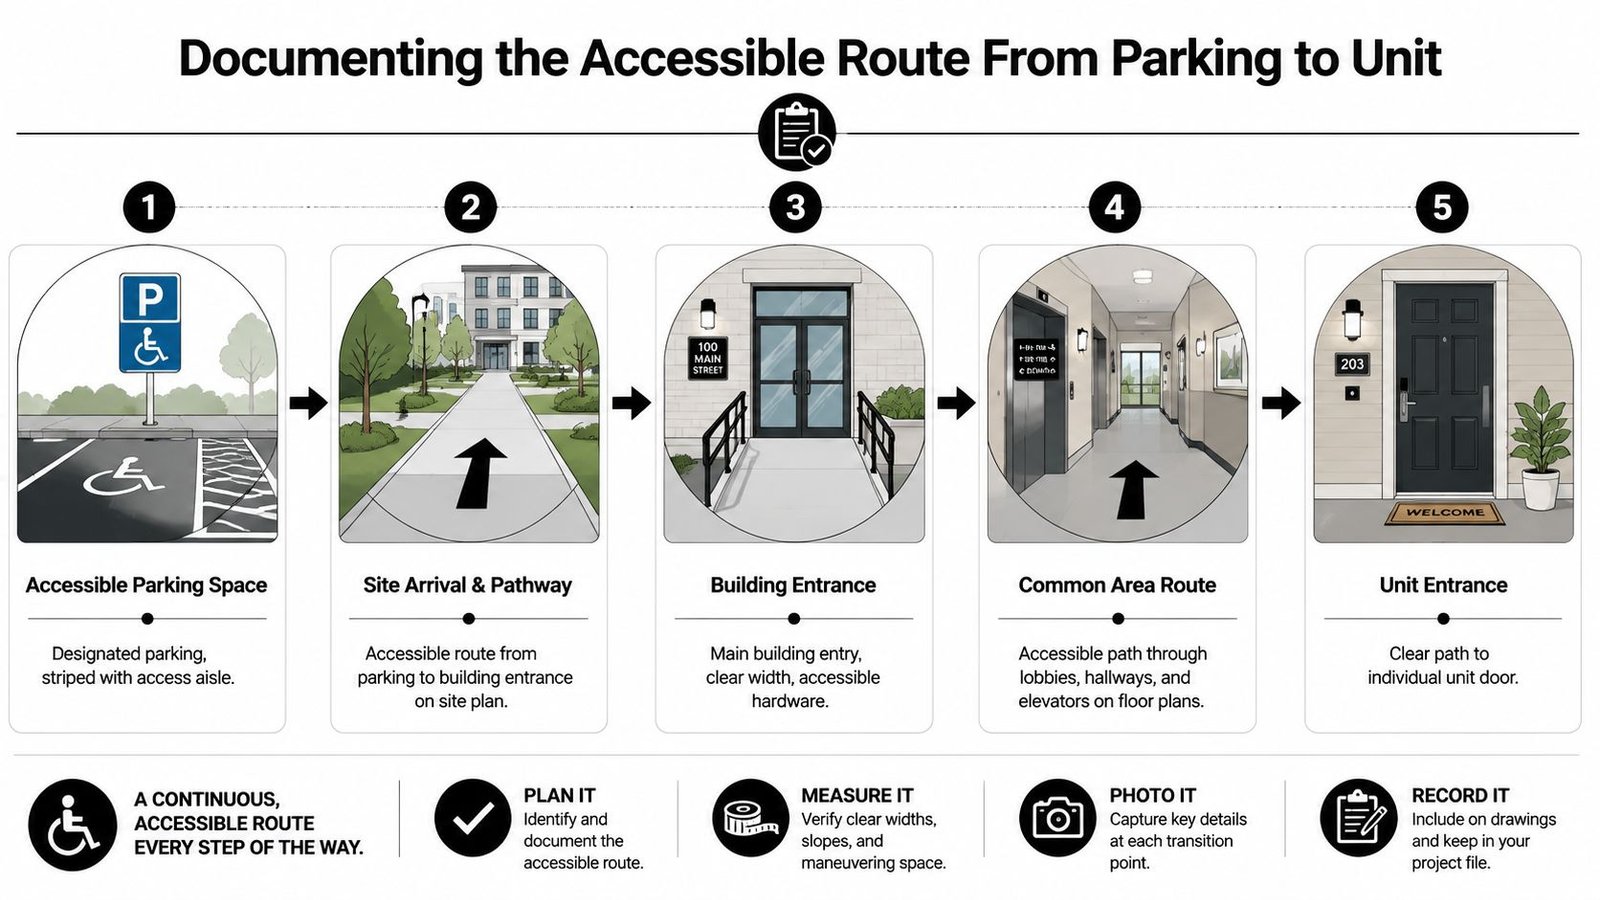
Documenting the Accessible Route From Parking to Unit
Reviewers don't stop at the apartment door. They trace the path from arrival to entry. If your drawings break that path between sheets, the set looks incomplete even when the building itself may be compliant.
Harvard's Joint Center for Housing Studies found that 4.2 million U.S. households report difficulty entering their own home, which is one reason entry sequence review gets close attention in housing accessibility analysis, as shown in Harvard JCHS research on housing stock accessibility.
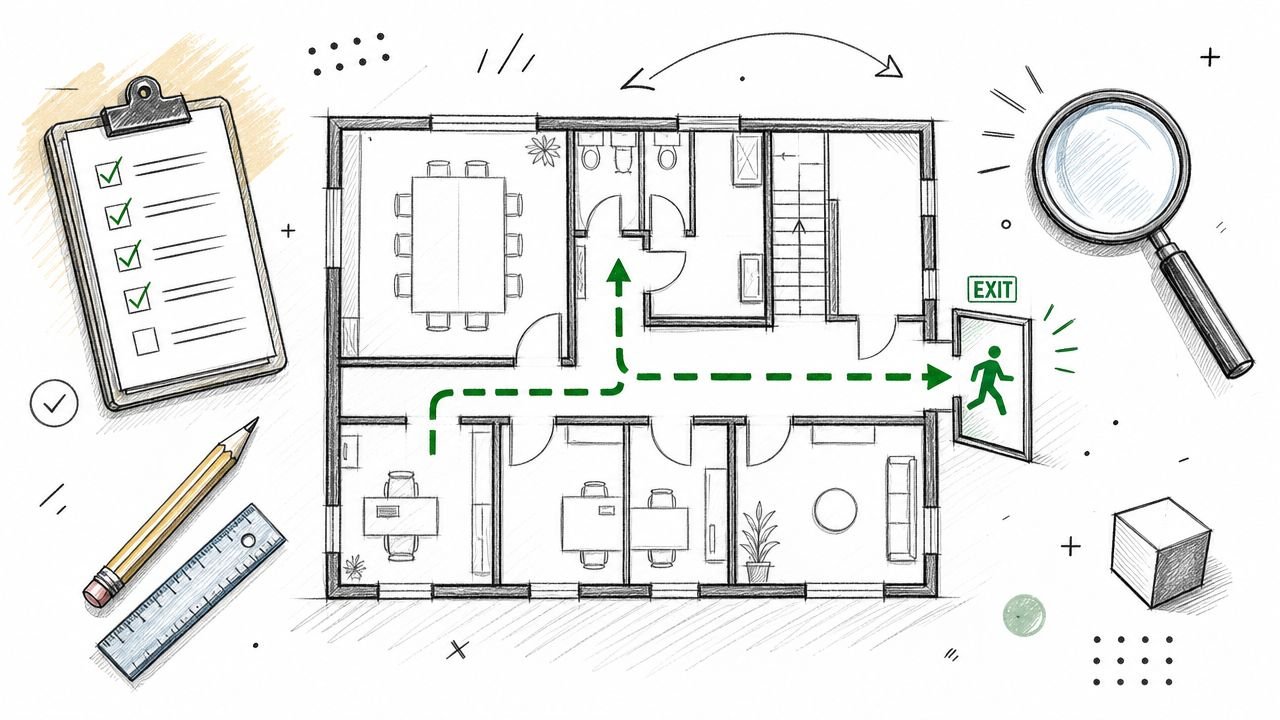
Draw the route as a continuous story
The route should be visible on the site plan, then continue into the building plans without guesswork. A reviewer should be able to start at accessible parking, move along the site path, pass through the entrance, continue through common areas, and arrive at the required unit entrance without interruption.
That usually means showing:
- Accessible parking and access aisle relationship
- Path from parking to building entry
- Entry sequence at the building
- Route through lobby, corridor, and elevator areas as required
- Final path to the unit door
A dedicated graphic overlay helps. In Revit, many teams use a specific line style or filled region strategy in permit views only. In CAD, a plotted route overlay on coordination layers works just as well if it's applied consistently.
Don't split responsibility across disciplines without a handoff
The route often dies in production because civil handles site access, architecture handles the lobby, and no one owns the handoff. The set then shows compliant fragments with no continuous path.
That's why route review should be a formal checkpoint before permit. Have one person trace it sheet to sheet. If there's a mixed-use podium, a grade change, or a parking-to-core transition, that review is even more important.
For teams refining site-to-building coordination, a reference point is this guide to accessible parking requirements, especially where parking count, route location, and building entry need to read as one coordinated system.
Common areas need route clarity too
Leasing, mail, amenity, and lobby spaces aren't just side notes. If the path through common areas is cluttered or undocumented, that becomes a review issue fast. The cleaner the route graphics, the fewer assumptions the reviewer has to make.
A Checklist for Common Accessible Unit Plan Corrections
By the time a city issues corrections, the project is already paying for preventable ambiguity. The better move is a pre-submission accessibility QA pass with a checklist that mirrors how reviewers read the set.
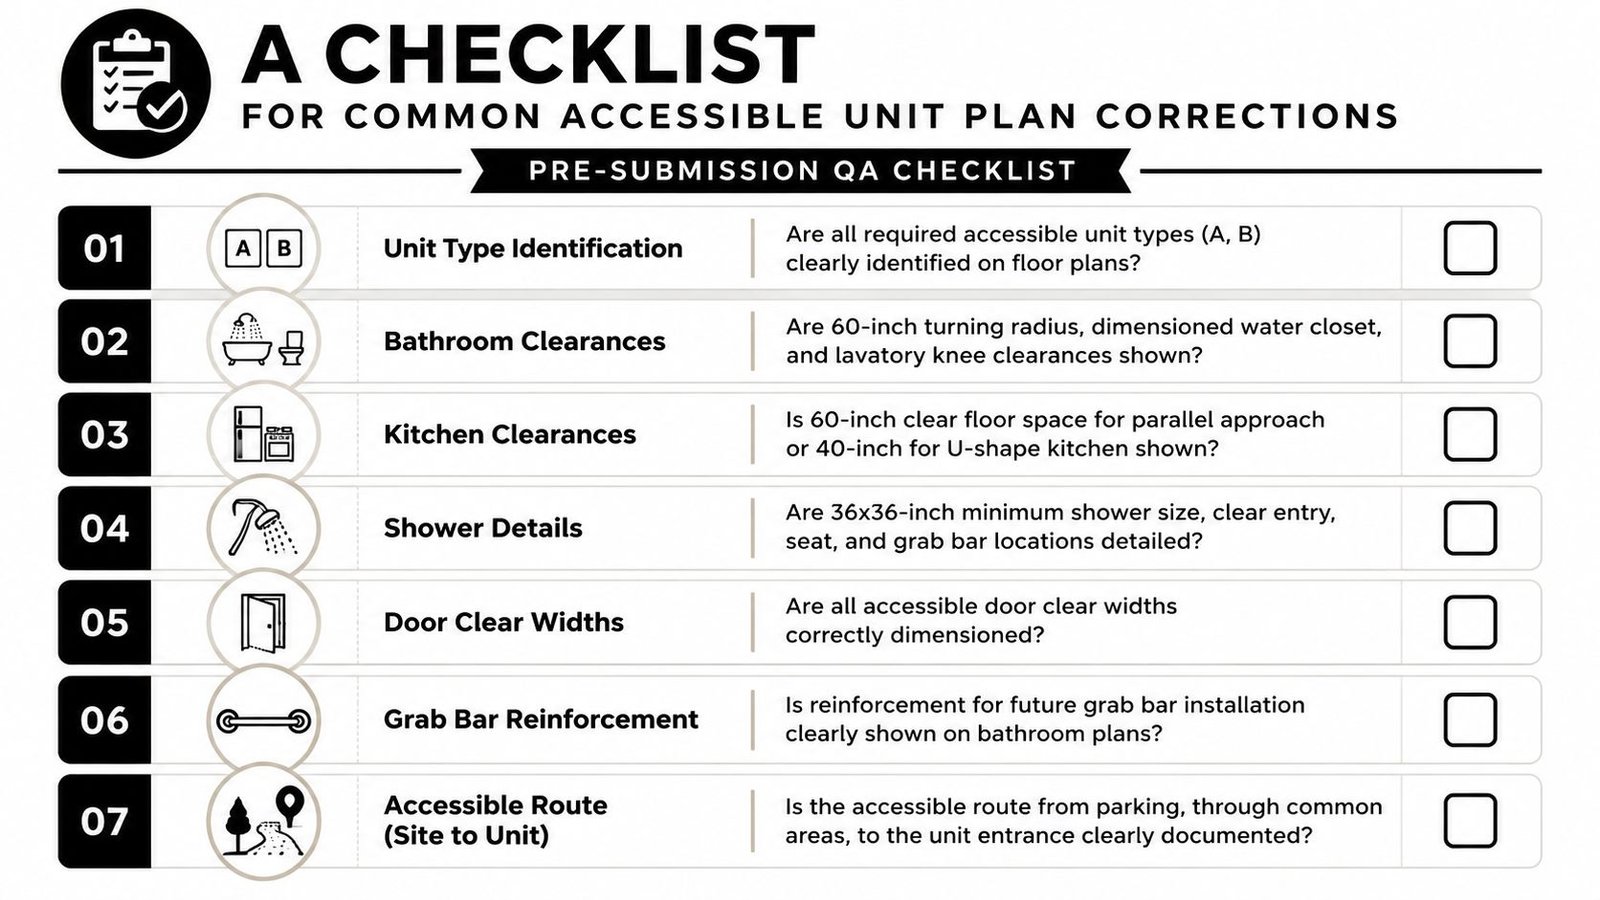
What the reviewer looks for and how to show it
Unit types are identified on plans. Tag every required Type A and Type B unit directly on the floor plan. Match those tags to the unit matrix and code summary.
Bathroom turning space is visible. Show the required turning configuration in each applicable Type A bathroom. Don't rely on room size alone.
Door clear widths are dimensioned. Reviewers check clear opening, not just nominal door size. Put the dimension on the plan where it can be verified quickly.
Kitchen clearances are explicit. Dimension required clear floor space in the kitchen. Appliance projections should be coordinated with actual selected or scheduled conditions.
Grab bar reinforcement is shown. Add blocking notes and extents to bathroom plans or enlarged details for units that require future reinforcement.
The accessible route can be traced. Overlay the route from parking through common areas to the unit entrance. Make it continuous across sheets.
Required versus provided counts are summarized. Add an accessibility table to the code sheet so the reviewer can verify unit numbers and categories without rebuilding the math.
A compact internal QA workflow
A reliable review flow usually looks like this:
- Model check for unit tags, door widths, and accessibility annotation visibility
- Sheet check for enlarged kitchens, bathrooms, and route continuity
- Code sheet check for counts, terminology, and consistency with plans
- Independent trace review by someone who didn't build the sheet set
That final step matters. Fresh eyes catch broken routes, missing tags, and contradictory notes faster than the original production team.
Strong accessibility documentation isn't about adding more notes. It's about removing every opportunity for the reviewer to ask a follow-up question.
If you want a stronger handoff into permit, use a repeatable review standard. Teams that already run disciplined issue workflows on permit set documentation usually adapt quickly because the underlying habit is the same. Make compliance visible, coordinated, and easy to verify.
If your team needs extra capacity to clean up multifamily CD sets, coordinate Type A and Type B unit plans, or standardize Revit-based accessibility QA before permit, BIM Heroes can help. Their architectural production support is a practical fit for firms that want tighter documentation, fewer avoidable corrections, and more predictable delivery without rebuilding internal workflows from scratch.