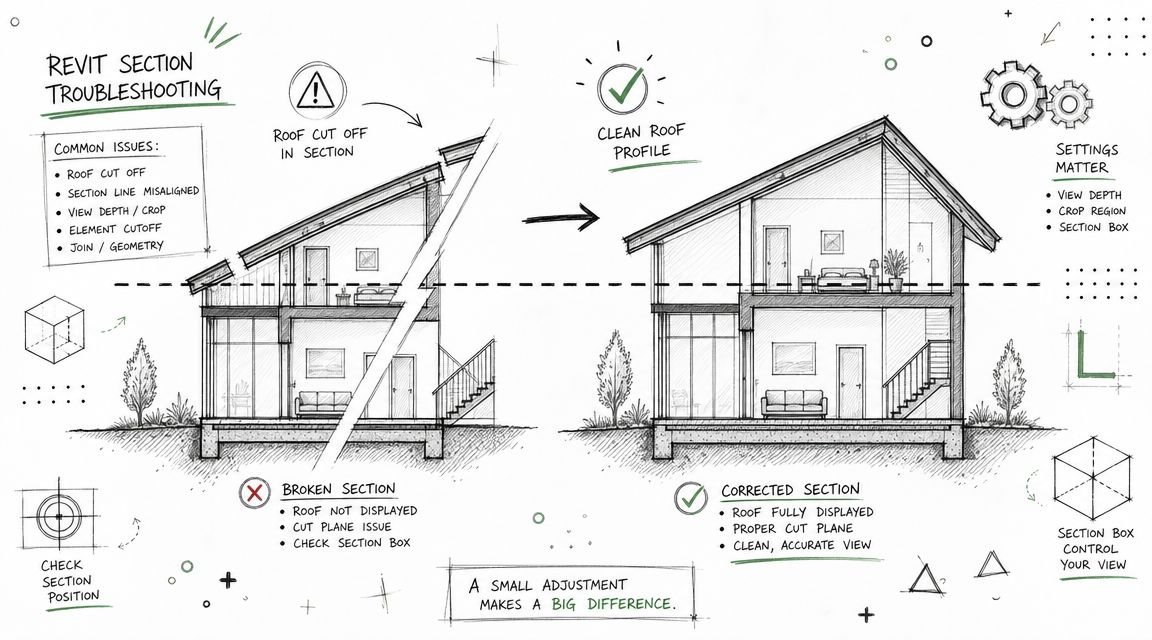
Five years after occupancy, the owner starts getting water intrusion complaints from several units below the balconies. The forensic walk finds the same problem repeatedly: the membrane at the deck-to-wall transition was installed inconsistently because the detail in the CD set left too much to interpretation.
That's the kind of failure that starts in documentation, not in the field. When a balcony detail doesn't clearly show how the waterproofing for deck conditions turns up, terminates, drains, and clears penetrations, the contractor improvises. In multifamily work, improvisation is where warranty exposure begins. A workable CD set has to do more than call out a membrane. It has to coordinate the architectural assembly, structural support, plumbing drainage, and attachment details so the installer can execute without guessing.
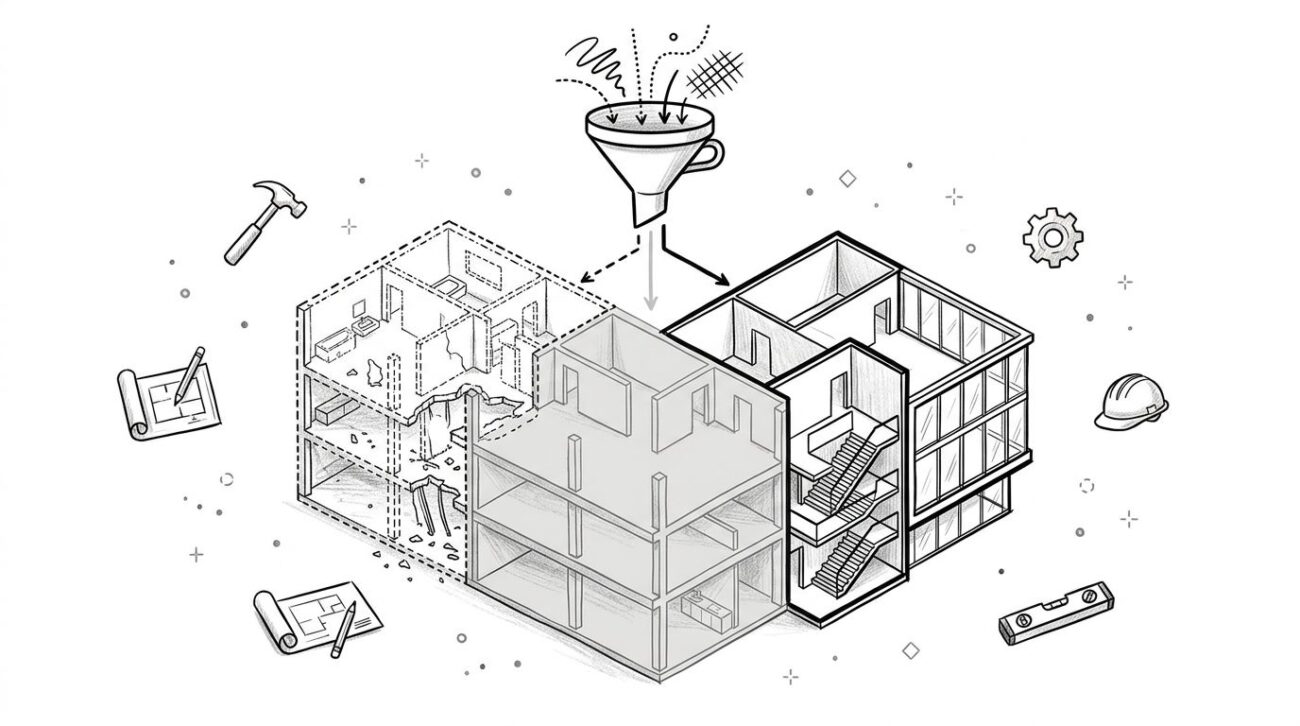
Introduction
In multifamily projects, balcony leaks rarely come from one dramatic miss. They usually come from a series of small documentation gaps that stack up into a built condition no one fully intended. The plan showed a drain, the section showed a membrane, the enlarged detail implied a flashing, and the railing sheet handled posts separately. Nobody owned the full transition.
That's why balcony and deck waterproofing details need production discipline. The issue isn't just whether the project has a waterproofing specification. The issue is whether the CD set shows enough for the installer, the waterproofing sub, the framer or concrete crew, and the plumber to build one continuous assembly. If the drawings don't close those loops, RFIs multiply in the best case. In the worst case, the crew keeps moving and the leak shows up years later.
Why Balcony Waterproofing Is a High-Risk Detail
Balconies are unforgiving because they combine exposure with occupancy. A wall can tolerate some cosmetic wear before anyone notices. A balcony can't. It takes rain directly, sees repeated wetting and drying, carries foot traffic, and often gets finished with materials that hide developing problems until moisture has already moved inward.
In wood-framed exterior assemblies, the risk isn't only the walking surface. Current guidance on under-deck protection frames the bigger problem as protecting the substructure, including joists, beams, and the ledger, from chronic moisture rather than just stopping water at the top surface, as noted by Trex RainEscape guidance on deck waterproofing and drainage. That's the right lens for multifamily CDs as well. If your detail only addresses what happens on top of the deck, it's incomplete.
Why failure spreads fast
A leaking balcony doesn't stay a balcony problem for long. Water reaches framing, sheathing, door thresholds, soffits, and units below. Once moisture gets into the assembly, every adjacent layer becomes part of the repair scope.
The production risk comes from the number of systems that intersect in a tight zone:
- Structural deck must support slope, dead load, and finish build-up.
- Waterproofing membrane must remain continuous at field, edge, and transition conditions.
- Drainage path must move water to a primary outlet and away from vulnerable framing.
- Surface finish must be compatible with the membrane system below.
- Wall-to-deck interface must stop reverse laps and hidden capillary paths.
- Railing anchorage must avoid turning every post into a leak point.
Practical rule: If those six systems are detailed on separate sheets without a clear point of integration, the installer will coordinate them in the field. That is not quality control.
Why multifamily magnifies the risk
Multifamily delivery adds repetition. One weak detail doesn't fail once. It gets copied unit after unit, floor after floor. That's why deck waterproofing multifamily work needs standardization, not just good intent. A detail that's only understandable after a coordination call is not ready for issuance.
Selecting the Right Deck Waterproofing System
Choosing the system is an early decision checkpoint, and it affects detailing, sequencing, inspection, and schedule reliability. In practice, projects often involve a choice between liquid-applied membranes and sheet membranes. Both can work. Both can fail. The difference is how much variability your production process can absorb.
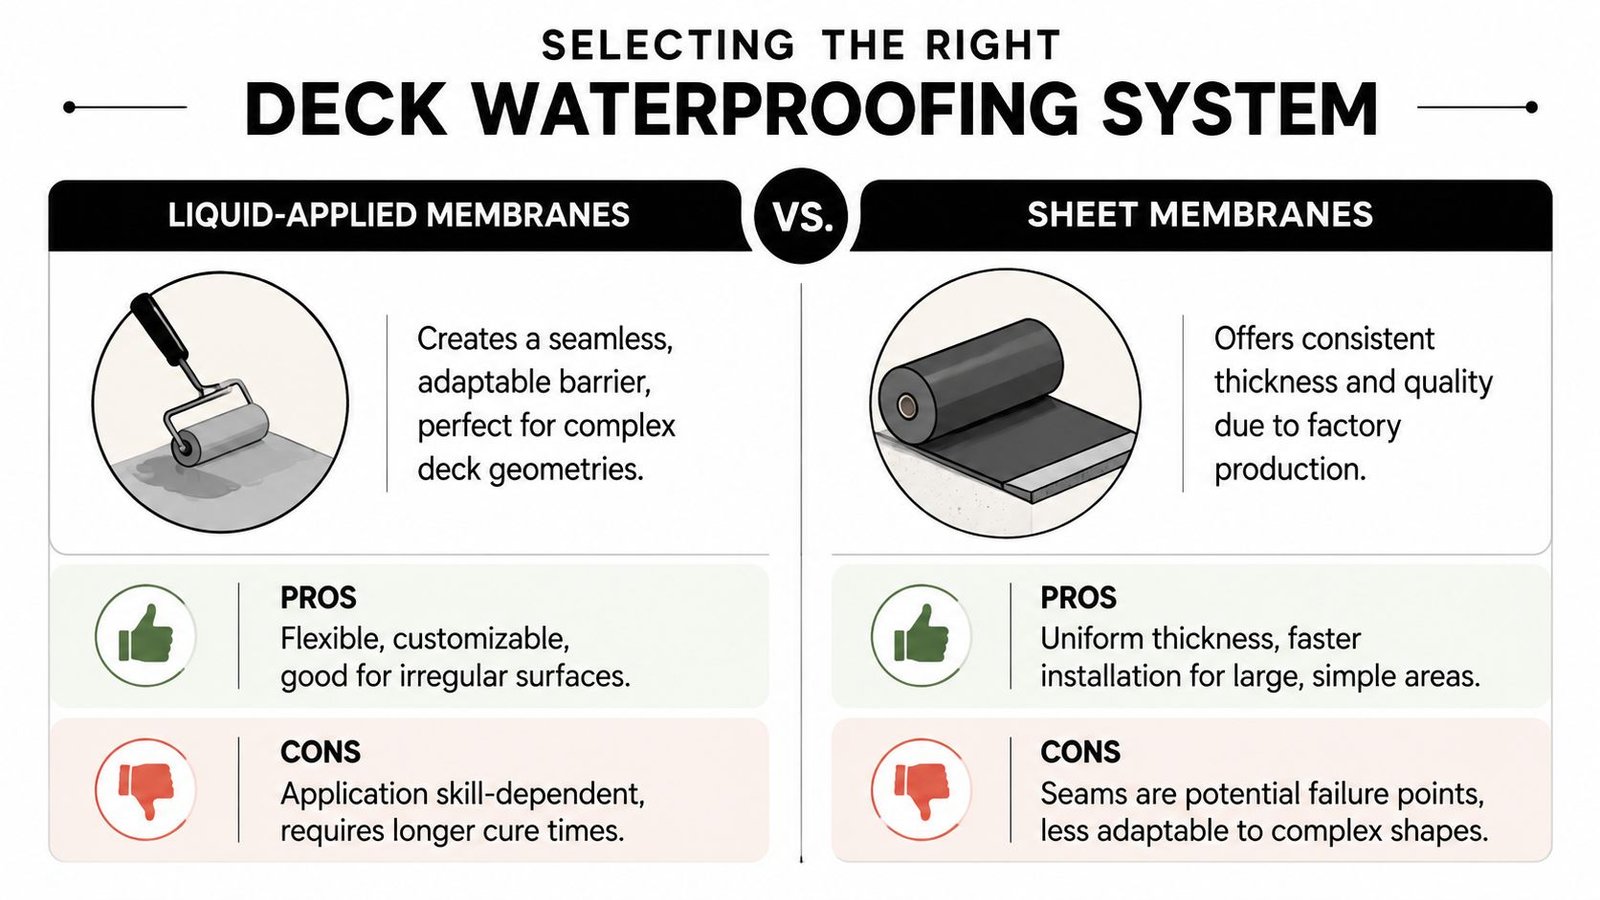
Liquid-applied systems
Liquid-applied systems are useful where geometry is irregular and transitions are frequent. They can create a monolithic field surface without seam layouts driving the design. On complicated balconies with multiple corners, curbs, and interrupted edges, that adaptability matters.
But the trade-off is execution control. These systems are sensitive to substrate condition, weather window, and application discipline. Industry guidance commonly calls for dry periods of at least 24 to 48 hours between coating stages and after application, with ideal temperatures between 50°F and 90°F, and notes that new concrete can take up to 28 days to cure before sealing, according to TimberTech deck waterproofing guidance. If your schedule assumes the membrane crew can just “come back tomorrow,” your schedule may already be wrong.
Sheet membrane systems
Sheet systems offer more consistency because thickness is factory controlled. That's often a better fit for teams trying to reduce field variability across many repeating balconies. The downside is obvious. Seams, laps, corners, and terminations become the quality battleground.
For multifamily production, that predictability can still be worth it. A well-detailed seam condition is easier to repeat than a vaguely specified liquid build-up that depends heavily on installer judgment.
Here's a practical comparison:
| System type | Where it helps | Where it gets risky |
|---|---|---|
| Liquid-applied membrane | Complex geometry, irregular transitions, monolithic surface | Surface prep, weather exposure, cure sequencing |
| Sheet membrane | Repetitive balcony layouts, controlled thickness, scalable documentation | Seams, inside corners, edge terminations, penetration flashing |
Don't leave the choice open-ended
One of the worst habits in permit sets is writing details that imply three possible waterproofing approaches and specifying none of them clearly. That almost guarantees substitution drift during procurement. If the project needs a sheet membrane below pavers, show that. If it needs a traffic coating over occupied space, show the complete assembly.
On wood-framed decks, teams also forget the role of secondary protection at framing members. If you're reviewing substructure protection options, products such as XTREME EDEALS deck joist tape are relevant to the conversation because they address moisture exposure at the tops of joists and can support longer-term durability where the framing remains vulnerable during service.
System selection isn't a spec-only decision. It changes what your details need to prove.
The Deck-to-Wall Transition The Most Critical Detail
If one condition deserves enlargement, notation, and QA attention beyond everything else, it's the transition where the horizontal deck meets the vertical wall. Most leak investigations end up here because multiple trades often overlap at this point, and incomplete drawing logic frequently forces a field decision.
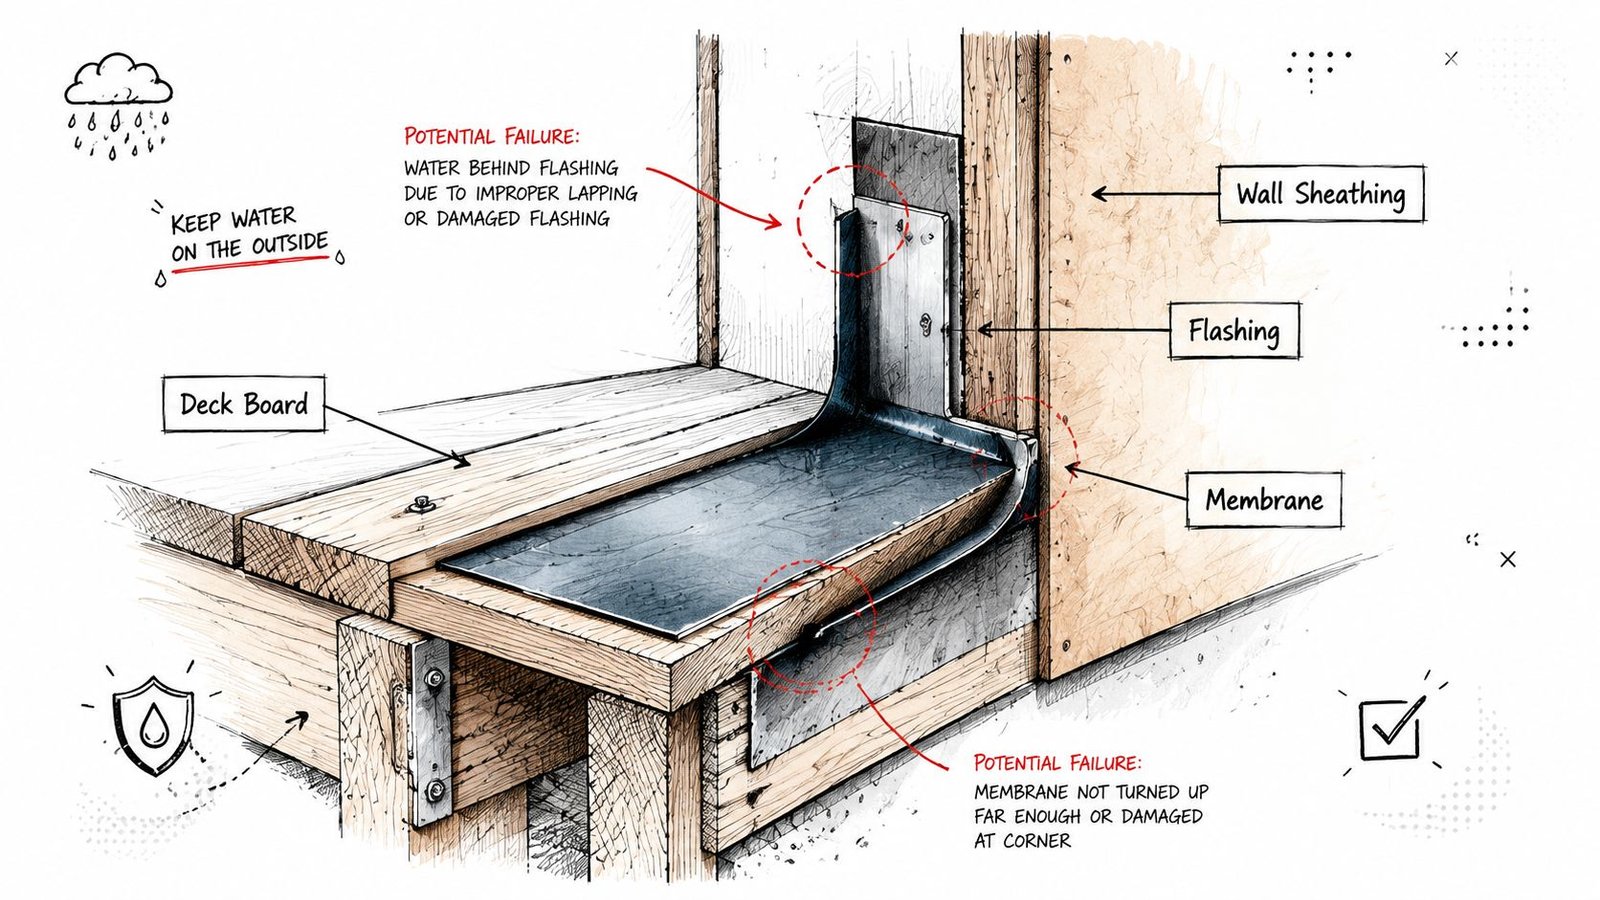
Show the full turn-up condition
In balcony waterproofing detail construction documents, don't stop the membrane at the inside corner graphically and assume the contractor understands the intent. Draw the membrane turning up the wall face and dimension the height from the finished deck surface.
A common office standard is to require the turn-up to be shown at 8 inches minimum above the finished deck surface, with more height where snow retention or build-up makes a higher termination prudent. The exact project requirement should be stated and dimensioned on the detail. “Extend up wall” is not enough.
The top of that turn-up also needs a complete termination strategy. That usually means:
- Termination bar shown explicitly at the top edge of the membrane
- Fastener location identified so the reviewer knows how the membrane is secured
- Counter-flashing or reglet condition noted so water can't get behind the membrane
- Sealant interface identified where the assembly requires a sealed top edge
Detail movement, not just waterproofing
The inside corner between deck and wall moves. Structural loading, thermal expansion, shrinkage, and finish movement all show up there. If the detail reads like the membrane is rigidly bonded into a sharp corner, it's inviting failure.
That's why your section needs to show the movement strategy, not just the membrane line. Depending on the system, that may be a cant strip, bond-breaker, preformed corner, or flexible transition flashing. What matters is that the installer doesn't have to invent the corner treatment.
For teams building repeatable detail libraries, a good parallel reference is how disciplined firms handle parapet details in coordinated Revit documentation. The same principle applies here. The vulnerable edge needs one vetted assembly logic, not project-by-project improvisation.
The contractor can only install the transition you actually drew. If your detail relies on “standard practice,” expect five different versions in the field.
Keep adjacent materials honest
This is also where door thresholds, cladding bases, screeds, and weeps start colliding. The waterproofing line has to coexist with those elements. If your wall section and balcony detail don't agree on sheathing build-up and finish clearances, the membrane turn-up is usually the first thing to get shortened in the field.
Documenting Slope Drainage and MEP Coordination
A balcony that can't drain is already on the path to failure. This isn't about adding a generic note and hoping the field team interprets it correctly. The drawings need to show how water leaves the deck, where it goes, and what happens if the primary path gets blocked.
Draw the slope, don't just mention it
The baseline rule is straightforward: the finished deck surface should slope to drain at one-quarter inch per foot. That needs to appear graphically in plan and be reinforced in section. A note that says “slope to drain” creates just enough instruction to shift liability and not enough to build accurately.
The detail also has to name the method:
- Structural slope if the slab or framing is pitched as part of the primary structure
- Tapered topping or setting bed if the structure is flat and slope is added above
- Other assembly-based slope strategy if the system depends on a manufacturer-specific build-up
Each option affects threshold heights, edge conditions, and drain elevations differently. If the architectural set doesn't lock that down, the structural and plumbing sheets can't coordinate to it reliably.
Drain bodies need real detailing
For deck waterproofing permit drawings, the drain is not a symbol. It is a built object with a flange, membrane interface, clamping mechanism where required, and overflow relationship. Those items belong on the detail sheet.
A workable drain detail should show:
- Drain body location relative to structural deck and finish surface
- Membrane integration at the drain flange or clamping ring
- Finish height relationship so water reaches the drain rather than ponding around it
- Overflow provision where the assembly requires secondary relief
Most drainage failures aren't caused by the absence of a drain. They come from an unresolved relationship between slope, drain elevation, and membrane termination.
Coordinate with plumbing before issue
Drain locations should be locked with the MEP model before permit issue, especially when balconies stack vertically and the routing affects framing bays, slab edges, or soffit zones. If the architectural team picks an ideal drain point that the plumbing team later shifts, the slope arrows, drain bowl, and edge detailing all become stale.
That coordination belongs in a repeatable workflow, not in a final redline sprint. For teams managing integrated models, MEP systems coordination in BIM workflows is where this gets resolved early enough to matter.
A good production check is simple. Overlay the architectural balcony plans with plumbing drain routing and verify that the drain body can sit where the detail says it sits. If not, your CD set is still schematic at the point that matters.
Detailing Penetrations for Railings and Edges
Every penetration through a waterproofed deck is a controlled failure point unless you've detailed it so clearly that the installer can't get it wrong. Railing anchorages are the usual offenders because they're handled late, delegated too loosely, or treated as a railing-shop issue instead of an envelope issue.

Through-deck posts
If a post penetrates the walking surface, the waterproofing detail has to show a sleeve or flashing boot strategy. A post dropped through a field-cut membrane opening is not a detail. It's a leak path.
The sequence matters as much as the geometry:
- Set the sleeve first so the membrane installer has a defined penetration edge.
- Lap the membrane to the sleeve in the direction the manufacturer requires.
- Seal the top of the assembly so water can't track downward along the post or sleeve.
- Coordinate post dimensions so the sleeve detail reflects the actual railing package.
Side-mounted railings
A side-mounted railing is usually the cleaner answer because it removes penetrations from the horizontal waterproofed surface. That doesn't eliminate waterproofing risk, but it moves the risk to a more manageable wall or slab-face condition.
When the design team is studying railing options, product references like steel deck railing systems can be useful during early detailing because they make bracket geometry and mounting logic more concrete. The important production point is this: your balcony flashing detail Revit content should show anchorage, blocking or embed support, and exterior finish sealing together, not as disconnected callouts on separate sheets.
Edges and drip conditions
The outside edge of the deck often gets less attention than the wall transition, but it still needs a complete termination. The membrane should terminate into a drip profile or equivalent edge condition that directs water away from fascia and framing below.
A clean edge detail usually needs to answer three questions:
- Where does the membrane end?
- What mechanically secures that edge?
- How does the metal profile force water clear of the face below?
If any of those are missing, field crews fill in the blanks with what's available.
A railing detail is part of the waterproofing assembly the moment it touches the deck. Treating it as a separate package is how leaks get designed in.
A Production-Focused BIM Workflow for Waterproofing
The best way to reduce balcony leaks in CDs is to stop treating these details as one-off drafting tasks. In a mature BIM workflow, exterior waterproofing conditions should come from a pre-vetted detail system, then be adapted deliberately to the project instead of reinvented under deadline pressure.
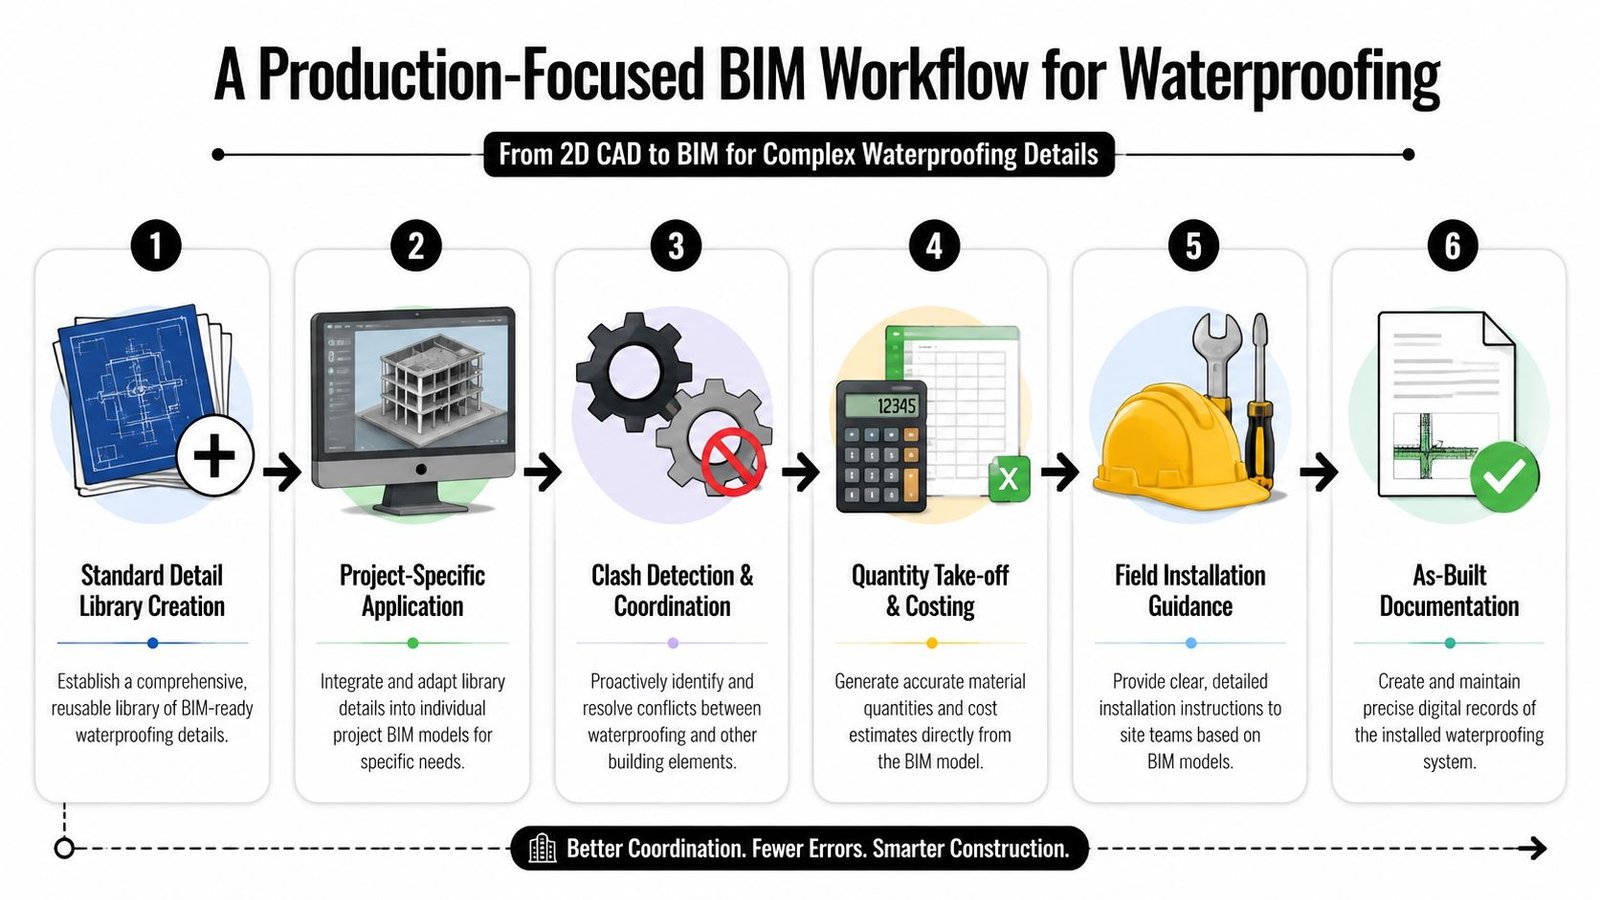
Build a repeatable detail library
Start with a controlled library of details for the conditions that repeatedly create RFIs:
- Deck-to-wall transition assemblies
- Primary and overflow drain details
- Through-deck post sleeves
- Side-mounted railing attachments
- Outside edge and drip terminations
- Door threshold interfaces at balconies
CAD-to-BIM evolution demonstrates its value. In 2D workflows, teams tend to copy old details and patch them visually. In Revit, you can standardize drafting views, keynotes, references, and component logic so the same tested assembly gets used consistently.
Use model views for coordination, not just presentation
Waterproofing is often coordinated too late because it lives only in 2D details. A stronger workflow creates dedicated views for membrane extents, slope direction, drain points, and build-up depth. That allows production staff to check the assembly against the model rather than hoping the enlarged detail agrees with the plan.
The most useful checks are practical:
- Confirm balcony finish build-up against interior finish elevation and door threshold.
- Verify that railing anchors don't conflict with slab edges or framing members.
- Review drain locations against plumbing routing before the permit set is frozen.
- Compare standard details against project-specific conditions rather than editing in place without record.
For multi-trade coordination, clash detection workflows for Revit-based project delivery help catch the obvious conflicts early, but its primary value is procedural. Teams start checking balcony assemblies the same way every time.
Add QA gates before issue
A scalable delivery pod shouldn't rely on one experienced reviewer remembering every failure point. Put decision checkpoints into the production process. Lock system selection early. Freeze standard details before sheet composition. Run a waterproofing-specific QA pass before permit and again before issue for construction.
That's what protects margin. Not heroic cleanup. Predictable documentation.
Common Plan Check Corrections and Field Blunders
Before issue, run a balcony package audit focused only on waterproofing for deck conditions. The usual misses are easy to spot if someone is assigned to look for them.
- Missing turn-up dimension means the installer doesn't know how high the membrane must rise above the finished surface.
- Incomplete top termination leaves the upper edge of the membrane unresolved, with no termination bar, reglet, or counter-flashing shown.
- No movement accommodation at the inside corner suggests a rigid transition where the assembly will move.
- Vague slope notation tells the field to drain the balcony without showing rate or direction.
- Drain detail omitted leaves membrane integration at the drain body to interpretation.
- Railing sleeve not shown turns through-deck posts into ad hoc field penetrations.
- Plumbing mismatch puts the drain in one place on the architectural sheets and another on the plumbing set.
- Threshold conflict allows topping or finish build-up to consume the clearance needed at the door.
Fixing those problems in the model or on paper is manageable. Fixing them after finishes are installed usually means opening completed work, sorting out trade responsibility, and arguing over who owned the ambiguity.
If your team is tightening up multifamily CD production and needs help standardizing balcony waterproofing details, drain coordination, Revit detail libraries, or pre-issue QA, BIM Heroes can support that work. If useful, start with their architectural production services and use them as an extra layer of production capacity for complex multifamily sets.
Meta description: Waterproofing for deck conditions in multifamily CD sets requires precise balcony details, drainage coordination, and BIM-based QA to prevent leaks, RFIs, and warranty claims.
Category: Construction Coordination & Documentation